")
In this post, you will learn how to set up Open VPN Server and Client on CentOS 8.
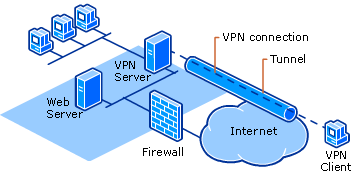
A virtual private network extends a private network across a public network and enables users to send and receive data across shared or public networks as if their computing devices were directly connected to the private network.
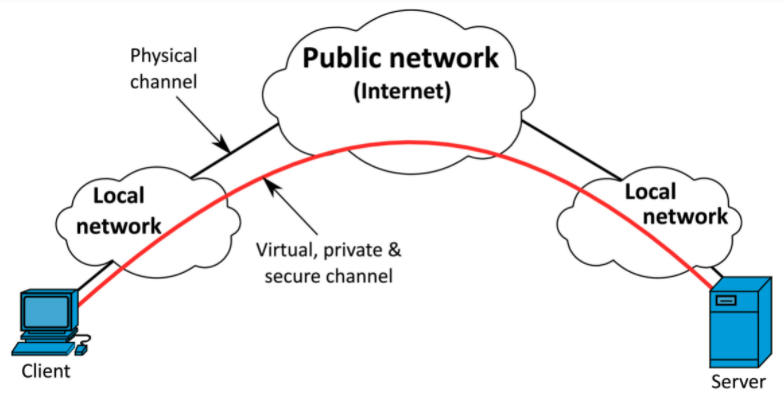
Open source OpenVPN uses VPN technologies to secure and encrypt data sent over the internet. Its custom VPN protocol uses SSL/TLS for key exchange and released under the GNU GPL license.
This tutorial provides step-by-step instructions for configuring an OpenVPN server and OpenVPN client on CentOS 8 Linux server.
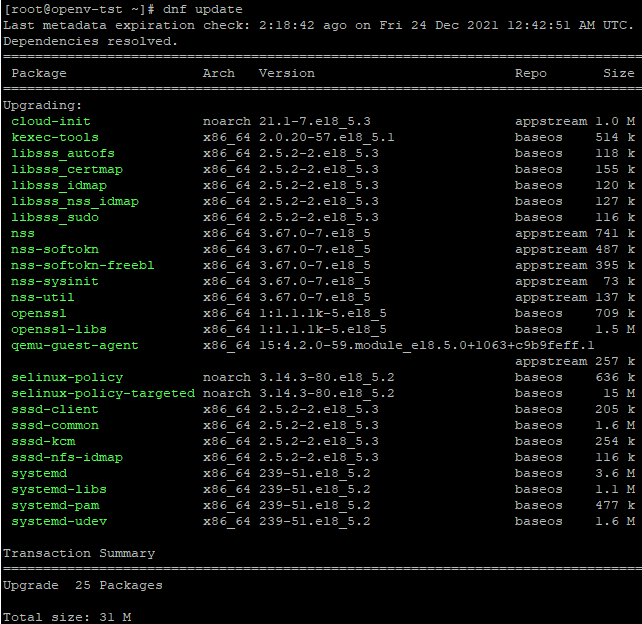
Step 1 – Update your system:
First you have to install CentOS8 update by executing following commands:
# dnf update
# yum update

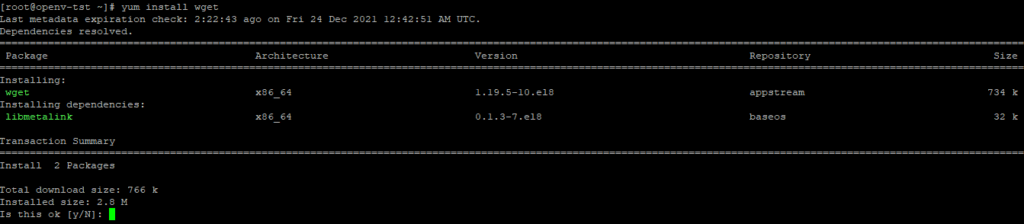
Now install wget package for retrieving files using HTTP and HTTPS:
# yum install wget
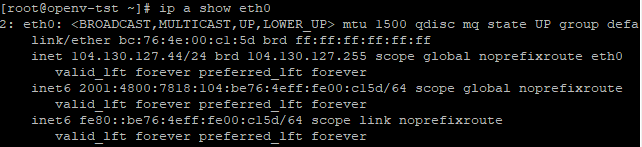
Step 2 – Find and note down your IP address:
Use the ip command as shown below.
# ip a
# ip a show eht0
We can try the following dig command/host command to find out your public IP address from Linux command line:
# dig +short myip.opendns.com @resolver1.opendns.com
# dig -4 TXT +short o-o.myaddr.l.google.com @ns1.google.com | awk -F'"' '{ print $2 }'
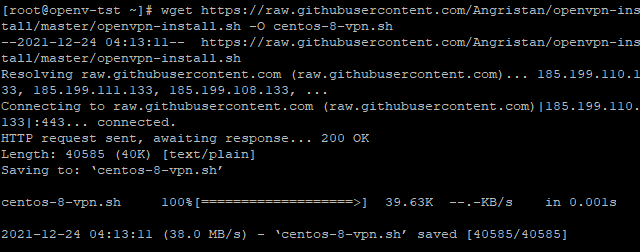
Step 3 – Install open vpn server
Use wget command in order to download the centos-8-vpn.sh script.
wget https://raw.githubusercontent.com/Angristan/openvpn-install/master/openvpn-install.sh -O centos-8-vpn.sh
Make sure you set up permissions using the chmod command:
# chmod +x centos-8-vpn.sh
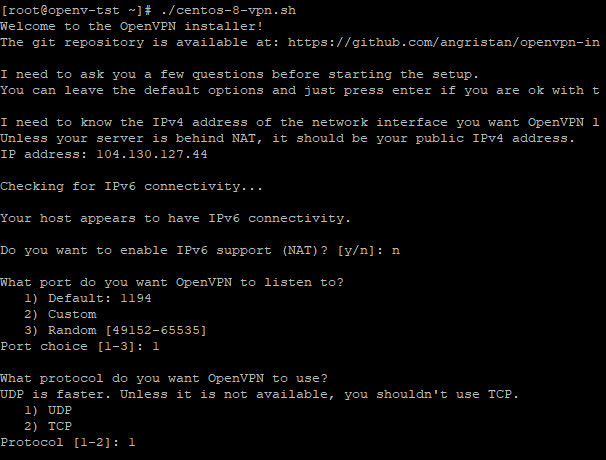
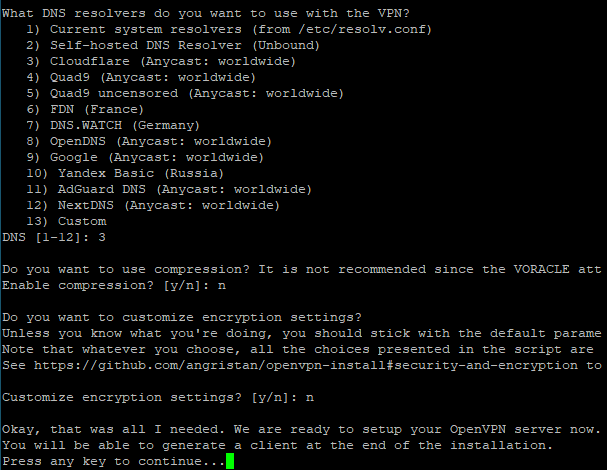
Execute the centos-8-vpn.sh script to install the OpenVPN server on CentOS 8 Linux:
It will ask you series of questions and you have to select options as per your requirements. Please see the screenshot below.
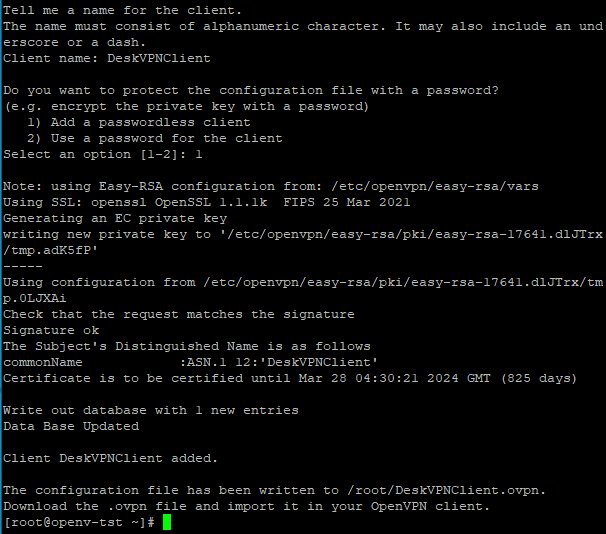
Desktop or Mobile client configuration:
When VPN server configuration done, we can create a desktop/mobile client VPN configuration file. You will be prompted as follows:
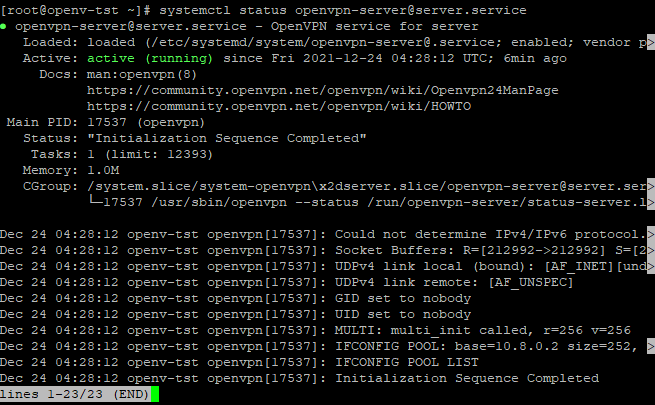
start/stop/restart OpenVPN server on CentOS 8:
# systemctl status [email protected]
# systemctl start [email protected]
# systemctl stop [email protected]
# systemctl restop [email protected]
Step 4 – Connect an OpenVPN server using Linux Client:
On your VPN server you will see a client configuration file called DeskVPNClient.ovpn.

You will have to copy this file to your linux client machine using the scp command.
# scp [email protected]:~/DeskVPNClient.ovpn .

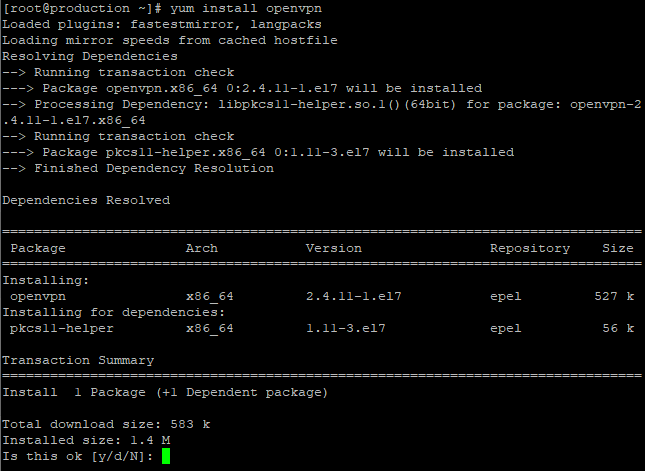
Install openvpn client on your linux client machine.
# yum install openvpn
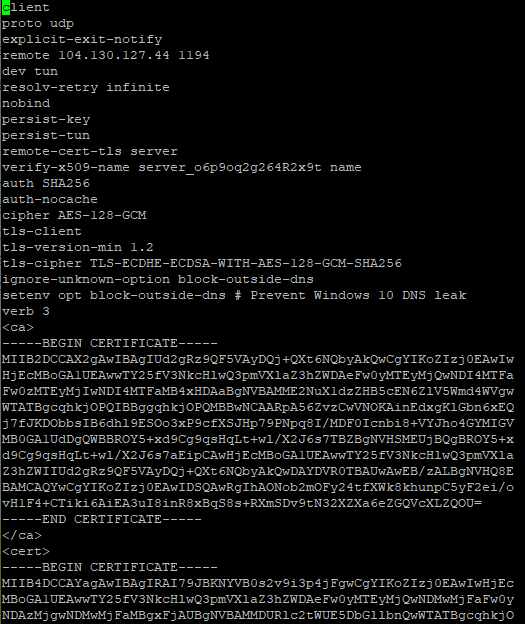
You can view the DeskVPNClient.ovpn file in linux editor like vi or vim etc.
# vi DeskVPNClient.ovpn
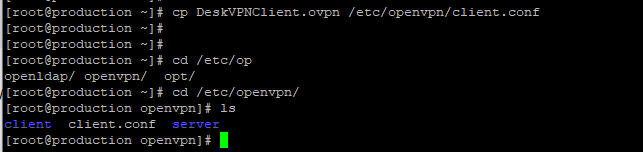
Now, copy the DeskVPNClient.ovpn in /etc/openvpn/client.conf
# cp DeskVPNClient.ovpn /etc/openvpn/client.conf
You can test the connectivity from the CLI.
# sudo openvpn --client --config /etc/openvpn/desktop.conf
Our Linux client will automatically connect when computer restart using openvpn script/service:
# sudo systemctl start openvpn@client
Step 5 – Verify connectivity between VPN Server and VPN Client.
Execute the following commands after connecting to OpenVPN server to your Linux client:
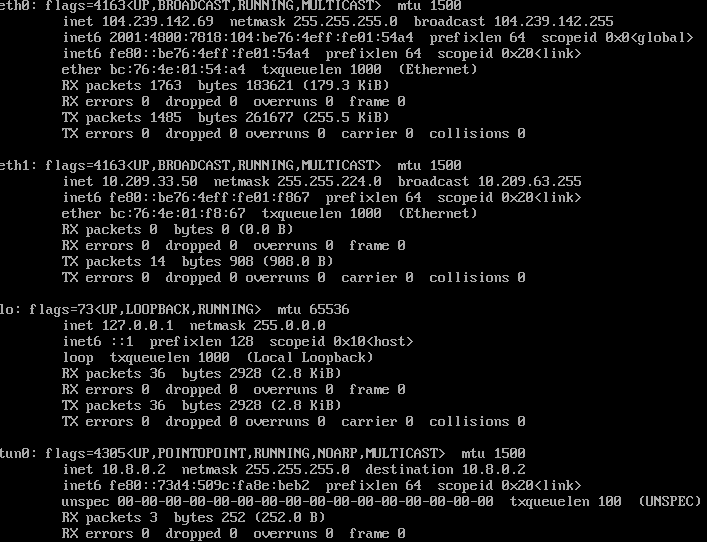
On VPN Client machine:
Check the interface detail on VPN Server machine.
# ip a
Ping to the VPN server gateway.
# ping 10.8.0.1
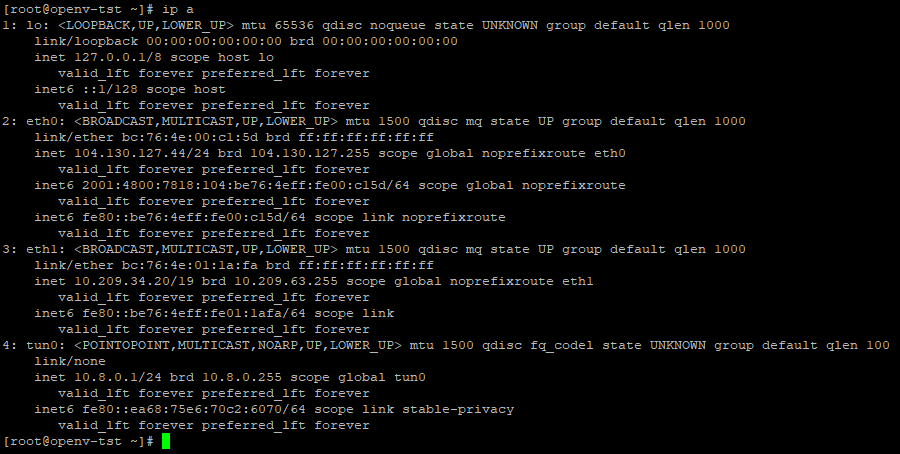
On VPN Server machine:
Check the interface detail on VPN Server machine.
# ip a
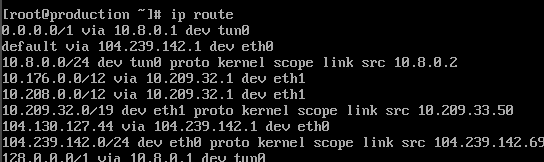
Make sure routing setup working.
#ip route
Step 6 – Add or remove OpenVPN client.
Log in to your CentOS 8 Linux server and run the script again
# sudo ./centos-8-vpn.sh
You will see different options for add, revoke, remove or exit, chose options as per your need.

Conclusion:
You successfully set up an OpenVPN server and OpenVPN client on CentOS 8 machine. If you face connectivity issue please check firewall rules and make sure that openvpn port should be allowed in your system firewall/network.