
Introduction
Apache is the most popular web server used on the internet. And it is ideal for most situations and allows flexibility for shared environments. In this tutorial, we will see how to secure an Apache webserver. For this tutorial, we will use Centos 8. you can find the apache installation tutorial here. We will see how to modify Apache configuration on Ubuntu/Debian system also.
1. Keep Up to date Apache
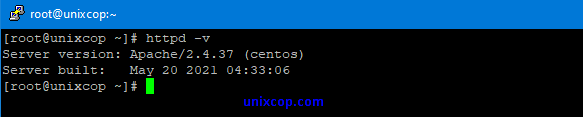
Log in to the system using a root or sudo privileged user account. check the Apache version by running the following command.httpd -v
2. Hide Apache version & Server os information.
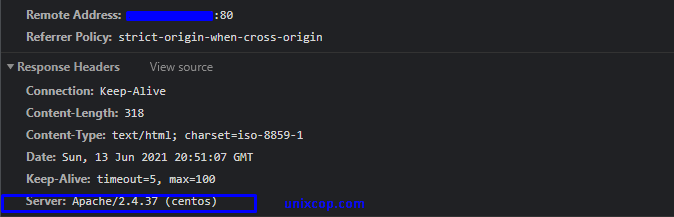
The first thing we need to consider, as we do not want to expose what web server version we are using in our system. Exposing version and os information means we are helping hackers to be speedy in the attacking process. In the below picture, we can see that Apache shows its version with the OS installed on our server.
To prevent Apache from exposing its version and operating system information, we need to change Apache‘s main configuration file. open the configuration file by running the following command-
nano /etc/httpd/conf/httpd.conf
nano /etc/apache2/apache.conf (Ubuntu / Debian)
Now add two below directives to the main configuration file and save it.
ServerTokens Prod
ServerSignature Off
And restart Apache server by running the following command-
systemctl restart httpd.service
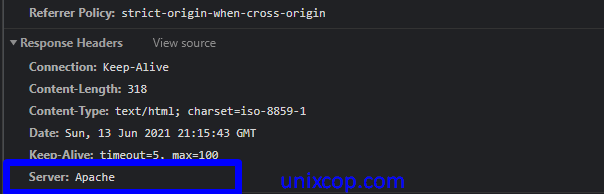
As we can see in the below image, the Apache version is not exposed, and operating information is also not visible.
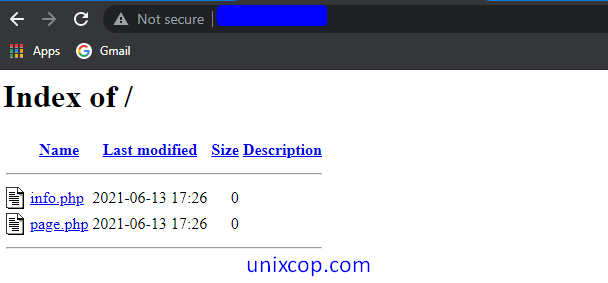
3. Disable Directory Indexing
By default, Apache shows all the content of the Webroot directory in the absence of an index file. Like the below image,
to prevent directory indexing in a browser, we need to change the options directive in the Apache configuration file. Open the configuration and change the entry as below.
<Directory /var/www/html>
    Options -Indexes
</Directory>
Now open the browser and type IP or URL in the address bar. And we will see an image like below
4. Disable ETag
Etag is used in HTTP headers to manage web caching behavior. However, Etag can cause security issues. It allows remote attackers to obtain sensitive information like inode number, mime type, and process through ETag header. To prevent attacks and information leakage, add the following directive to Apache configuration.
to achive this simply add the following line to Apache configuration file and restart the Apache.
FileEtag None
5. Disable CGI & SSI
SSIs (server-side includes) are directives are used to write an HTML page with dynamic contents & CGI is used to inject malicious scripts in your web code. Restrict CGI and SSI by adding the following option directives to Apache configuration:
Options -Includes -ExecCGI
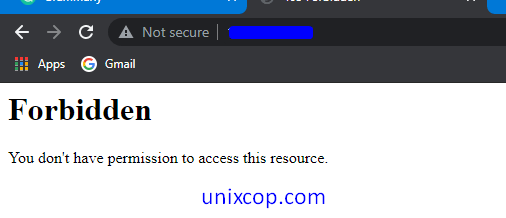
6. Restrict Directory Access
It is a good security practice to restrict webroot directory access using the “Allow and Deny” syntax. To achieve this, make the following changes in the apache configuration file. Open the configuration file and server for Directory block and write the directory directive as follow and save it. now restart the Apache to changes the effects
<Directory />
   Options None
   Order deny,allow
   Deny from all
</Directory>
The above setting will deny requests from anyone to the root directory. Nobody can access the root directory.
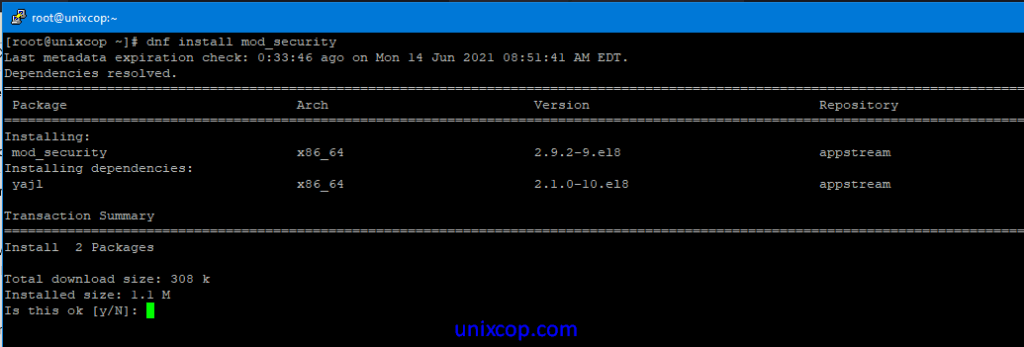
7. Secure Apache with Mod_Security
Mod_security is a security tool, works as a firewall for websites or applications. It helps to protect websites or applications from UN-authorized access and also from brute force attacks. Install mod_security by running the following command and restart Apache to work with mod_security.
dnf -y install mod_security
8. Define HTTP Request Methods
In the current HTTP protocol, many requests are not required, and some have a security risk. However, it is pretty enough for a web application to allow GET, HEAD, and POST request methods. We can configure this setting by adding the respective Directory directive. to achieve this, open the Apache configuration file, search for Directory and add the following inside directive and restart Apache
<LimitExcept GET POST HEAD>
deny from all
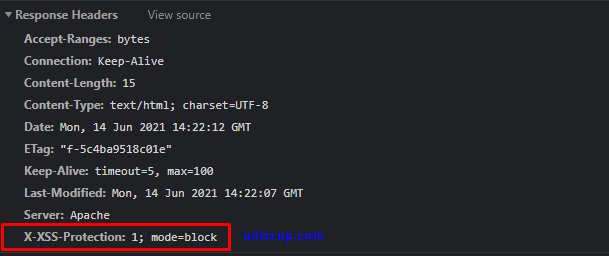
</LimitExcept>9. Enable XSS Protection Header
Cross-site scripting is known as (XSS), and it is a common vulnerability found in web applications. Cross-Site Scripting (XSS) protection could skip in many browsers. However, we can prevent some XSS attacks by adding the following entry to our Apache configuration file and saving it. And restart the Apache server.
Header set X-XSS-Protection "1; mode=block"
Now check the request header in the browser developer tool, we can in the below image, that header is implemented successfully.
10. Disable TRACE HTTP Request
By default, Trace HTTP Request open in Apache to allowing for Cross-Site Tracing. This option enables a hacker to steal cookie information easily. to prevent this, add the following parameters to the Apache configuration file. And restart Apache.
TraceEnable off
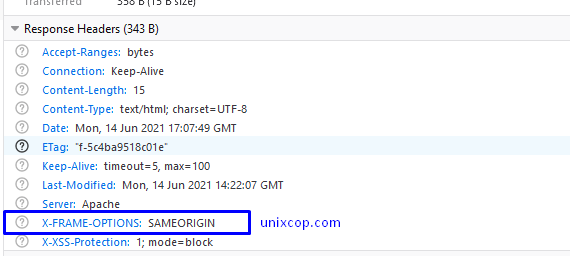
11. Prevent Clickjacking Attacks
Clickjacking, also known as “User Interface redress attack,” is a malicious technique to collect an infected user’s clicks. Clickjacking tricks the victim (visitor) into clicking on an infected site. To prevent this incident, we need to use “X-FRAME-OPTION” in the Apache configuration file. To do this, add the following line in the configuration file.
Header set X-FRAME-OPTIONS "SAMEORIGIN"
Now check the request header in the browser developer tool, as we can see that we have successfully added X-FRAME-OPTIONS on the Apache configuration file.
13. Secure Cookie with HTTPOnly Flag
Without having HttpOnly and Secure, it is possible to steal or manipulate web application sessions and cookies, and it is dangerous. To mitigate this, we need to ensure that the mod_header module is running on the server-side.
apachectl -M | grep header
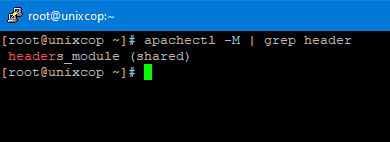
In the above image, we can see that the mod_header module loaded and enabled in Apache. Now add the following line in Apache main configuration file and restart the Apache server.
Header edit Set-Cookie ^(.*)$ $1;HttpOnly;Secure
14. Limit Request Size
By default, the HTTP request in Apache is unlimited; hence web server is susceptible to DoS attacks by keeping it open for the high number of request. Then it’s important to set the limit for file request. This can be done by adding the LimitRequestBody directive in the Apache configuration file.
For example, unixcop is a directory that contains files uploaded by users. Now We are limiting the upload size to 2K so that the user can not upload file more than this.
<Directory "/var/www/html/unixcop">
LimitRequestBody 20000
</Directory
Conclusion
From this tutorial , we learned how we can protect our Apache server from attacker. hope our article will help you to protect your server. you can also follow my other articles.