Today we will talk about Jenkins GitHub Integration.
What is Git, why is it demanded?
As we are aware, Git is an open-source and distributed version control system. It is used for tracking or managing the source code during development of projects. It stores the changes in files diversely with other Version Control Systems. VCS stores the distinction between two versions. For instance, think about a file XYZ that got changed multiple times. The complete file will be saved in the first version and as the new versions are presented, the distinction from the past variant.
We can save the repository/code on the centralized server which is provided by Git in the form of a GitHub repository and also we can save it on the local server or computer of each worker/developer which means while doing the work, we don’t have to connect to the remote repository all the time.
Why is Jenkins GitHub Integration needed?
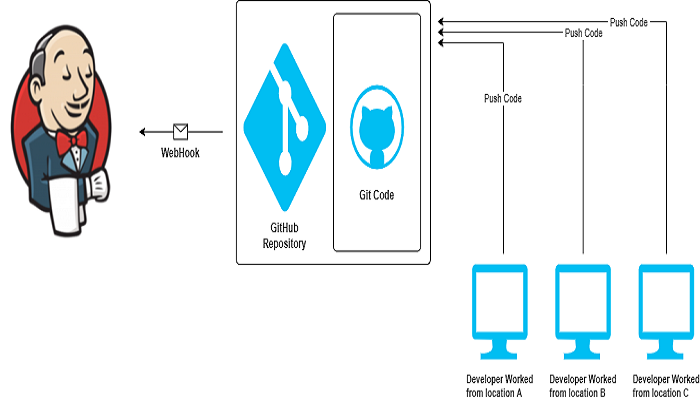
In the real computing world, everybody deals with their local machine however by the day’s end, ultimately they have to put their complete code in a central repository, like the GitHub repository from where they can run the complete project. Therefore, our complete code resides remotely from the central repository of GitHub.
The need for this integration is because it automates a few processes including the deployment process or testing process. Also, it saves time for developers and testers by improving the final product quality. In the Github repository, when a new commit comes, Jenkins can automatically trigger the build and present the result. This automation is very important to complete the deployment and testing process.
What is Build Trigger?
Remote access API is used by Jenkins Build Trigger. In the SCM Product(Bitbucket, GitHub, Beanstalk etc), Webhook can be used as a RemoteAPI. Events like OnPush/OnCommit can be added to the webhook. In the GitHub repository, when a new commit comes, Jenkins automatically triggers the build and the latest code would be deployed on the application server.
Let’s start with a practical example of how we can integrate Jenkins with GitHub. For this, we need the Jenkins Git plugin.
Step 1: Let’s start with an installation of the Jenkins Git plugin followed by these steps:
- Navigate to Manage Jenkins > Plugin Manager > Available.
- Type Git plugin in the search box.
- A dropdown will open, select the Git plugin from given options.
- Lastly click on “Install without restart”.
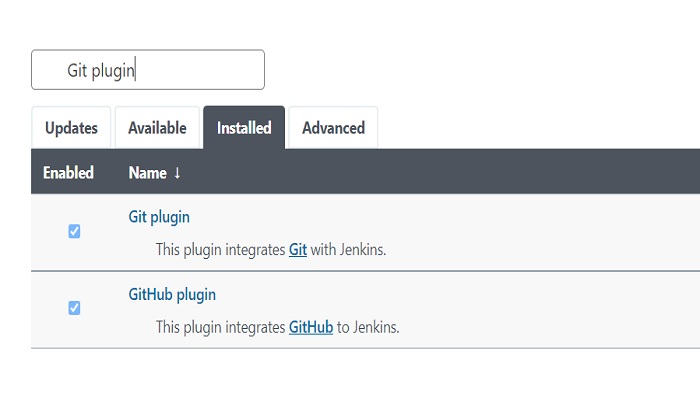
NOTE: Just to verify if the Git plugin is installed successfully, follow these simple steps:
Select the Installed tab under Plugin Manager. Type Git plugin in the search box. If the plugin appears, it means plugin is installed successfully.
Step 2: Let’s Create a new Jenkins job by following these simple steps:
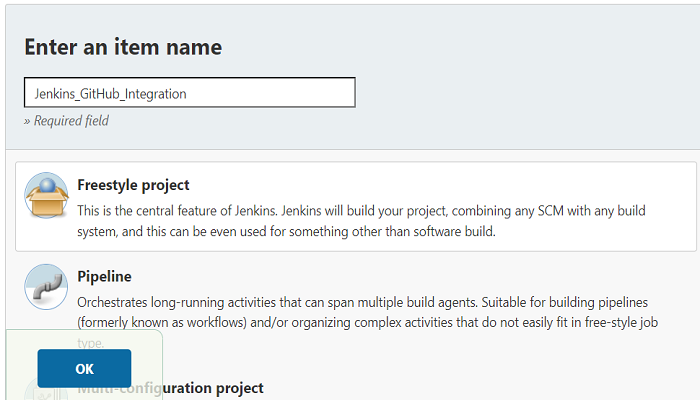
- Navigate to Jenkins dashboard and click on “New Item”.
- Enter the “Item Name”(In my project, I have entered Jenkins_GtHub_Integration in item name).
- Select the project type as “freestyle project”.
- Click on “OK”.
Now configuration page will open. Here, select the Source Code Management option from the top menu and select the Git option under the section of Source Code Management.
NOTE: Source Code Management option will show only when the Git plugin would be installed properly.
As soon as you select the Git option, a dialogue box will open where you have to enter the Git repository information.
Enter the Git repository URL and Branch name in the Branch specifier.
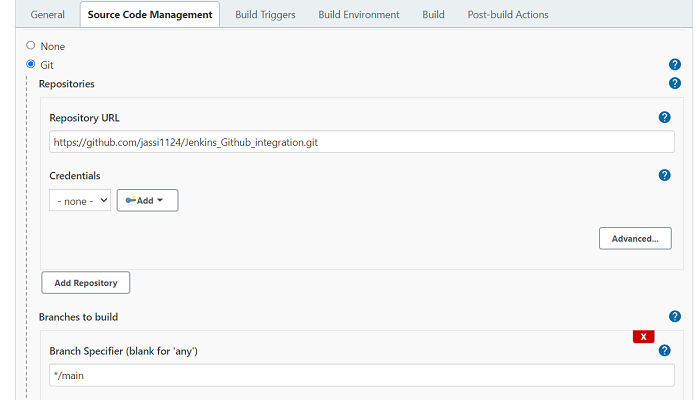
NOTE: If you already have a GitHub account and an existing repository, then use that one and enter the necessary information like Git repository URL and Branch name else follow Steps 6 & 7 for creating a new repository.
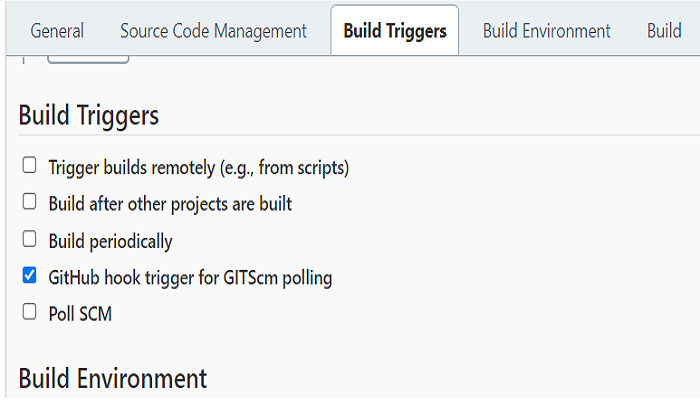
Click on “Build Triggers” from the top menu and select the option “GitHub hook trigger for GITScm polling”.
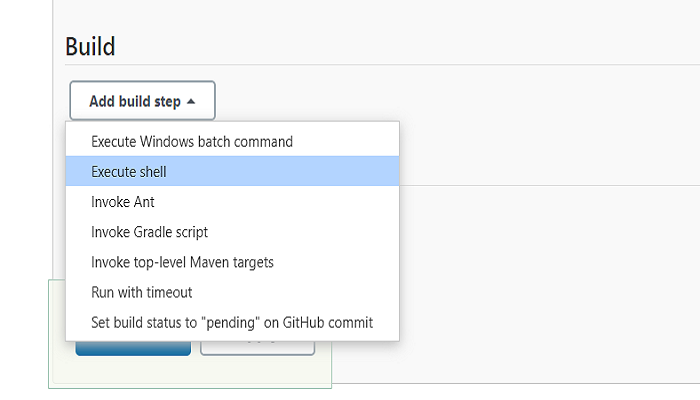
Now click on the “Build” section from the top menu. Click on “Add build step” then select “execute shell” from the dropdown menu then click on “Apply” and “Save”.
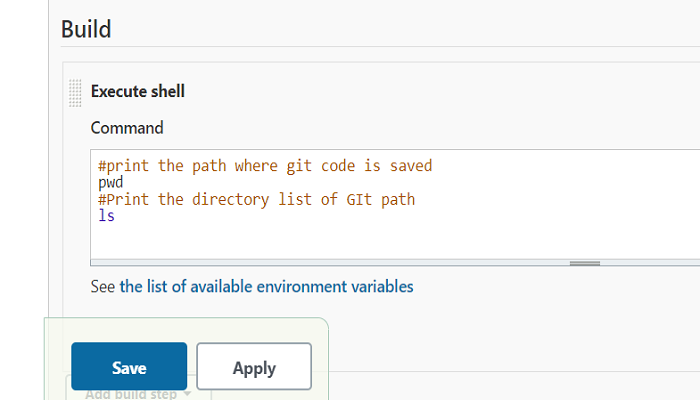
Here you can put your Build steps according to your Project. In this example, I am taking a simple command, Just printing the list of directory content and the path where Git code is saved.
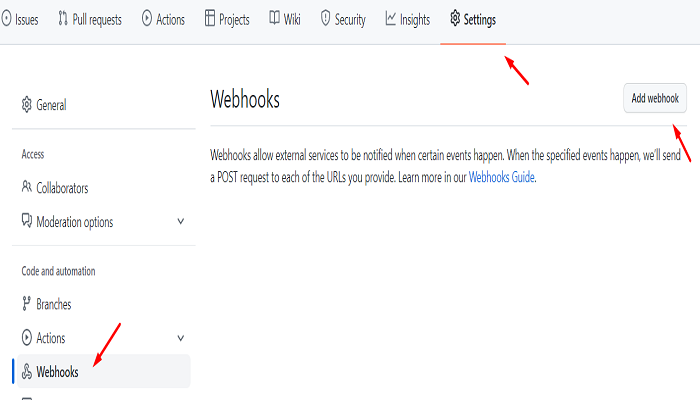
Step 3: Add Webhook by following these steps:
- Go to Github Repository.
- Click on “Settings” from the top menu.
- Click on “Webhooks” from the left side menu then click on “Add Webhook” to create the webhook with Jenkins.
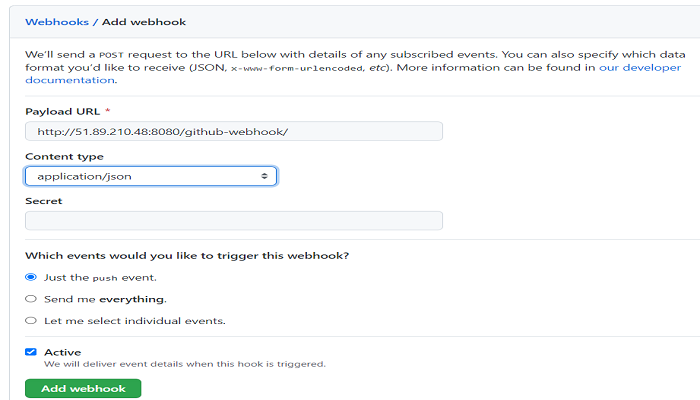
Soon after you click on “Add webhook”, it will redirect you to the webhook configuration page where you can give information about webhooks.
- Enter the “Payload URL” which would be a combination of your Jenkins URLs appended with text github-webhook/. Remember to add / toward the finish of URL.
- Change the “Context type” as application/json from the dropdown.
- Select the event as “Just push the event”.
- Make sure there should be a tick on the “Active” checkbox.
- Last, Click on “Add webhook”.
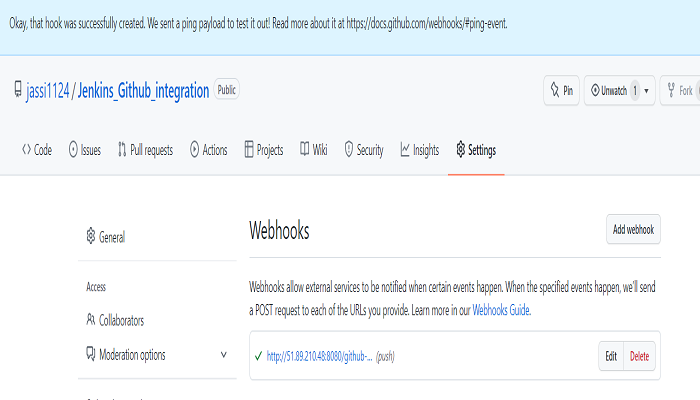
A successful message would appear on the top after clicking on the Add webhook which means, the Jenkins GitHub integration has been successfully done.
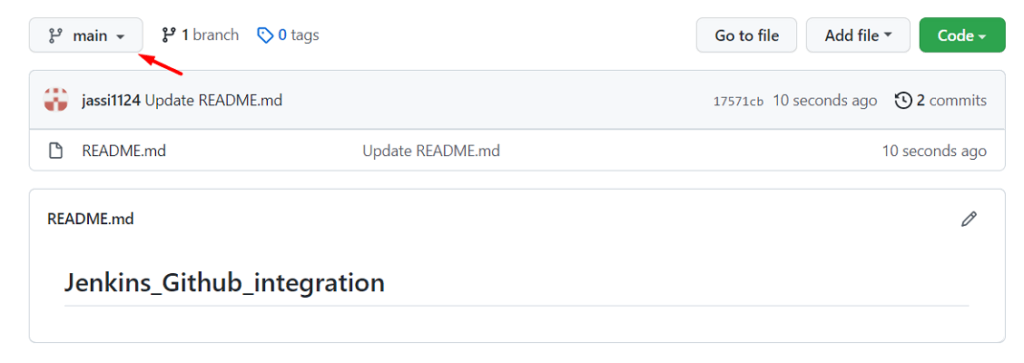
Step 4: Now, In my GitHub repository I have only one file.

Let’s create a new file. Click on create a new file from the dropdown menu under the add file option on the top menu. I have created the file named jenkin.php

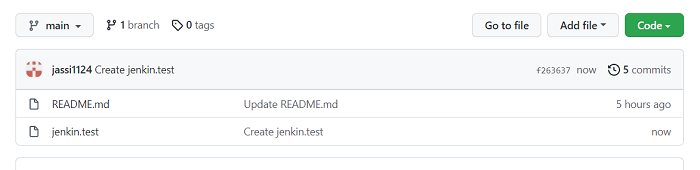
Step 5: As soon as I created the file the Jenkin job ran automatically.
In the job build history, you can see build number 2 runs automatically after creating the file.
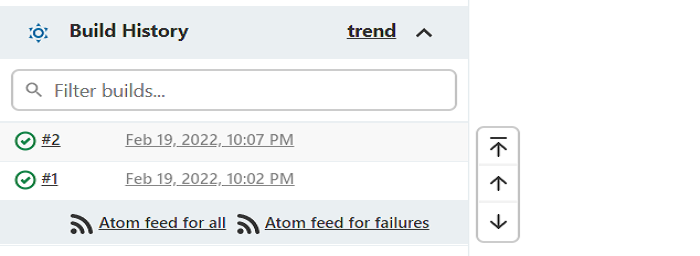
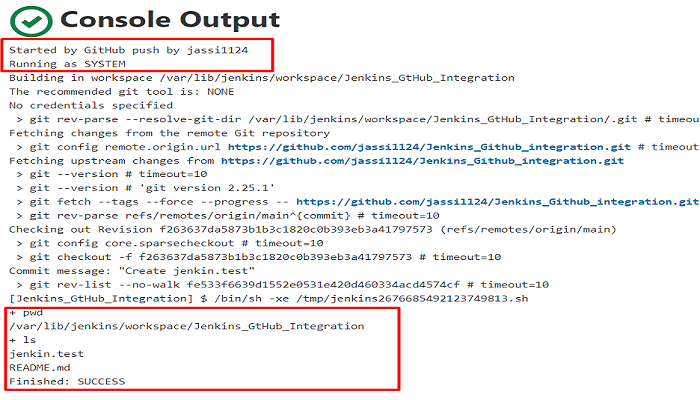
For further detail, let’s check the console output of the Jenkins job.
- Jenkins job started by GitHub push by jassi1124. (Jassi1124 is the username of my Github account.)
- Output of commands that wrote in execute shell during step2.
Here, you can see:
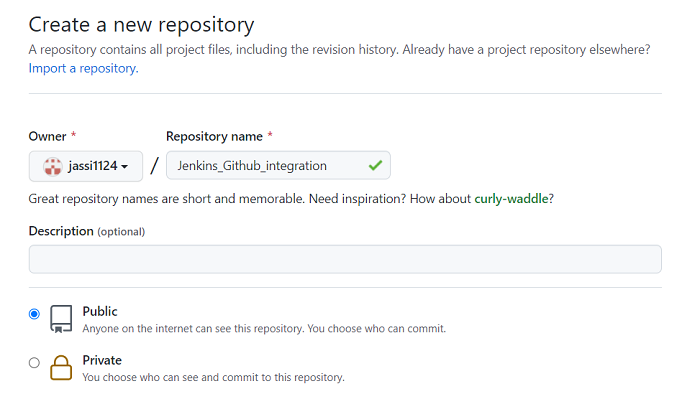
Step 6: Create a New repository in the GitHub dashboard
- Click on New.
- Enter the Repository Name.
- Select the repository as Public.
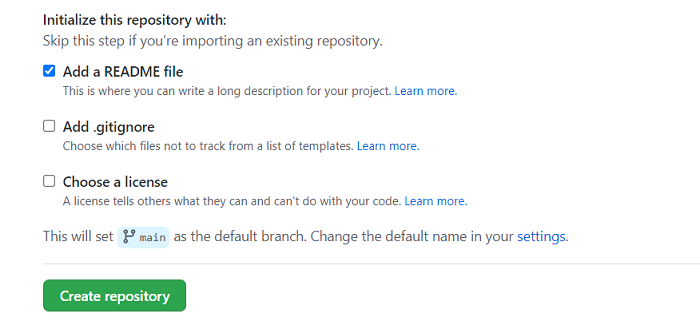
- Select the readme box to create the readme file in the repo.
- Click on Create Repository.
Step 7: As soon as you click on Create Repository, it will redirect to the new page and we will see the Branch name and Code in the form of files/folders in the repository.
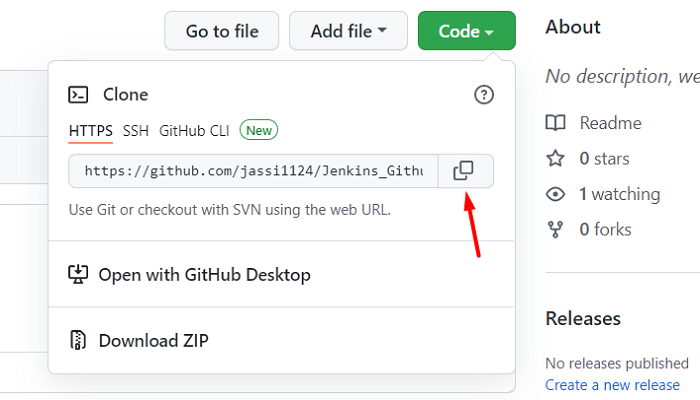
Click on Code and it opens the box where it shows the Repository URL and other options like Download zip and opens with GitHub Desktop.