Hello, dear friends. The tools to make and manage backups on our system are very useful to avoid data loss and related problems. So, in this post, you will learn how to install UrBackup on Ubuntu 20.04.
Introducing to UrBackup
According to the UrBackup website
UrBackup is an easy to setup Open Source client/server backup system, that through a combination of image and file backups accomplishes both data safety and a fast restoration time.
As it is a Client / Server architecture we can expect flexibility in the management of the two devices. In other words, we can install a server where we can store and manage the backups that will be made from the clients without network or process problems.
UrBackup also continuously watches folders you want backing up to quickly find differences from previous backups. Because of that, incremental file backups are really fast. So it can be quite useful in enterprise environments where there is a lot of different data.
Some of the advantages of using UrBackup are as follows:
- The application is quite fast because the client continuously watches file changes. So that only a few files have to be looked at during incremental file backups.
- UrBackup is open source so we can be sure that there are no backdoors or malware.
- It is very easy to use and configure thanks to its powerful graphical interface.
- Being multi-platform, UrBackup (both client and server) can be installed on Windows, Linux, or macOS.
So UrBackup is a solid alternative for us to have professional backups of all our client files.
Let’s go for it.
Install UrBackup on Ubuntu 20.04
Unfortunately, UrBackup is not present in the official Ubuntu repositories so we have to resort to an external one. Despite this, the process is quite simple…
So, open a terminal or connect via SSH to your server and once you can, run these commands to upgrade UBuntu
sudo apt update
sudo apt upgrade
Upgrading ubuntu is an important step that will help us to avoid errors with the packages to install.
After this, you have to install some packages needed to correctly add the necessary repository.
sudo apt install curl gnupg2 software-properties-common
Then, we can add the repository using the command
sudo add-apt-repository ppa:uroni/urbackup
This repository is trusted because it is from the developers of the application.
So, after adding it, just refresh APT and it will be ready to use.
sudo apt update
And to install UrBackup Server you have to execute the following command
sudo apt install urbackup-server
In the process, the installer will ask you to specify the directory where the data will be stored.

It will then continue the installation normally until it is complete.
Working with the UrBackup service
With the server installed, we have to learn how to manage the service so that we can use it without problems.
To start the UrBackup service you have to execute
sudo systemctl start urbackupsrv
Another good idea is to have the service run at system startup. This will avoid that if we have to restart the UrBackup server it won’t do it.
sudo systemctl enable urbackupsrv
Now, if you want to check the status of the service and know if it is running correctly, you have to run
sudo systemctl status urbackupsrv
● urbackupsrv.service - LSB: Server for doing backups
     Loaded: loaded (/etc/init.d/urbackupsrv; generated)
     Active: active (running) since Tue 2021-11-02 20:51:31 CET; 34s ago
       Docs: man:systemd-sysv-generator(8)
      Tasks: 17 (limit: 2280)
     Memory: 99.0M
     CGroup: /system.slice/urbackupsrv.service
             └─20059 /usr/bin/urbackupsrv run --config /etc/default/urbackupsrv --daemon --pidfile /var/run/urbackupsrv.pid

Nov 02 20:51:31 unixcop systemd[1]: Starting LSB: Server for doing backups...
Nov 02 20:51:31 unixcop systemd[1]: Started LSB: Server for doing backups.
When you make a change to the application’s configuration, it is necessary to restart the service so that it can be applied.
sudo systemctl restart urbackupsrv
This is how to manage the UrBackup service from the terminal.
Access to the web interface
Once everything is configured and ready, you can access the UrBackup web interface through an external web browser at the address http://your-server:55414.

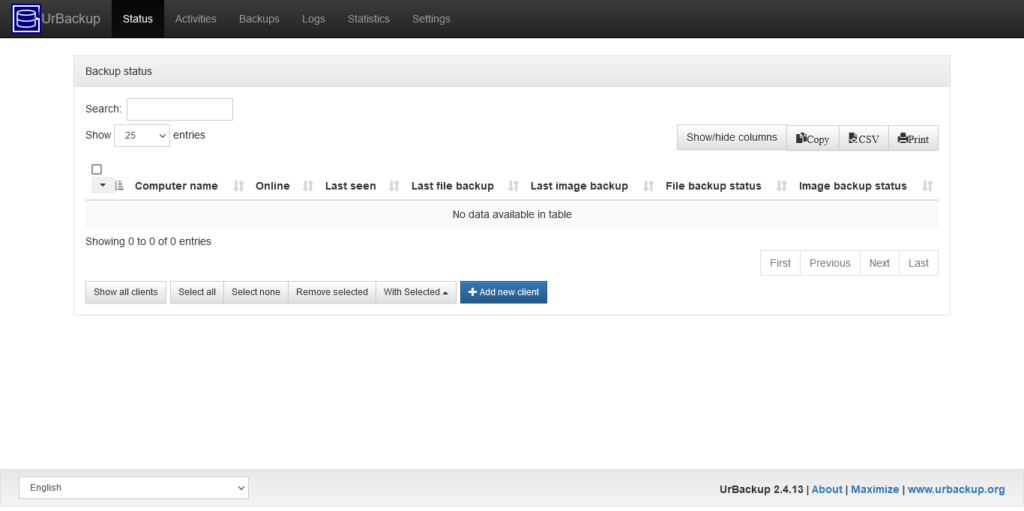
There you will see the following graphical interface where you will be able to see the initial status of the server. There you can add a new client by clicking on the Add New Client button.
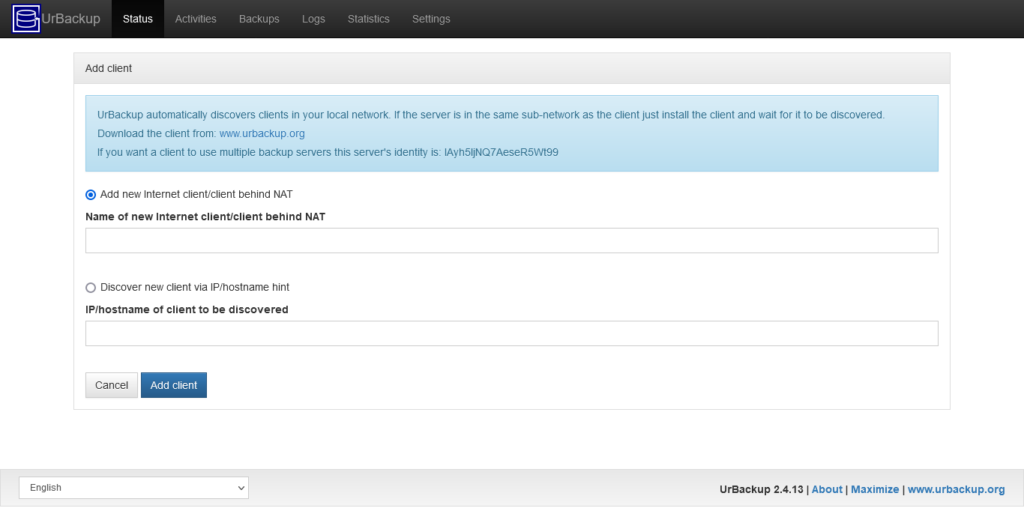
Then, you will see this screen.

UrBackup discovers new clients on a local network, but you can also specify an IP address of a client and add it without any problems.
Conclusion
UrBackup is a necessary tool for many professional network operations. With it, we can protect our data from the loss quickly, easily, and always securely.


