")
Squid is a web proxy that used my wide range of organizations. It is often used as a caching proxy and improving response times and reducing bandwidth usage.
It has a wide variety of uses, including speeding up a web server by caching repeated requests, caching web, DNS and other computer network lookups for a group of people sharing network resources, and aiding security by filtering traffic. Although primarily used for HTTP and FTP, Squid includes limited support for several other protocols including Internet Gopher, SSL, TLS and HTTPS.
Step # 1: Update Ubuntu Server.
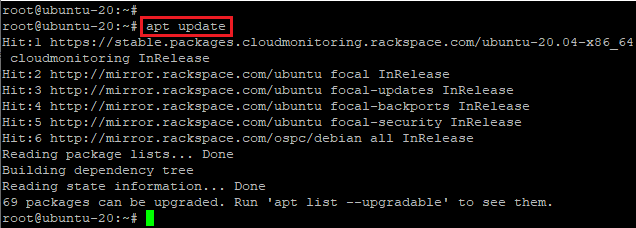
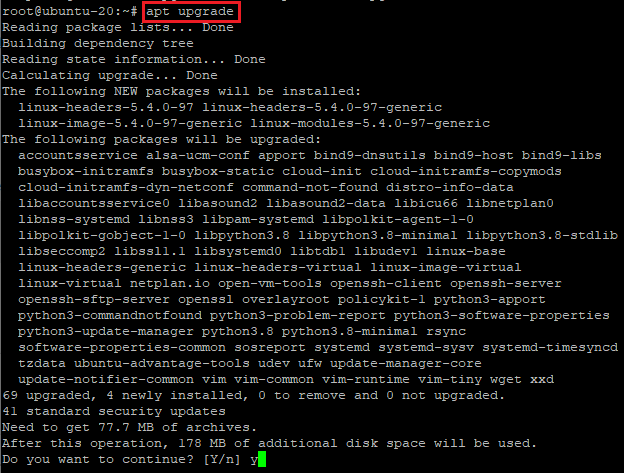
Update your system using the apt command:
apt update
apt upgrade
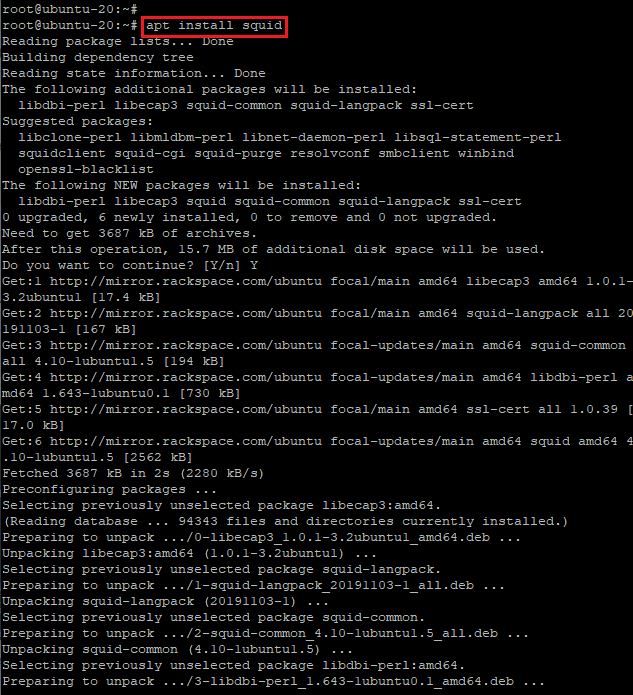
Step # 2: Installing Squid Server.
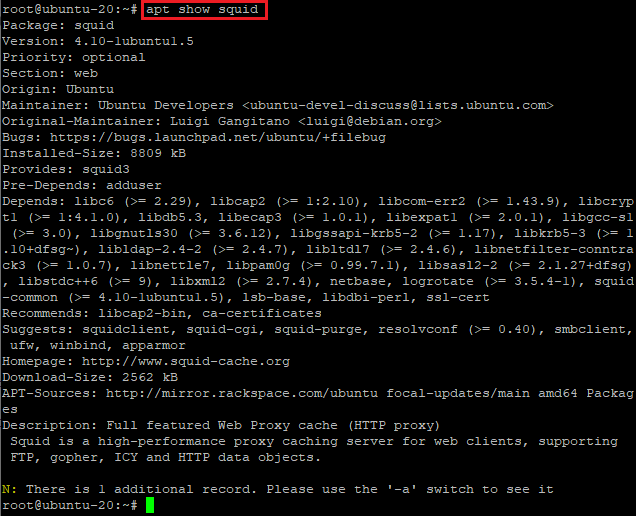
We can search for the squid package as follow:
apt show squid
Now that system software up to date, it is time to install the Squid server, enter:
apt install squid
Step # 3: Configuring Squid server.
Now configure the squid server, first make a backup of the original file so that if any thing goes wrong we can go back to the original state.
cp -v /etc/squid/squid.conf{,.factory}
‘/etc/squid/squid.conf’ -> ‘/etc/squid/squid.conf.factory’

The squid configuration file is located at /etc/squid/squid.conf and /etc/squid/conf.d/ directory.
Open the squid config file using vi text editor.
vim /etc/squid/squid.conf
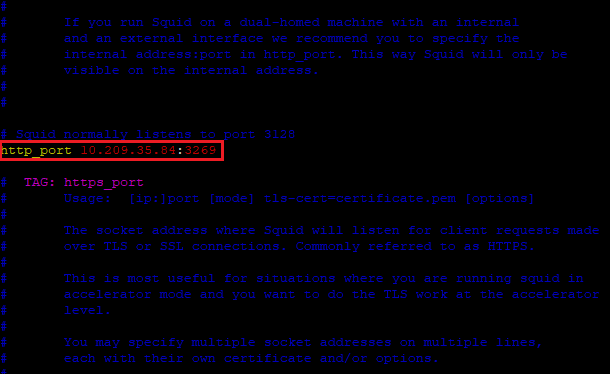
Change squid port and listing IP address
By default, squid listens to all IP addresses on all interfaces. The default port is TCP 3128. Find line:
http_port 3269
Change it as follows or as per your needs:
http_port 10.209.35.84:3269
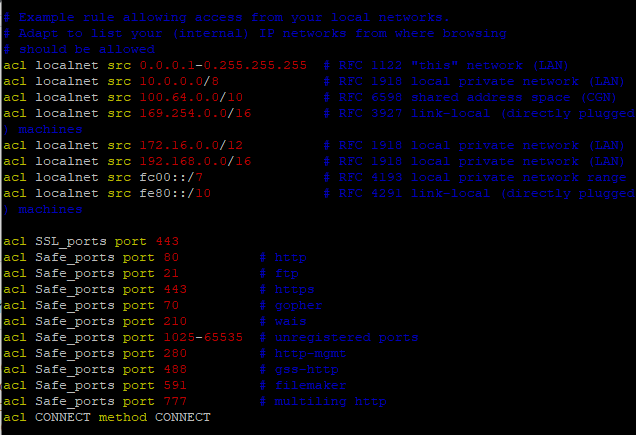
Define SSL and safe ports that you would like to allow
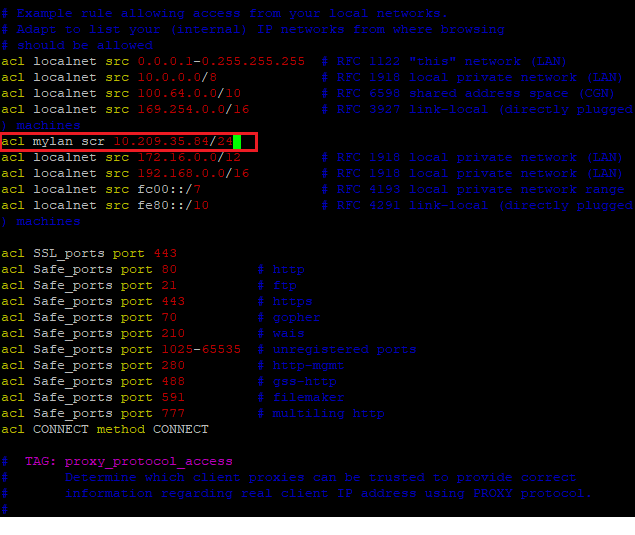
Adapt to list your (internal) IP networks from where browsing should be allowed
Define your LAN acl as follows
acl mylan src 10.209.35.84/24
We can also define other domains that you wish to block
acl baddomain1 dstdomain www-bad-guys-domain-name-here
if you have multiple IP addresses assigned to your server we can change proxy server outgoing IP address as follows:
tcp_outgoing_address x.x.x.x
Set cache memory size as per your needs
cache_mem 256 MB
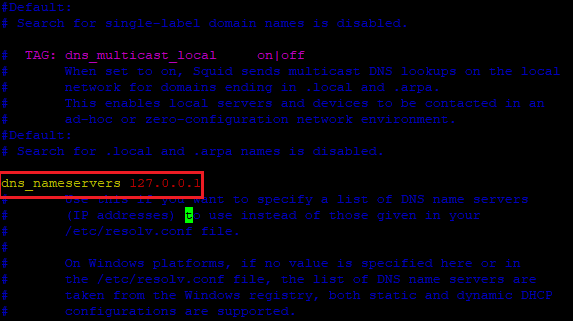
Specify a list of DNS name servers to use
dns_nameservers 127.0.0.1
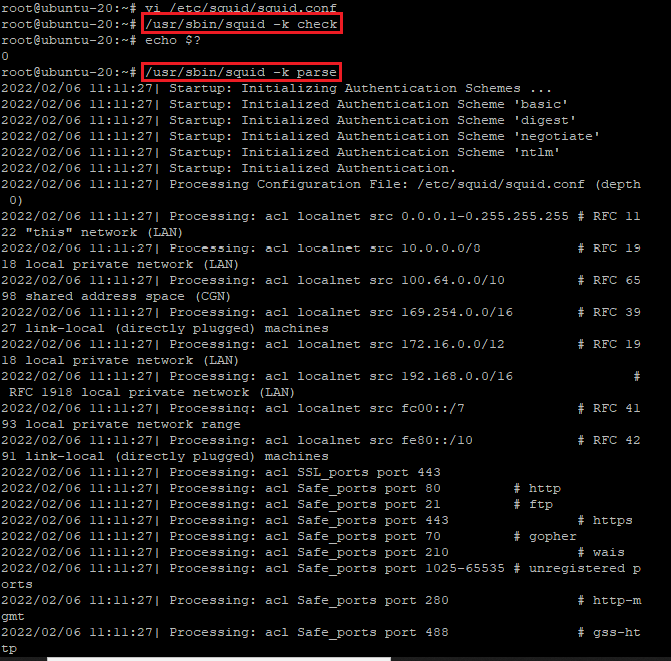
Verify that config options are valid
To parse and test configuration file, enter:
/usr/sbin/squid -k check
echo $?
/usr/sbin/squid -k parse
Step # 4: Start/stop/restart Squid.
First, turn on Squid service at boot time using the systemctl command:
systemctl enable squid.service

The syntax is as follows:
Start the Squid server
systemctl start squid.service
Stop the Squid server
systemctl stop squid.service
OR
squid -k shutdown
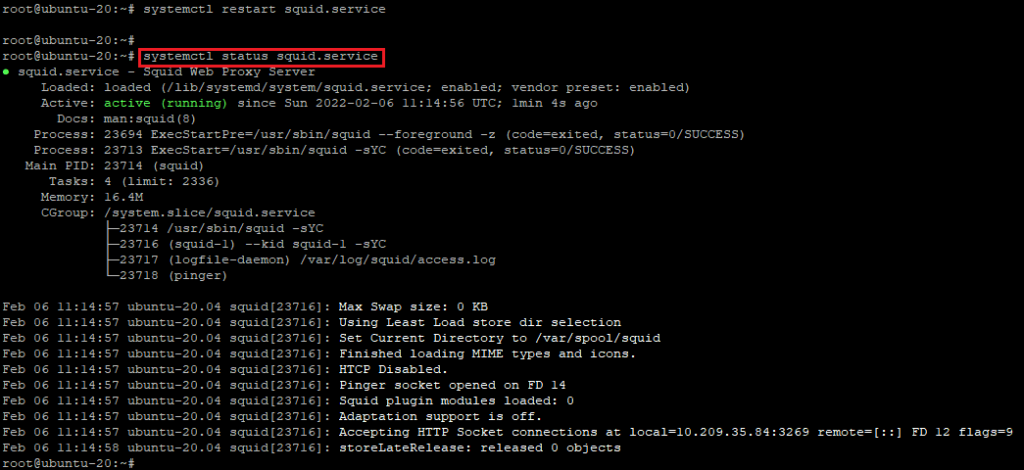
Restart the Squid server
systemctl restart squid.service
Find the Squid server status
systemctl status squid.service
Reload the Squid after config changes gracefully
Whenever you make changes to the squid.conf, reload it as follows:
squid -k reconfigure

OR
systemctl reload squid.service
Step # 5: Block domains.
Let us block twitter.com and facebook.com:
acl socialsite dstdomain .twitter.com
acl socialsite dstdomain .facebook.com
http_access deny socialsite
Step # 6: Block URLs using keywords.
Say if any url contains keyword such as “foo” or “browse.php?u=” block it using the url_regex acl:
acl urlkeywordsblocks url_regex -i "/etc/squid/blocked-urls-keyword.conf"
http_access deny urlkeywordsblocks
Create a file named /etc/squid/blockd-urls-keyword.conf as follows:
sudo vim /etc/squid/blocked-urls-keyword.conf
Append the urls/keywords:
foo
browse.php?u=
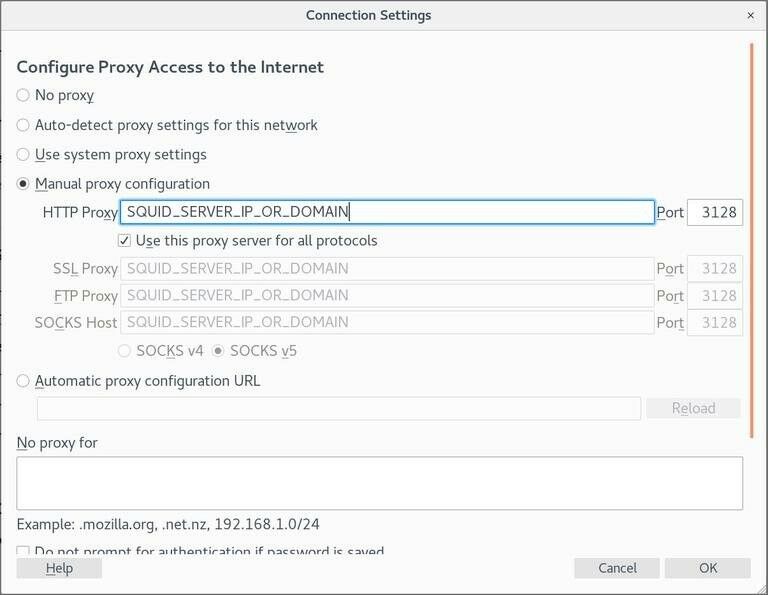
Step # 7: Configure web browser
- In the upper right-hand corner, click on the hamburger icon ☰ to open Firefox’s menu:
- Click on the ⚙ Preferences link.
- Scroll down to the Network Settings section and click on the Settings… button.
- A new window will open.
The steps below are the same for Windows, macOS, and Linux.
Select the Manual proxy configuration radio button.
Enter your Squid server IP address in the HTTP Host field and 3128 in the Port field.
Select the Use this proxy server for all protocols checkbox.
Click on the OK button to save the settings.
Firefox Squid Proxy
At this point, your Firefox is configured, and you can browse the Internet through the Squid proxy. To verify it, open google.com, type “what is my ip” and you should see your Squid server IP address.
Conclusion:
That’s it. We have successfully installed and configured Squid Proxy.
In this article, we have seen how to install Squid Proxy on Ubuntu 20.04