")
So, today you will learn how to install miniconda in Linux
Miniconda is a minimal and stripped-down version of Anaconda distribution. As the name implies, Miniconda contains only Conda package manager, Python and a small number of useful packages such as pip, zlib including their dependencies.
Miniconda is suitable for those who don’t mind to install each package individually. It saves you not only the disk space but also avoids dumping a lots of unnecessary applications that you don’t use often in your hard drive. For those wondering, Anaconda distribution automatically installs 1,500 packages that consumes around 3 GB disk space. If you use only a handful of applications, miniconda might be a good choice.
In this tutorial we will install miniconda on Linux and using CentOS 8.
Download the latest Miniconda version using the following command:
wget https://repo.anaconda.com/miniconda/Miniconda3-py39_4.9.2-Linux-x86_64.shNow check the file with SHA-256.
sha256sum Miniconda3-py39_4.9.2-Linux-x86_64.sh
Installation of Miniconda on Linux:
To install Miniconda on Linux, run the following command:
bash Miniconda3-py39_4.9.2-Linux-x86_64.sh You should include the bash command regardless of the shell you’re using.
Press ENTER to continue installation:

Next, you will see the license agreement. Press ENTER key to scroll to the bottom of the license terms and type “Yes” and press to agree the license agreement and continue installation.

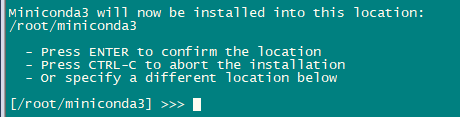
Next the installer will prompt where do you want to install Miniconda. Press Enter to install at the specified location if you want to install at another location provide the path and then press Enter.
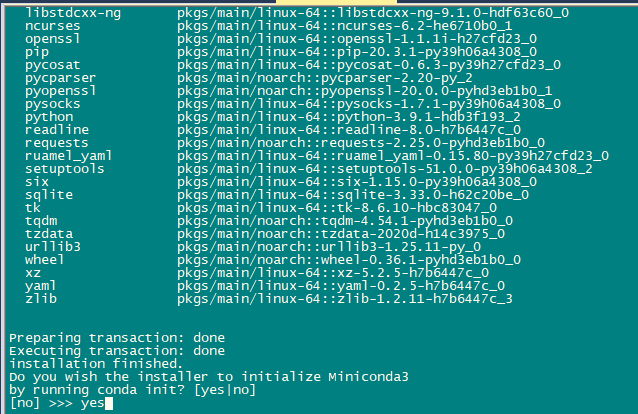
Finally, A prompt will ask you to initialize Miniconda. It is recommended to initialize it, so just type Yes and press ENTER to continue.
Miniconda is now Installed.
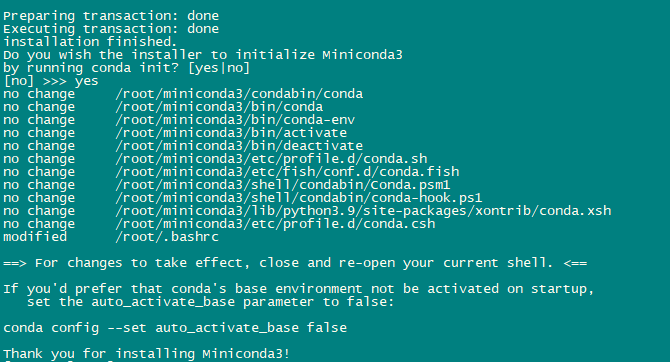
For the installation to take effect, close and re-open your Terminal. Alternatively, run the following command to effect the changes immediately:
source ~/.bashrcYou will now see the prefix (base) in front of your shell prompt. It means that the conda’s base environment is functional.

If you don’t want the conda’s base environment activated by default on system startup and wish to run conda from anywhere, deactivate it using command:
conda config --set auto_activate_base falseNow, Run the following command so that change may take effect.
source ~/.bashrcFrom now on, you have to manually activate conda environment using command:
conda activateTo deactivate conda environment:
conda deactivate
Now you can use Miniconda as per your need.
Great tutorial… I worked flawlessly