Hello, friends. In this post, you will learn how to install Kubernetes on Rocky Linux 9.
Kubernetes is a portable and extensible open-source platform for managing workloads and services. Kubernetes makes it easy to automate and declarative configuration.
So let’s get to it.
Installing Kubernetes in Rocky Linux 9
The process is pretty straightforward, but we have to make a few configurations beforehand.
Installing Docker and some necessary components
For this post, it is assumed that we have a freshly installed Rocky Linux server, with a configured hostname and everything in order.
So, the first thing to do is to update it
sudo dnf updateThen, we have to install Docker on the system. To achieve this, add the repository to an external repository because it is not present in the official repositories.
sudo dnf config-manager --add-repo https://download.docker.com/linux/centos/docker-ce.repoSample output:
Adding repo from: https://download.docker.com/linux/centos/docker-ce.repoAnd now you can install Docker. Of course, we will take the opportunity to install other necessary programs such as nano, curl and containerd.
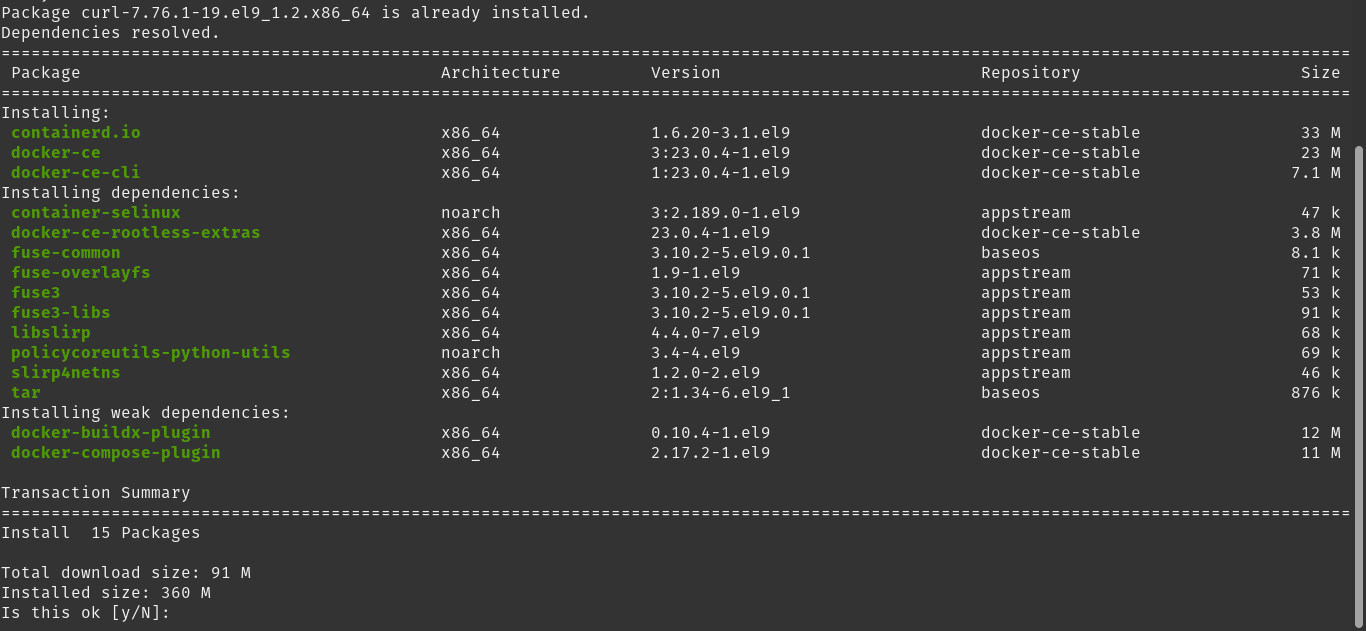
sudo dnf install nano curl docker-ce docker-ce-cli containerd.io
Next, start Docker and have it load with the system
sudo systemctl start docker
sudo systemctl enable docker
Sample output:
Created symlink /etc/systemd/system/multi-user.target.wants/docker.service → /usr/lib/systemd/system/system/docker.service.Make the current user able to run Docker without root permissions. To achieve this, add the current user to the Docker group.
sudo usermod -aG docker $USER && newgrp dockerApply the changes by logging out and logging in again.
Docker is up and running, but there is something else. Kubernetes does not work well when there is Swap on the system. So, you have to disable it.
sudo swapoff -a
sudo sed -i '/ swap / s/^/#/' /etc/fstab
The first command does it temporarily for this post and the second one permanently.
Install Kubernetes
Now it’s time for Kubernetes and its components. First, install minukube directly from its RPM package. First download it:
curl -LO https://storage.googleapis.com/minikube/releases/latest/minikube-latest.x86_64.rpmNow install it:
sudo rpm -Uvh minikube-latest.x86_64.rpm
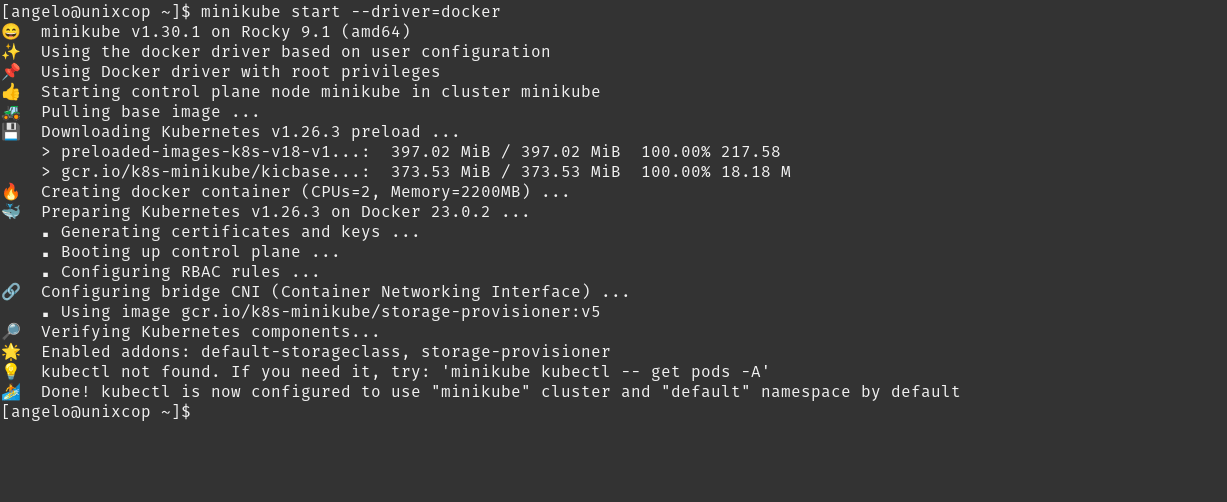
Start Minikube with the Docker driver.
minikube start --driver=docker
Install the kubectl command by executing
minikube kubectl -- get po -A
NAMESPACE     NAME                               READY   STATUS    RESTARTS   AGE
kube-system   coredns-787d4945fb-d2fg9           0/1     Running   0          28s
kube-system   etcd-minikube                      1/1     Running   0          40s
kube-system   kube-apiserver-minikube            1/1     Running   0          40s
kube-system   kube-controller-manager-minikube   1/1     Running   0          40s
kube-system   kube-proxy-fl8dk                   1/1     Running   0          28s
kube-system   kube-scheduler-minikube            1/1     Running   0          40s
kube-system   storage-provisioner                1/1     Running   0          39s
Now, prepare an alias for kuberctl.
alias kubectl="minikube kubectl --"And make it permanent, by adding that to the end of the .bashrc file
nano ~/.bashrcThen, you can start a test deployment.
kubectl create deployment hello-minikube --image=kicbase/echo-server:1.0Sample output:
deployment.apps/hello-minikube createdAnd expose it:
kubectl expose deployment hello-minikube --type=NodePort --port=8000Sample output:
service/hello-minikube exposedAnd to test if everything is OK:
kubectl get services hello-minikube
Then you will see that it is working.
Conclusion
In this post, you learned how to install Kubernetes on Rocky Linux 9. The process is simple and opens the door to more complex situations.


