
Oracle Application Express is a low-code development platform that enables you to build scalable, secure enterprise apps, with world-class features, that can be deployed literally anywhere.
Also it’s a proprietary web-based integrated development environment (IDE) developed by Oracle Corporation for creating and managing Oracle databases and other related database functionality. In addition to, With it developers can quickly develop and deploy compelling apps that solve real problems and provide immediate value, even it’s not necessary to be an expert in a vast array of technologies to deliver sophisticated solutions.
We will discuss about the architecture an overview of the total APEX & ORDS interconnection & obviously hands on ! So let’s start with the architecture first
Architecture
So It’s a three tier architecture where requests are sent from the browser, through a web server, to the database.
Also all processing, data manipulation and business logic executed in the database.This architecture guarantees zero latency data access, top performance, and scalability, out of the box.
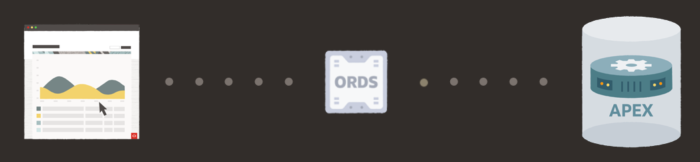
So A web request from the web browser sent to Oracle REST Data Services (ORDS) where it handed to Oracle Database to_be auctioned.Within the database, the request processed by Oracle APEX. Once the processing is complete, the result sent back through ORDS to the browser.
Features
Also APEX helps you build better apps by taking care of these six facets of application development
Data
Oracle APEX strives to make it as easy as possible for you to display, manipulate, chart, and process data as easily and efficiently as possible. No matter where your data comes from, whether it is from a local database, remote database, or a web service, Oracle APEX features state-of-the-art functionality to help you turn data into information.
Security
Also Oracle APEX designed to build web apps that are highly secure out of the box.
In addition to, In a world of constantly changing web standards and increasingly resourceful attackers finding new ways to hack sites, our focus on security means that your applications stay protected.
Accessibility
Also Oracle APEX s designed to make it as easy as possible for developers to build highly accessible web apps, that provide an inclusive user experience for users with different abilities and requirements.
With every release, we strive to make this easier than ever, with new accessibility-specific functionality added, known accessibility bugs fixed, and ongoing improvement of our own testing strategies, all in the aim of providing a tool with a fantastic developer, and user experience for everybody.
Monitoring
SO Monitoring and logging provide insight into how users interact with your application. This information can be indispensable in identifying hacking attempts, performance issues and application errors. With Oracle APEX you covered, because monitoring and logging already built in.
Globalization
So Globalization is the ability of a development framework to support developing applications that perform well and correctly in a multiple languages and locales environment. Oracle APEX designed with globalization in mind, this includes support for translating applications as well as localization, i.e. adapting an application to support a specific language and locale.
User Interface
Universal Theme is a user interface for Application Express that enables developers to build modern web applications without requiring extensive knowledge of HTML, CSS, or JavaScript. With some working knowledge of Application Express, you can use Universal Theme to easily build a responsive application that is highly accessible, easily customization, and easy to maintain.
Done with enough discussion I guess, let’s start talking about how to get it
Requirements
I needed the following things to do the installation & configuration work:
- Fresh installed Cantos 8 Machine
- 4 GB of RAM.
- 4 Core CPU.
- 50 GB of free Space.
- 1 Static IP.
- Graphical Access on the server (if you work with ssh XAuthority like me)
Before Getting Started
Machine Installation
I have installed a centos8 machine on the virtual box with the IP 192.168.0.168 & user apex. We will do the rest of the work with the username apex & oracle (User oracle will_be added later on the installation interest). User apex has administrative access to the machine.
Not recommended that we use root for the installation purposes.
Set the Hostname
We will set the hostname as ipamaster.unixcop.local. Obviously you can set of your own
hostnamectl set-hostname apex.unixcop.local
SELinux Permissive
We need to set the SELinux is Permissive/Disabled mode
We can make it permanent or temporary by changing the configuration situated at the /etc/selinux Directory
Entry to the hosts file
We have to add the IP & hostname to the /etc/hosts file. In my case, the IP is 192.168.0.168
Install TomCat Server
First, we have to create tomcat user, we will provide no shell as we don’t need the shell for that particular user
sudo useradd -s /bin/false tomcat
Now, we need to download the archive, run the following command
wget https://www-us.apache.org/dist/tomcat/tomcat-9/v9.0.50/bin/apache-tomcat-9.0.50.tar.gz
Then extract & move all the files to the native directory of tomcat
tar xzf apache-tomcat-9.0.50.tar.gz
sudo mv apache-tomcat-9.0.50/* /opt/tomcat/
Also, set the proper ownership of all files
sudo chown -R tomcat:tomcat /opt/tomcat/
So Tomcat provides bash scripts to start, stop service. But, to make it simple, create a startup script to manage Tomcat as systemd service. Let’s create a tomcat.service file with the following content:
sudo vim /etc/systemd/system/tomcat.service
[Unit]
Description=Tomcat 9
After=network.target

[Service]
Type=forking

User=tomcat
Group=tomcat

Environment="JAVA_HOME=/usr/lib/jvm/jre"
Environment="JAVA_OPTS=-Djava.security.egd=file:///dev/urandom"
Environment="CATALINA_BASE=/opt/tomcat"
Environment="CATALINA_HOME=/opt/tomcat"
Environment="CATALINA_PID=/opt/tomcat/temp/tomcat.pid"
Environment="CATALINA_OPTS=-Xms512M -Xmx1024M -server -XX:+UseParallelGC"

ExecStart=/opt/tomcat/bin/startup.sh
ExecStop=/opt/tomcat/bin/shutdown.sh

[Install]
WantedBy=multi-user.target
Reload, enable & start the tomcat service
sudo systemctl daemon-reload
sudo systemctl enable tomcat.service
sudo systemctl start tomcat.service
Install Oracle Application Express (APEX)
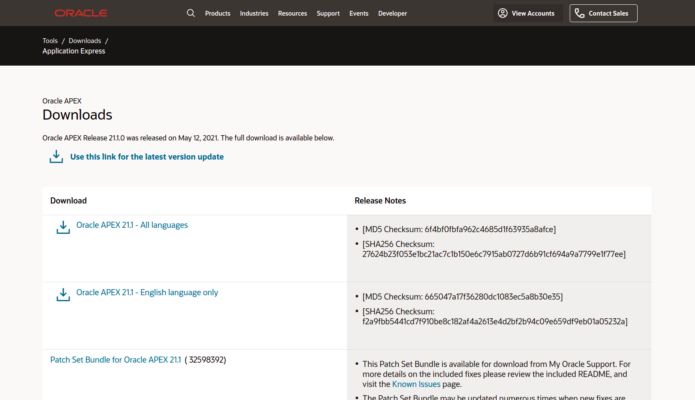
Download the APEX software from this link https://www.oracle.com/tools/downloads/apex-downloads.html
Unzip the software either on your client PC if you intend to install it from there using the SQLPlus client on your PC, or on the database server if you intend to install it from there. The latter will be more efficient as you will reduce the network traffic between the SQLPlus client and the database server.
Also If you don’t have SQLPlus;You can download it from here https://www.oracle.com/database/technologies/instant-client/linux-x86-64-downloads.html
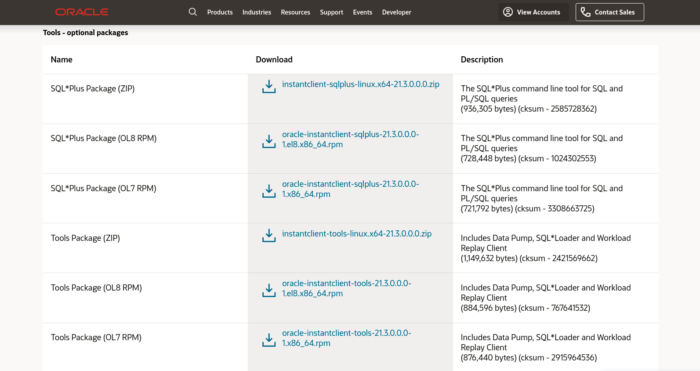
I have downloaded & installed form OLM8 as I am using CentOS 8
Now create a directory for APEX
mkdir -p /opt/oracle/apex
Unzip the Downloaded APEX here
unzip apex_21.*.zip -d /opt/oracle
Need to change permission like this
chown -R oracle:oinstall /opt/oracle/apex
Now, Create an allow all ACL for APEX sql file in the APEX directory. We will call it apex_acl.sql.
BEGIN
BEGIN
dbms_network_acl_admin.drop_acl(acl => 'all-network-PUBLIC.xml');
EXCEPTION
WHEN OTHERS THEN
NULL;
END;
dbms_network_acl_admin.create_acl(acl => 'all-network-PUBLIC.xml',
description => 'Allow all network traffic',
principal => 'PUBLIC',
is_grant => TRUE,
privilege => 'connect');
dbms_network_acl_admin.add_privilege(acl => 'all-network-PUBLIC.xml',
principal => 'PUBLIC',
is_grant => TRUE,
privilege => 'resolve');
dbms_network_acl_admin.assign_acl(acl => 'all-network-PUBLIC.xml',
host => '*');
END;
/
sho err
COMMIT;
/
Now connect to the pluggable database as sysdba. Run the following snippet
cd /opt/oracle/apex
sqlplus /nolog
Change the roleCONN sys@pdb1 AS SYSDBA
Running this to install a full development environemnt@apexins.sql SYSAUX SYSAUX TEMP /i/
Creating Administrator & Setting up the password
@apxchpwd.sql
Unlocking Public User
ALTER USER APEX_PUBLIC_USER ACCOUNT UNLOCK;
ALTER USER APEX_PUBLIC_USER IDENTIFIED BY "uN1xC0p!";
Configuring REST Data Services@apex_rest_config.sql
Running ACL Setup@apex_acl.sql
Now we will disconnect from the databaseexit
Copy APEX static files to the web server directory. They will be used to serve static images from the proxy.
mkdir -p /var/www/apex/images
cp -a /opt/oracle/apex/images/. /var/www/apex/images
At this point, we are done installing the APEX
Install Oracle Rest Data Services (ORDS)
Download the installation file from this link https://www.oracle.com/database/technologies/appdev/rest-data-services-downloads.html
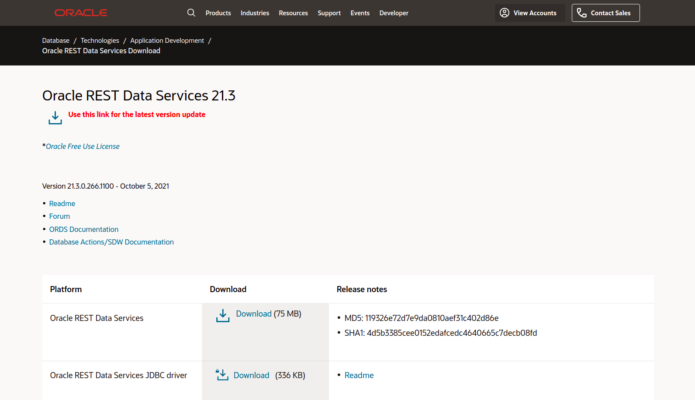
Download the latest version of this software
Like APEX create a directory for ORDS
mkdir -p /opt/oracle/ords
Unzip the file to the created directory
unzip ords-21.*.zip -d /opt/oracle/ords
Run the ORDS configuration command with the advanced mode to run the interactive installation process.
java -jar ords.war install advanced
When prompted for ORDS configuration directory, Tyep config.
Then provide the connection info to your pluggable database XEPDB1
After the configuration is completed, the values are saved in opt/oracle/ords/config/ords/defaults.xml file. It can be modified
tomcat user must have read-write access to the ORDS configuration folder
chown -R tomcat:tomcat /opt/oracle/ords/config
Copy the ords.war into the Tomcat webapps directory for this
We are done with ORDS as well, now final configuration with the apache
Mapping Apache httpd to ORDS
Add a custom httpd configuration file. By default, every .conf file placed in the etc/httpd/conf.d/ directory is read by httpd as an additional configuration file to the main /etc/httpd/conf/httpd.conf config file.
Create the apex.conf file in the etc/httpd/conf.d/ directory with the contents as follows:
# forward ORDS tomcat
<VirtualHost *:80>
    # uncomment the lines below if you plan to serve different domains
    # on this web server, don't forget to change the domain name
    # ServerName yourdomain.tld
    # ServerAlias www.yourdomain.tld

    # alias for APEX static files
    Alias "/i" "/var/www/apex/images/"

    # uncomment the line below if you want
    # to redirect traffic to ORDS from root path
    # RedirectMatch permanent "^/$" "/ords"

    # proxy ORDS requests to tomcat
    ProxyRequests off
    <Location "/ords">
        ProxyPass "ajp://unixcop:8009/ords"
        ProxyPassReverse "ajp://unixcop:8009/ords"
    </Location>
</VirtualHost>
Restart the required services
systemctl restart httpd
systemctl restart tomcat
Adjust the firewall policies
firewall-cmd --permanent --add-service={http,https}
firewall-cmd --reload
Finally, it’s time to access your APEX from the browser
Go to the browser and hit http://apex.unixcop.local/ords
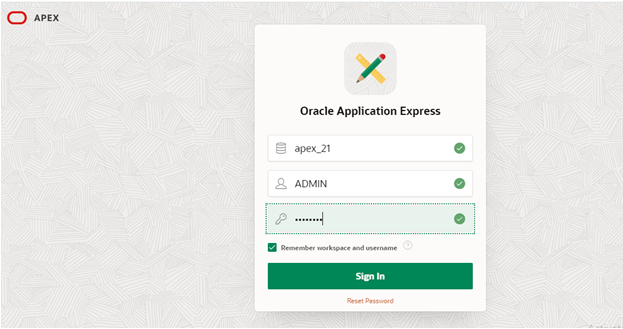
After login with the ADMIN Credentials, we will get the ADMIN Console as follows

That’s it for today. Hope this article will help you to learn a new thing. Share with your friends & if you have any queries let me know in the comment section. Have a wonderful day of learning !