
Apache CouchDB is an open-source document-oriented NoSQL database, implemented in Erlang. CouchDB uses multiple formats and protocols to store, transfer, and process its data, it uses JSON to store data, JavaScript as its query language using MapReduce, and HTTP for an API. CouchDB was first released in 2005 and later became an Apache Software Foundation project in 2008 Unlike a relational database, a CouchDB database does not store data and relationships in tables. Instead, each database is a collection of independent documents. Each document maintains its own data and self-contained schema.
Step 1: Install EPEL Repo
dnf install epel-release -y

Step 2: Create and install CouchDB repository
create couchdb.repo file using below command.
vi /etc/yum.repos.d/couchdb.repo
now add below configuration in this file.
[bintray–apache-couchdb-rpm]
name=bintray–apache-couchdb-rpm
baseurl=http://apache.bintray.com/couchdb-rpm/el$releasever/$basearch/
gpgcheck=0
repo_gpgcheck=0
enabled=1
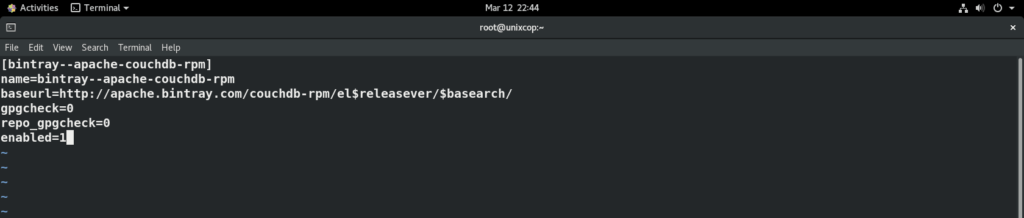
save changes to file and exit.
Step 3: Install CouchDB on CentOS 8
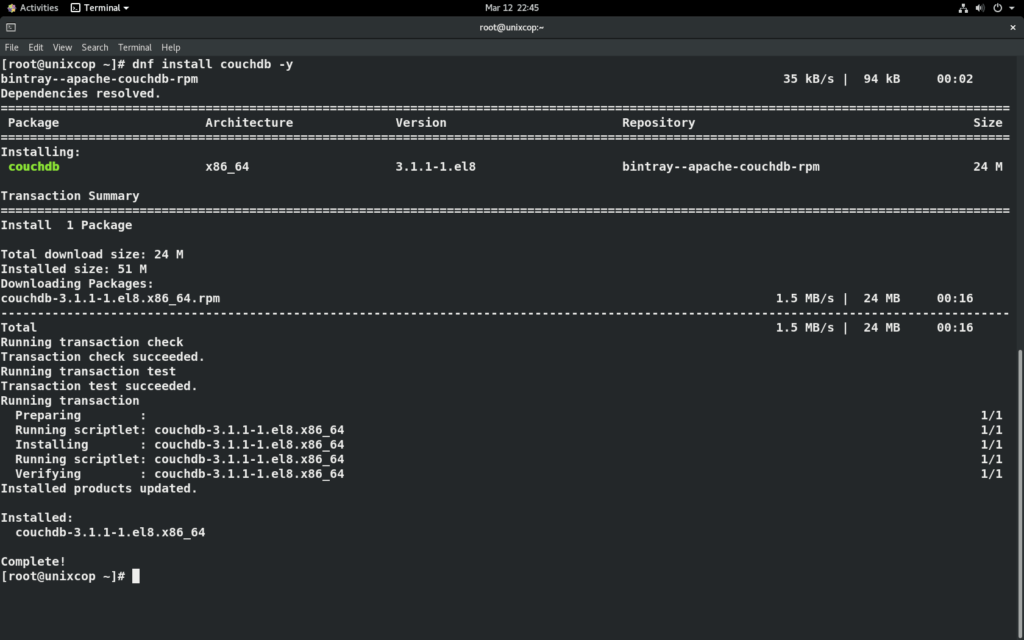
use following command to install CouchDB
dnf install couchdb -y
Step 4: CouchDB Necessary Configuration
Now we are going to make CouchDB configuration so that we can access it from browser. Secondly CouchDB can also be configured in clustered and Standalone mode, however in this guide we will configure it in standalone mode.
we need to make changes in local.ini file located under /opt/couchdb/etc/ directory.
vi /opt/couchdb/etc/local.ini
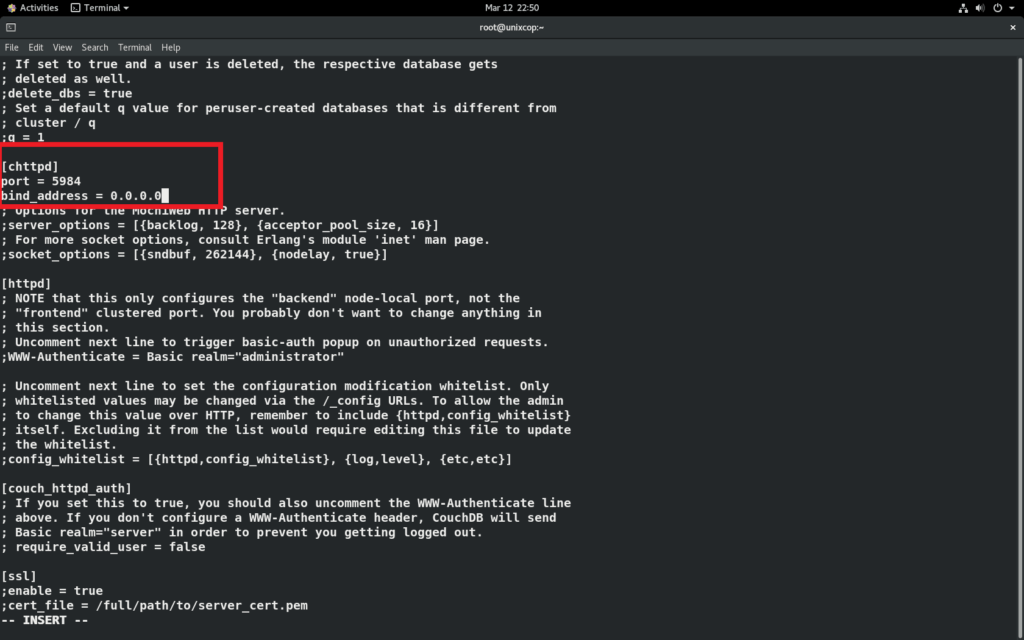
If you want to access your DB from external IP addresses, locate [chttpd] section. Uncomment the port and bind-address lines. Also, set the bind-address from 127.0.0.1 to 0.0.0.0 to allow access from external IP addresses.
[chttpd]
port = 5984
bind_address = 0.0.0.0
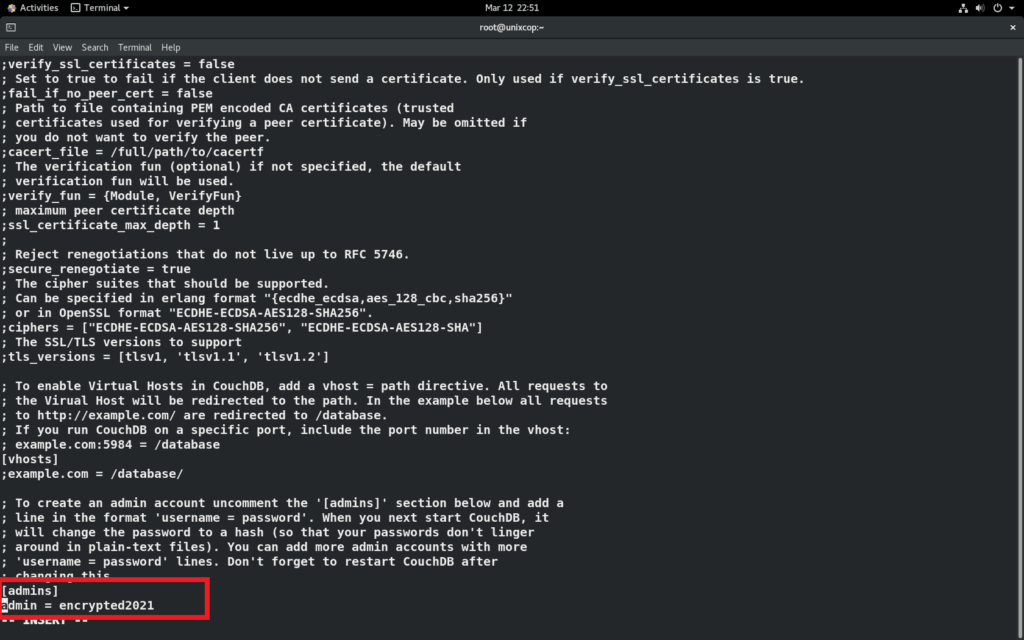
now locate [admins] section, uncomment the line admin = mypassword and set your desired password so that you can access admin account.
[admins]
admin = mypassword
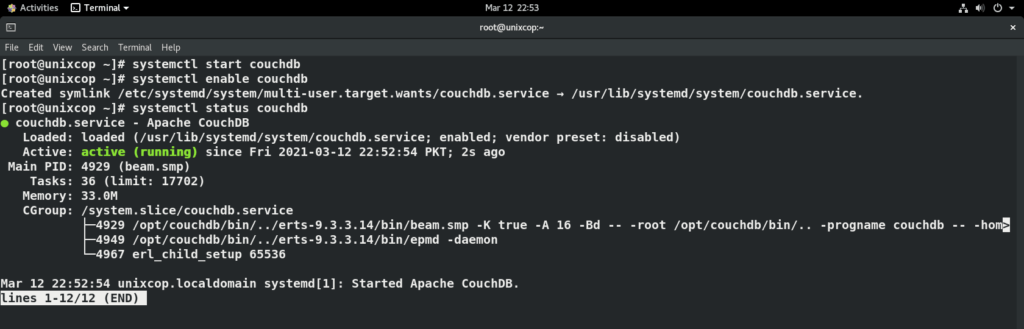
Step 5: Start and enable CouchDB services
systemctl start couchdb
systemctl enable couchdb
systemctl status couchdb
Step 6: Firewall Configurations
CouchDb listen on port 5984 so we must enable this port in firewall.
firewall-cmd --permanent --zone=public --add-port=5984/tcp
firewall-cmd --reload

Step 7: Access CouchDB Web Interface
CouchDB has been installed and configured, now verify that everything is going good regarding CouchDB. Run below command to verify:
curl http://127.0.0.1:5984/
If everything is successful, you will see similar output.

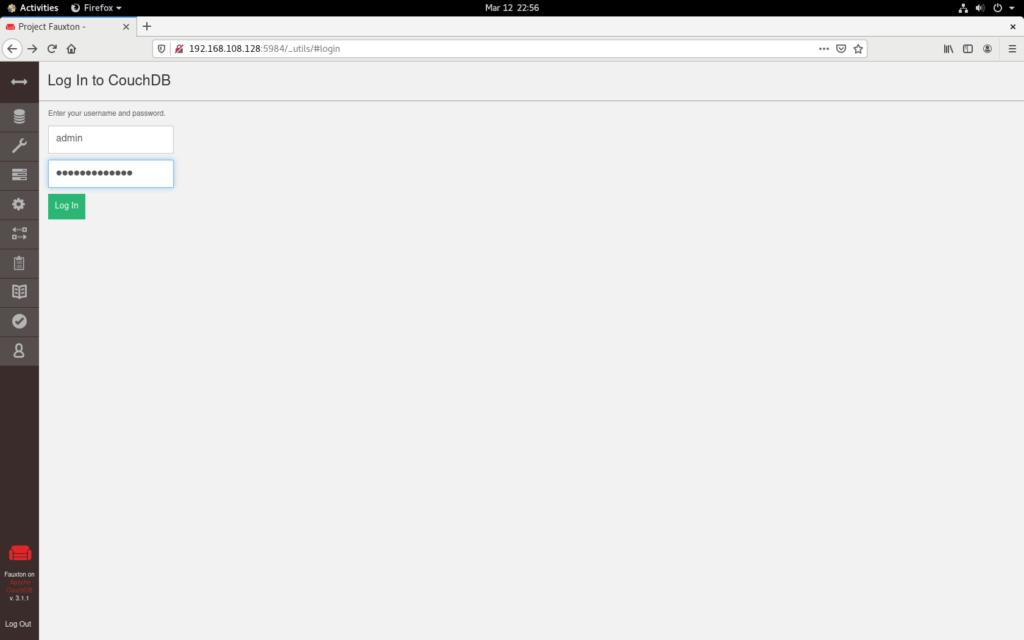
Finally open your web browser, use following URL with your Server IP address and enter your admin login details to access CouchDB.
http://YOUR-ERVER-IP:5984/_utils/
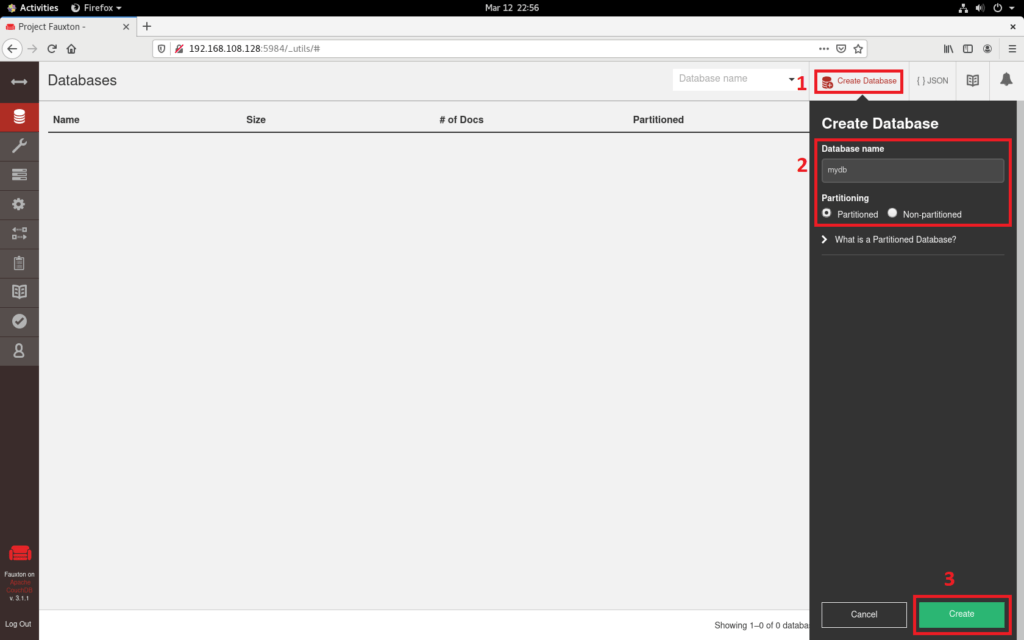
After logging in you can create your databases by following steps in given screenshot.
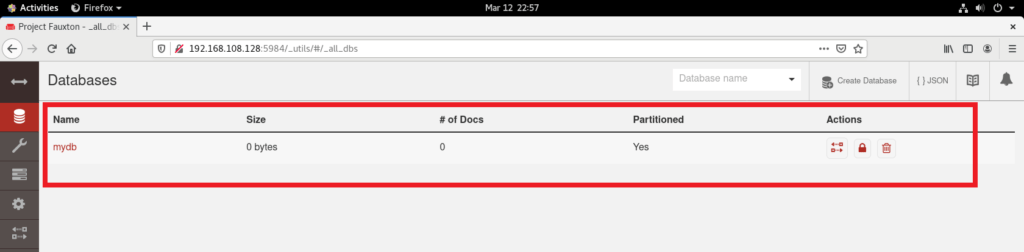
Once you click on create button, you database will be appeared.
You have installed CouchDB successfully, now you can explore more things from its web bases interface.