")
Hi, today you will learn how to install and configure Virtualmin on Ubuntu 20.04
So, Virtualmin is an open-source web hosting and cloud control panel. Virtualmin has the right features and controls over managing all the different domains at the same portal. It allows access to the server via an SSL-encrypted HTTP line. For example,. via a standard browser and provides a clear user interface.
Virtualmin is free, although it has a paid version called Virtualmin PRO that offers specialized support and includes more tools than the normal version.

In this article, you will learn how to install Virtualmin Ubuntu control panel on 20.04 LTS Server.
Prerequisites:
A fully qualified domain name (FQDN)
You need to have root access on your server through SSH for this guide to work.
Step # 1: Update server and all install packages:
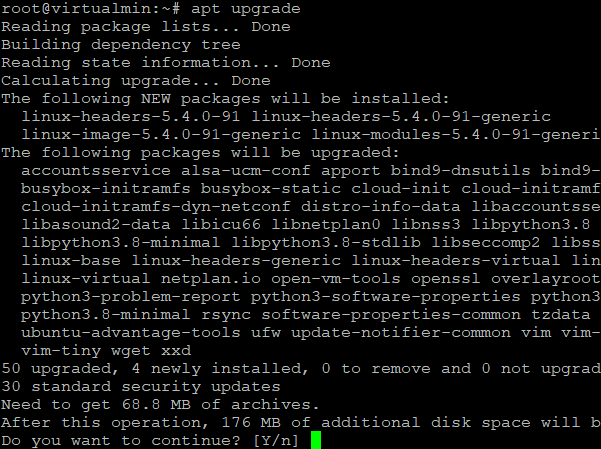
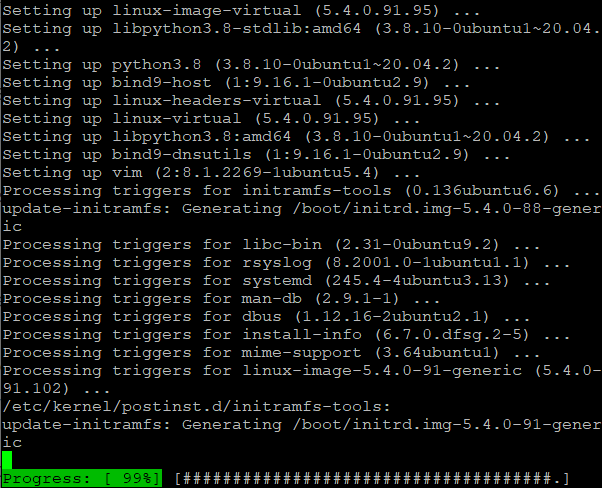
First, make sure all the existing packages on your system are up to date.
# apt update
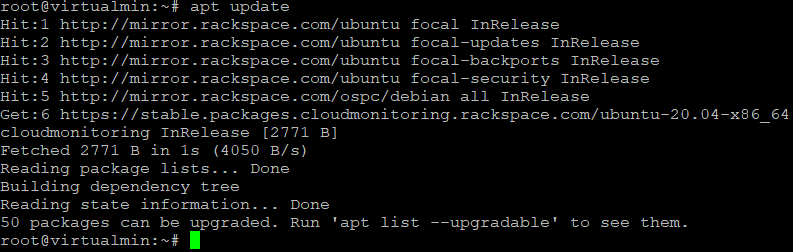
# apt upgrade
OR
# apt upgrade -y
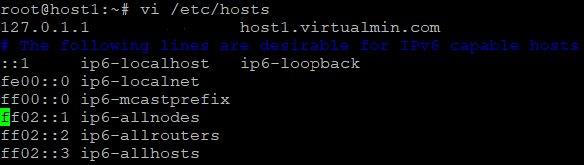
Step # 2: Set the hostname and server’s fully qualified domain name:
# hostnamectl set-hostname host1.virtualmin.com

# vi /etc/hosts
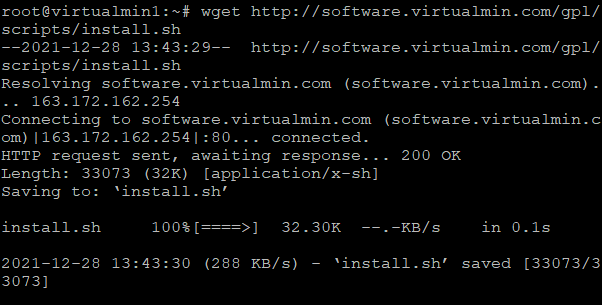
Step # 3: Download the Virtualmin installation script.
let’s download the install script using wget that will install both Webmin and Virtualmin on our Ubuntu 20.04 server.
# wget http://software.virtualmin.com/gpl/scripts/install.sh
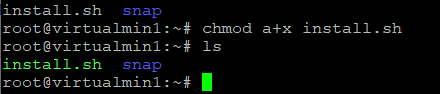
Step # 4: Make the script executable.
Now, change to permission of install.sh so that we can execute it on the system.
# chmod a+x install.sh
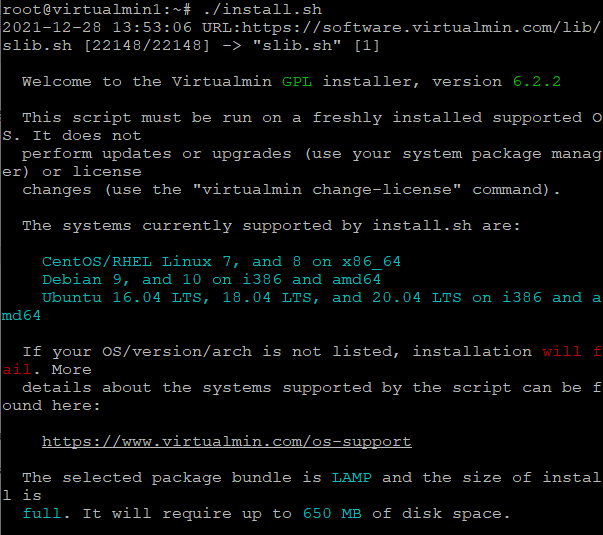
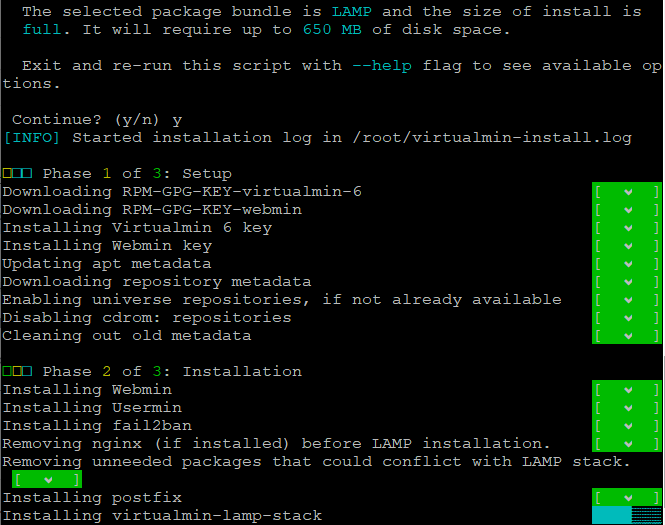
Step # 5: Run the script to install both Webmin and Virtualmin.
#./install.sh
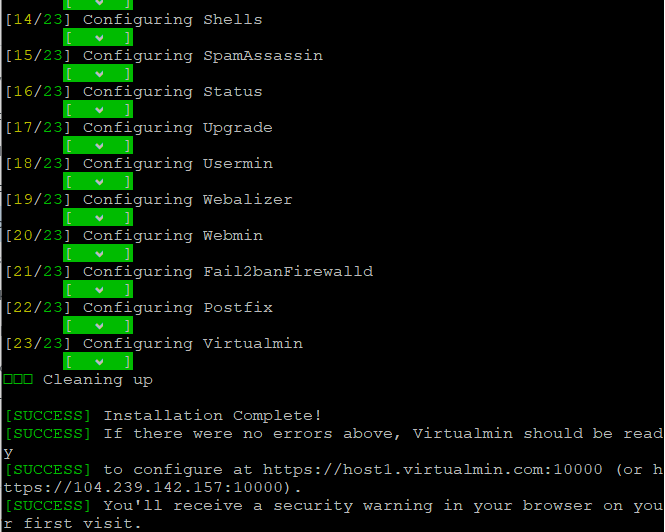
Step # 6: Allow access to Virtualmin through the firewall.
Make sure that Virtualmin port: 10000 is allowed in your network/firewall.
# ufw allow 10000
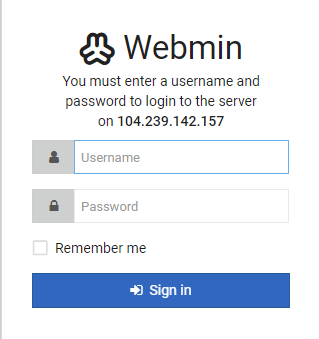
Step # 7: Access virtialmin url on web browser:
Navigate to port 10000 at the server’s fully qualified domain name to access the Virtual Web Interface using server DNS or server IP address. For example:
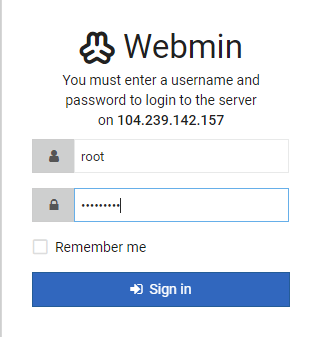
As you see the login page.
Enter your server’s root username and its password. Example username– root password– the one you have set for the root user on your server.
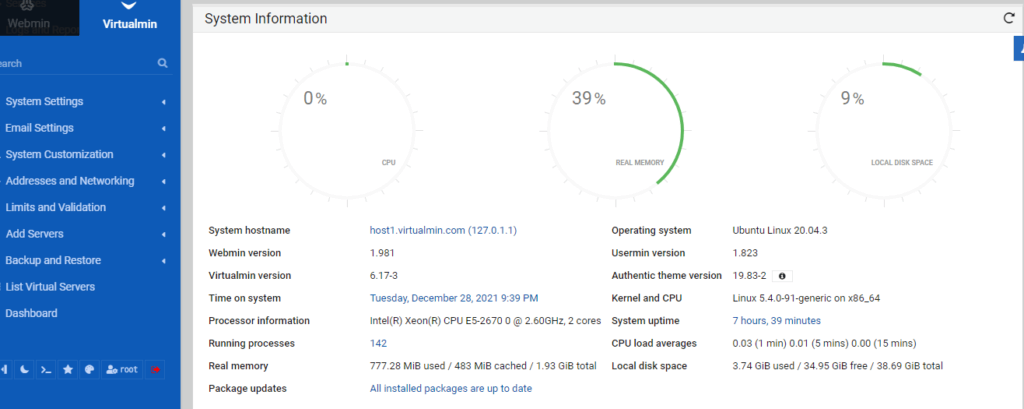
Finally, you will have the Dashboard from where you can access the various settings and options required to start hosting websites.
Post-Installation of Virtualmin Server:
Step 1: This post-installation wizard allows you to configure Virtualmin optimally for your system. You can make selections depending on whether you want to host websites, email, or databases, and based on your system’s memory and CPU power.
To continue, click the Next button below. To skip it and use the default settings, click Cancel.

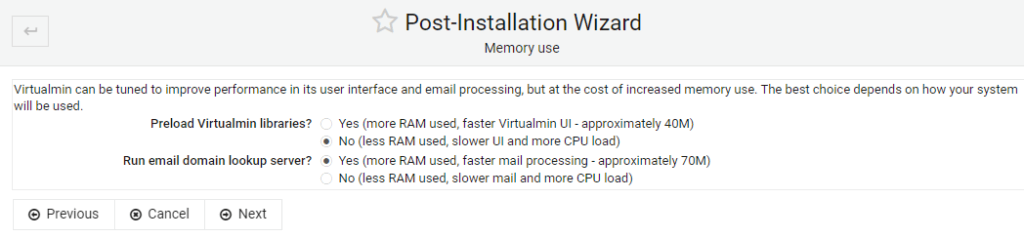
Step 2: Virtualmin can be tuned to improve performance in its user interface and email processing but at the cost of increased memory use. The best choice depends on how your system will be used. Thus, as per your need select the options or leave the default as it is.
Step 3: Enable virus scanning with ClamAV:
If your system is going to host domains that will receive a large amount of email, scanning incoming messages for viruses can generate a high CPU load. Because scanning is done using the ClamAV scanning server clamd, it will consume RAM even when not processing email. If your system will not be hosting email, virus scanning can be disabled. Or let it be on-demand scanning

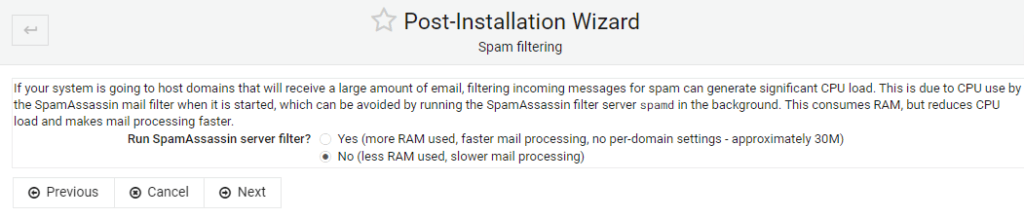
Step 4: Run SpamAssassin server filter?
If your system is going to host domains that will receive a large amount of email, filtering incoming messages for spam can generate a significant CPU load. This is due to CPU use by the SpamAssassin mail filter when it is started, which can be avoided by running the SpamAssassin filter server spamd in the background. This consumes RAM, but reduces CPU load and makes mail processing faster.
Working with VirtualMin
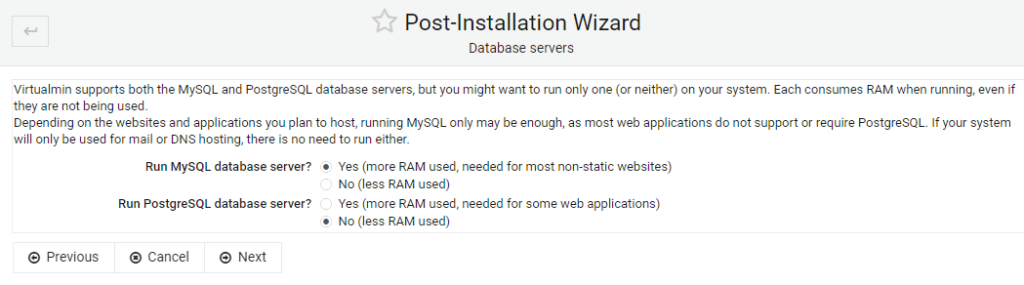
Step 5: Virtualmin supports both the MySQL and PostgreSQL database servers, but you might
want to run only one (or neither) on your system. Each consumes RAM when running, even if they are not being used.
Depending on the websites and applications you plan to host, running MySQL only may be enough, as most web applications do not support or require PostgreSQL. If your system will only be used for mail or DNS hosting, there is no need to run either.
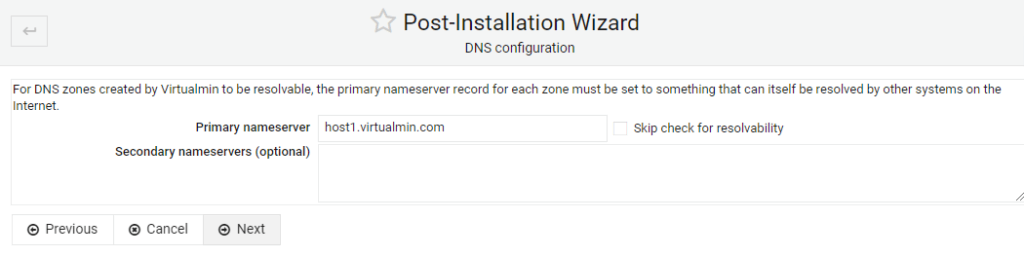
Step 6: For DNS zones created by Virtualmin to be resolvable, the primary nameserver record for each zone must be set to something that can itself be resolved by other systems on the Internet.
Just hit the Next button and Virtualmin will automatically set it after ensuring the availability of the same.
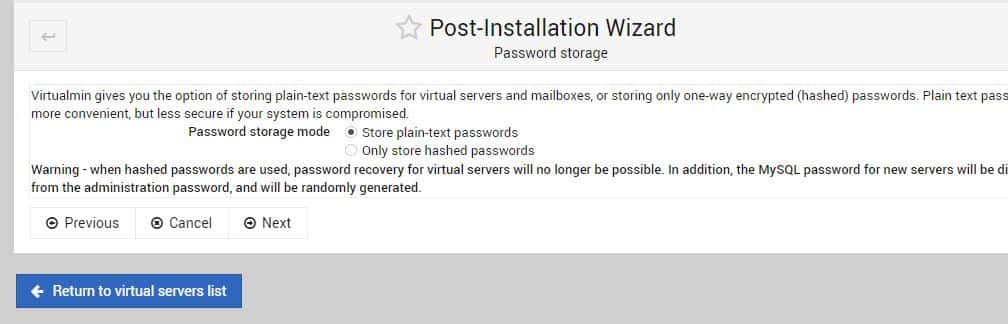
Step 7: Virtualmin gives you the option of storing plain-text passwords for virtual servers and mailboxes or storing only one-way encrypted (hashed) passwords. Plain text passwords are more convenient, but less secure if your system is compromised.
Remember: when hashed passwords are used, password recovery for virtual servers will no longer be possible. In addition, the MySQL password for new servers will be different from the administration password and will be randomly generated.

Webmin and databases
Step 8: To prevent other users on your system from managing the MYSQL database, a password for the root user should be set.

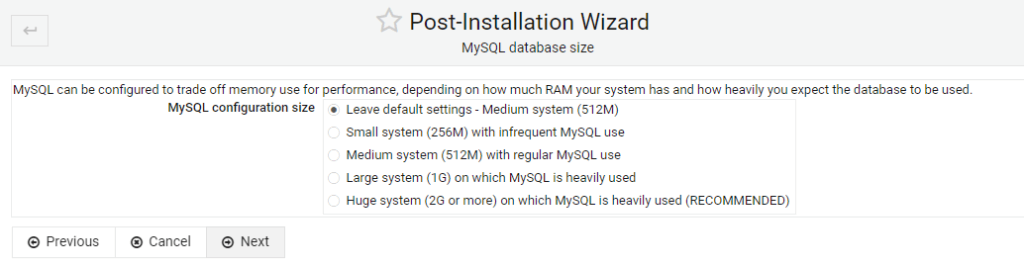
Step 9: MYSQL can be configured to trade off memory use for performance, depending on how much Ram your system has and how heavily you expect the database to be used. Select the options as per your requirements.
Step 10: Virtualmin can create a default virtual server that will serve web requests to your system that don’t match any other domain. It can also be used to request a Let’s Encrypt SSL certificate for use by Virtualmin’s own UI.

Step 11: Virtualmin post-installation configuration is now complete! Press Next.

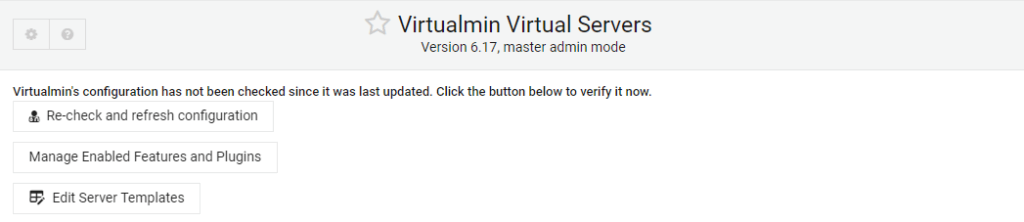
Checking the configuration
Step 12: Virtualmin configuration has not been checked since it was last updated. Click the button below to verify it now.
Just click on the Re-check and refresh configuration.
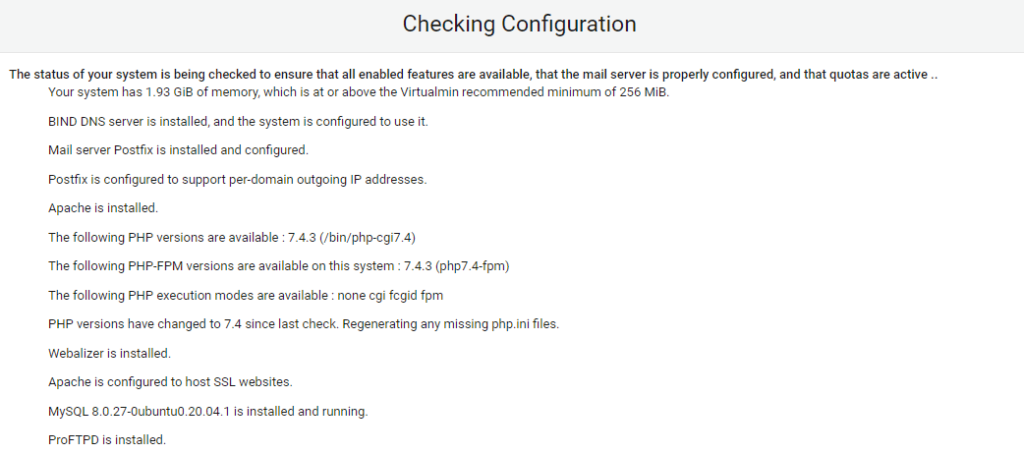
Now the Step 13: The status of your system is being checked to ensure that all enabled features are available that the mail server properly configured and that quotas are active..

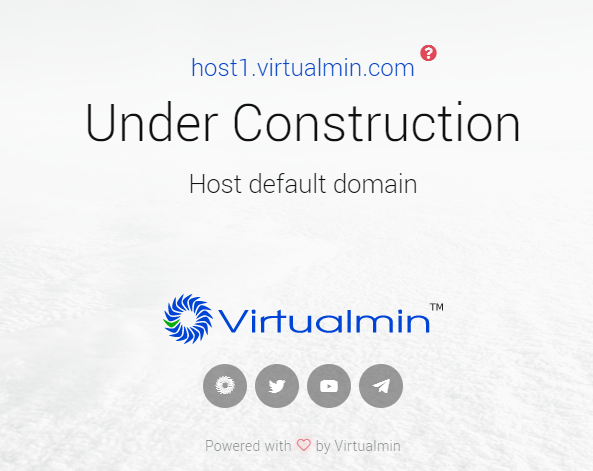
Step 14: By default, if you access the domain set on Virtualmin, the host1 HTML page will appear saying “Under construction”.
Final steps for intalling Virtualmin on Ubuntu 20.04
Now, if you want to install any content management system such as WordPress, click on the Filemanager, under Public_html you will find the index.html file. Delete it and upload the WordPress file there by clicking on the File menu and corresponding upload option. Once that is done. Create a database using Webmin. After that refresh, your domain URL showing the Under construction page. Thiis time you will see the WordPress setup page, furnish the required details.
Conclusion:
So, Virtualmin is a good choice for a web hosting control panel. It is very versatile and offers many features to help you manage your Linux servers from one place. So, if you don’t want to pay for Cpanel, then this one is a nice option