
Hello, friends. Let’s go with a more technical tutorial. Many times, we need to increase the size of the boot partition in Rocky Linux 8 / CentOS. The reasons can be very varied, but it’s always good to know. Let’s get started.
Test environment
For this post, I created a virtual machine with Rocky Linux 8, but it must work on all other derivatives like Alma Linux 8.
The installation of the system has been done in the normal way and the partitioning scheme is the one proposed by the installer but using ext4 as file system.
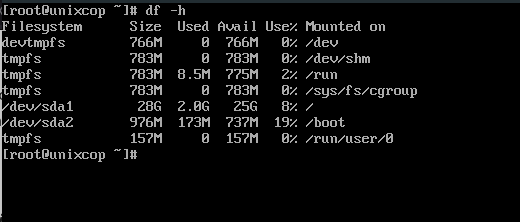
Here are my partitions
Let’s go for it, then.
Increasing the boot partition size on Rocky Linux 8 / CentOS
Prepare the external disk for /boot
As demonstrated by the screenshot above, the size of my /boot partition is about 700mb. How to increase it? The best way is to add a second hard disk or other memory.
In my case, it is connected and recognized. To find out where it is located, you can run.
fdisk -l | grep dev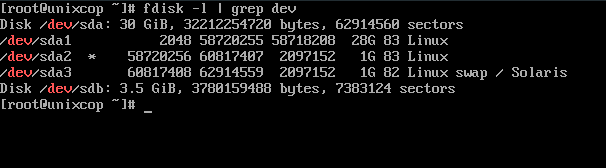
In my case, it is in /dev/sdb and is 3.5Gb in size.
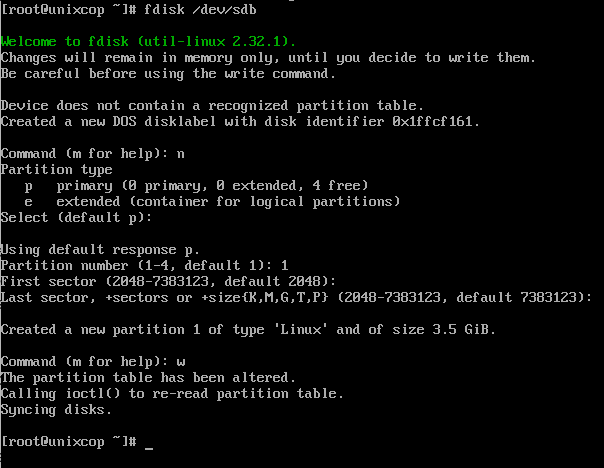
The next step is to create a new partition on this disk. To achieve this, we will use the fdisk tool.
fdisk /dev/sdbAnd there we will start to be asked the usual questions. First, it will ask us to create a new partition. Answer n. Then, the type of the partition. In this case, I will choose primary by typing p.
Command (m for help): n
Partition type
   p primary (0 primary, 0 extended, 4 free)
   e extended (container for logical partitions)
Select (default p):
Then select the partition number. Type 1.
And apply the changes by pressing w.
The next step is to format the new partition with ext4. This is effortless.
mkfs.ext4 /dev/sdb1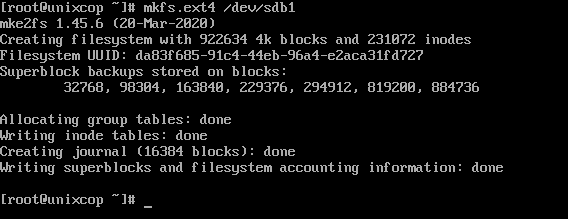
Remember that /dev/sdb1 is the location of the partition we created earlier. It may change depending on the device.
When finished, you will get an output screen like this.
Increasing the size of /boot
Using the e2fsck tool, we will have to verify the integrity of the partition.
e2fsck -f /dev/sdb1And then copy the entire contents of /boot which in my case is in /dev/sda2 to the new partition.
dd if=/dev/sda2 of=/dev/sdb1 bs=20M conv=noerror,syncThen, re-verify it
e2fsck -f /dev/sdb1Finally, resize the /dev/sdb1 partition.
resize2fs /dev/sdb1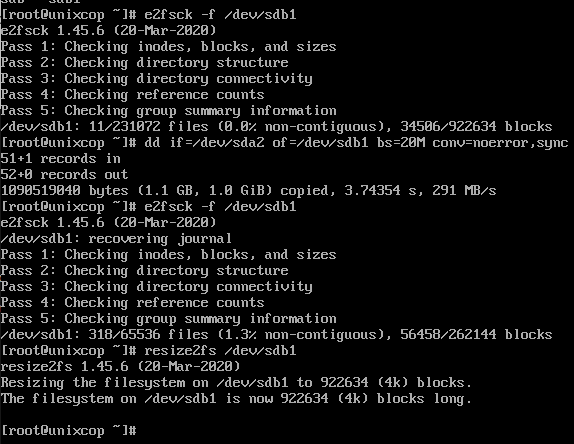
Now you can mount the new partition
mount -t ext4 /dev/sdb1 /bootReview the changes
df -h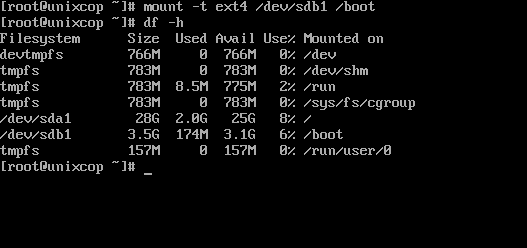
Everything is fine. The /boot/ partition has a new size. What we need to do is to make the changes permanent.
To achieve this, edit the /etc/fstab file.
vi /etc/fstabAnd at the end of the file and add the following
/dev/sdb1 /boot ext4 defaults 1 2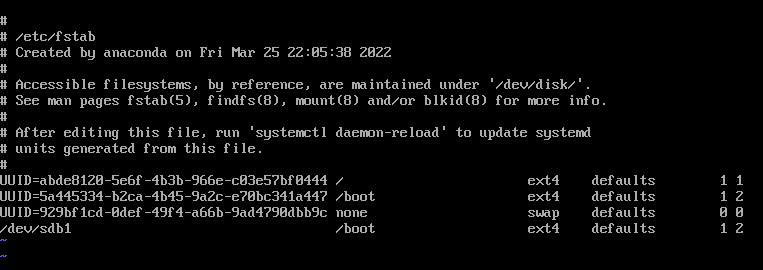
Save the changes and close the editor.
Now all that is left is to reboot the server.
If you want to check again
df -h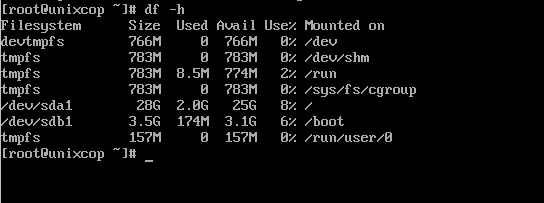
And you are done!