We demonstrated how to configure a GitLab instance in our previous post so that you may manage the projects for your company or yourself. We advised using an FQDN and making the GitLab instance accessible through HTTPS. Since most of the applications are containerized, it makes sense to configure a container registry where multiple iterations of your programme and its many components can be kept in Docker images.
Don’t worry if you don’t know what a container registry is. Once you actually upload the first container image to a GitLab instance, it will become evident. Consider it like repositories for your container images for the time being. These are simply images, stored inside the remote GitLab instance but are not running containers.
Why would you need a registry for GitLab containers?
It’s likely that your application is packed as a set of Docker images or as a single image. As a result, various versions will be linked to various images, and a container registry will make it easier for you to keep track of them all separately and identify which ones should be included in a given release.
GitLab is a single location to manage them all.
Prerequisites
- A running GitLab server using HTTPS.
- Instance with root user access.
- Ability to change the DNS entries for your domain name.
- We’re going to presume that https://gitlab-unixcop.tk is where our GitLab is located.
DNS and TLS certificates for the registry
To access the container registry option across the whole GitLab instance, you have to be the root user. Then, if they so like, individual users might decide to utilize this option in their own projects. Two methods exist for doing this:
1. Utilize the current domain gitlab-unixcop.tk and TLS certificates while running the registry on a specific port.
2. Point another domain registry.gitlab-unixcop.tk, on the same IP where GitLab is running and set up the registry there.
Let’s choose the second choice because it is significantly more proficient.
Step 1:
Add a registry A record, pointing to the exact IP as your GitLab server is registry.gitlab-unixcop.tk.
Step 2:
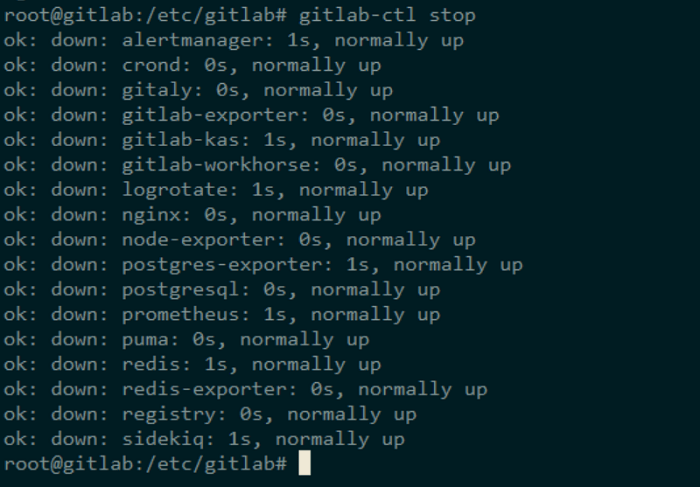
The GitLab services on your server must be stopped.
$ sudo cd /etc/gitlab/
$ sudo gitlab-ctl stop
Step 3:
Install certbot after adding the PPA for the ACME client to your server.
$ sudo add-apt-repository ppa:certbot/certbot
$ sudo apt update
$ sudo apt install certbot
Step 4:
Generate Let’s Encrypt certificates.
$ certbot certonly
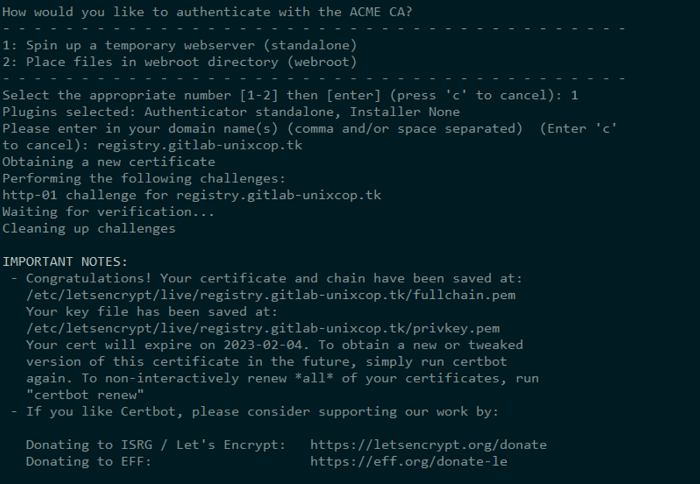
Next, you will be prompted to enter your email address, confirm your acceptance of their terms of service, and most importantly your domain name, in our case its registry.gitlab.example.com. Whether the certificates were successfully obtained or not will be indicated in a message that you get. If so, proceed to Step 5 immediately.
Step 5:
It’s time to add our certificates to the folders associated to GitLab currently we have.
$ cp /etc/letsencrypt/live/registry.gitlab-unixcop.tk/fullchain.pem /etc/gitlab/ssl/registry.gitlab-unixcop.tk.crt
$ cp /etc/letsencrypt/live/registry.gitlab-unixcop.tk/privkey.pem /etc/gitlab/ssl/registry.gitlab-unixcop.tk.key
$ ls -l /etc/gitlab/ssl/

Securing their permissions:
$ chmod 600 /etc/gitlab/ssl/registry.gitlab-unixcop.tk*
Make sure you substitute your current domain name with example.com, similar to the previous guide. Since that will be the name of the folder where certbot has saved the certificate.
Step 6:
Modify GitLab’s configuration. Add the following lines at the bottom of the file /etc/gitlab/gitlab.rb:
registry_external_url 'https://registry.gitlab-unixcop.tk'
The most challenging part of the setup should be complete if you followed all the instructions properly! Now that the Container Registry is running, simply run:
$ sudo gitlab-ctl reconfigure
$ sudo gitlab-ctl start
Enabling Registry and Pushing Images
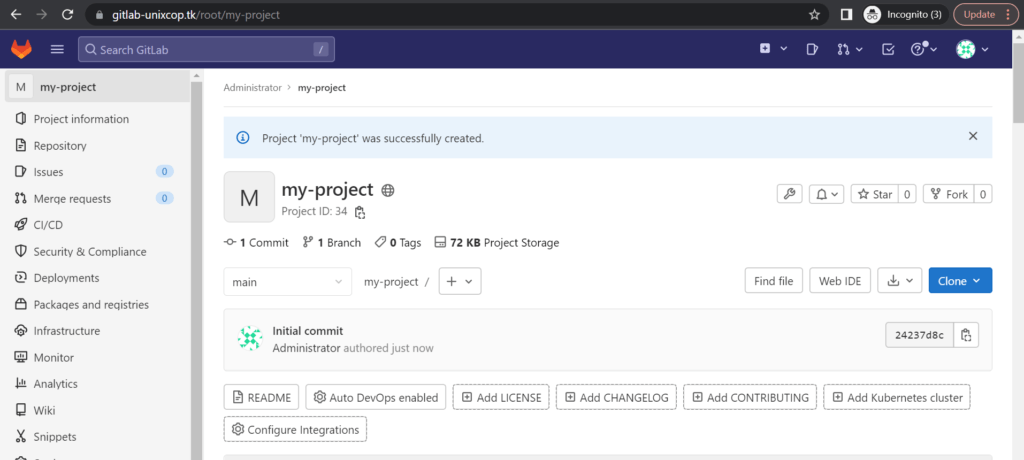
So, we have a Container Registry to ourselves, let’s use the GitLab web UI to create a fresh project and test that it works.
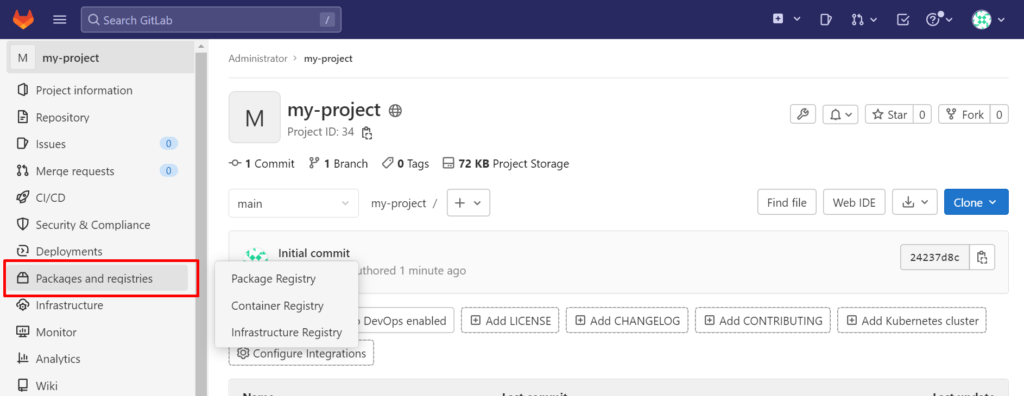
There is a section labeled “Registry” in the left-hand column. simply click on it, To view comprehensive guidelines regarding how to log in and upload images. Return to our local PC, Docker should already be set up there.
It could be used to create a nginx container that we can upload to this registry. Make a new folder on your local system as follows:
$ cd ~
$ mkdir registry
$ cd registry
Let’s add the following information to a file called Dockerfile that we’ll create inside of it:
Vim Dockerfile
FROM nginx:latest
## Your custom commands here
You only need the first line in your Dockerfile. A standard Nginx container will be used. You now construct it with a useful tag (We will apply the tag my-project, which is identical to the name of our GitLab project). Run the following commands in the same directory:
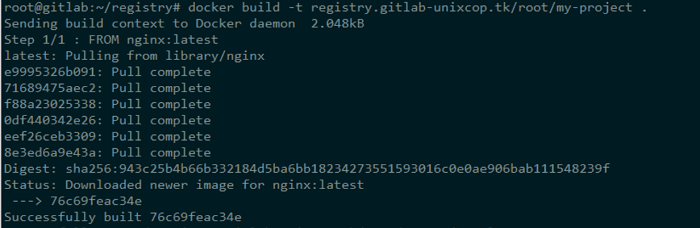
$ docker build -t registry.gitlab-unixcop.tk/<username>/my-project .
Remember to replace the username in the above command with your GitLab username.
It basically builds an Nginx container and downloads the image. which will gets pushed. If the container is modified and a new image is formed using it (Using the docker commit command, a new image will be created). Let’s upload/push the generated image to our registry.
We must first log in to Gitlab using our username and password:
$ docker login registry.gitlab-unixcop.tk

then proceed:
$ docker build -t registry.gitlab-unixcop.tk/root/my-project .
$ docker push registry.gitlab-unixcop.tk/root/my-project
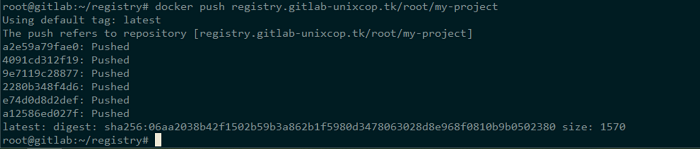
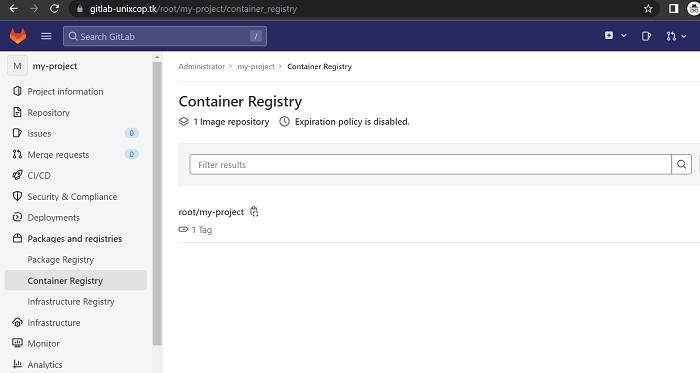
Visit your project’s registry page, where there will be instructions if you’re unsure what your container’s tag should be. You can notice a new docker image being uploaded/pushed in your GitLab account if the docker push command ran successfully. As seen in my case:
========================================================================
Keep Reading More Articles:
========================================================================