
In this article I will show you how to setup a NAS with XigmaNAS, formerly known as Nas4Free.
A NAS (Network-attached Storage) is a network server specialized for serving files. With a PC, a couple of disks and XigmaNAS you can build a low-cost ZFS-based NAS with little effort.
Downloading
Go to https://xigmanas.com/xnaswp/download/ and choose the correct format for you:
- LiveCD/LiveUSB: allows you to run in live CD mode (or USB if you don’t have a compact disk drive) or install to hard disk
- Embedded installation: they provide an image file to install in an USB key or a compact flash card and is the preferred and recommended method. This way you can have an extra spare SATA. Also all the system will load into memory which is faster than run from hard drive.
Because of this isn’t a real installation (just for the tutorial), I’m using the Live CD image on a virtual machine.
My setup
For this tutorial I’ve created a virtual machine with the following specs:
- 4 CPU cores, for no particular reason (it was the my default on gnome-boxes)
- 1Gb RAM. Also for no particular reason. On real NAS, the more memory the better
- 5 small hard drives. 4 of them for the data and 1 for the system, that last 1 isn’t mandatory but gnome-boxes just created. More disks means more fault protection. Also bigger disks means more space to save your data
Let’s get to work
After you boot your XigmaNAS you will see the following screen:
Console menu
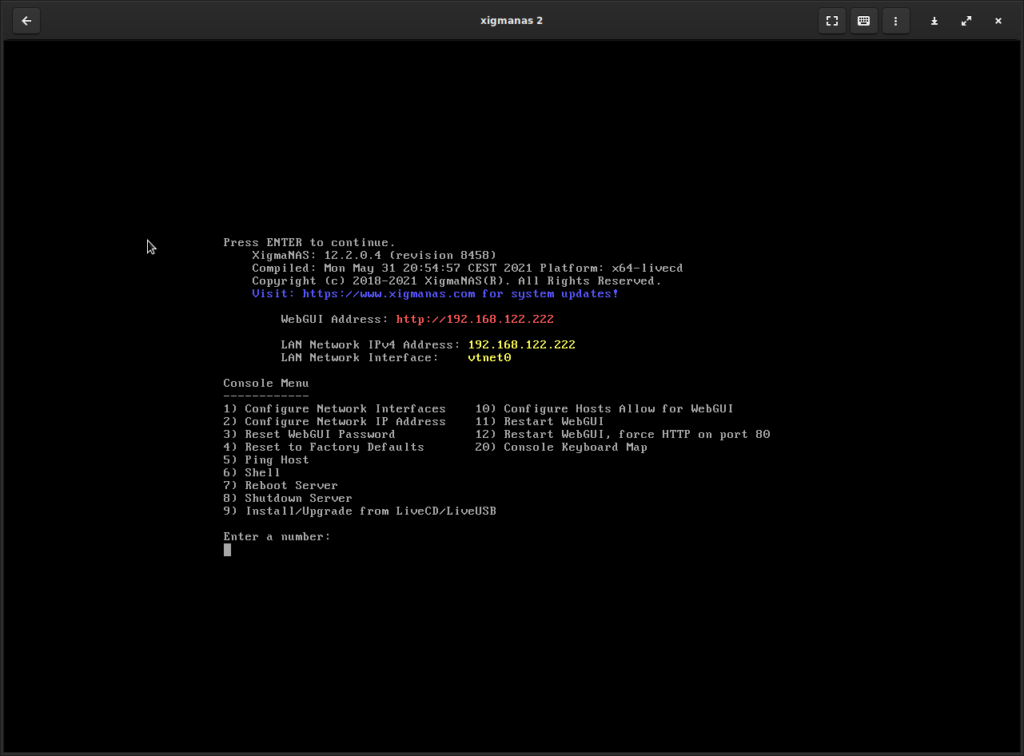
There is not much to do here, most of the configuration is done via web, but take a look at some options:
- Configure network interface, Configure network IP address and Ping host: if the system did not detect correctly the interface to your LAN (because you have more than one) press 1. The system will try to configure the network with DHCP, press 2 to change that. Test the connection by pinging some host.
- Reset WebGUI password: useful if you forgot your admin password
- Reset fo factory Default: start over from almost 0
- Shell: open a command line to do things by hand
- Configure hosts allow for webgui: disable host allow/deny if you locked yourself and can’t enter the webadmin
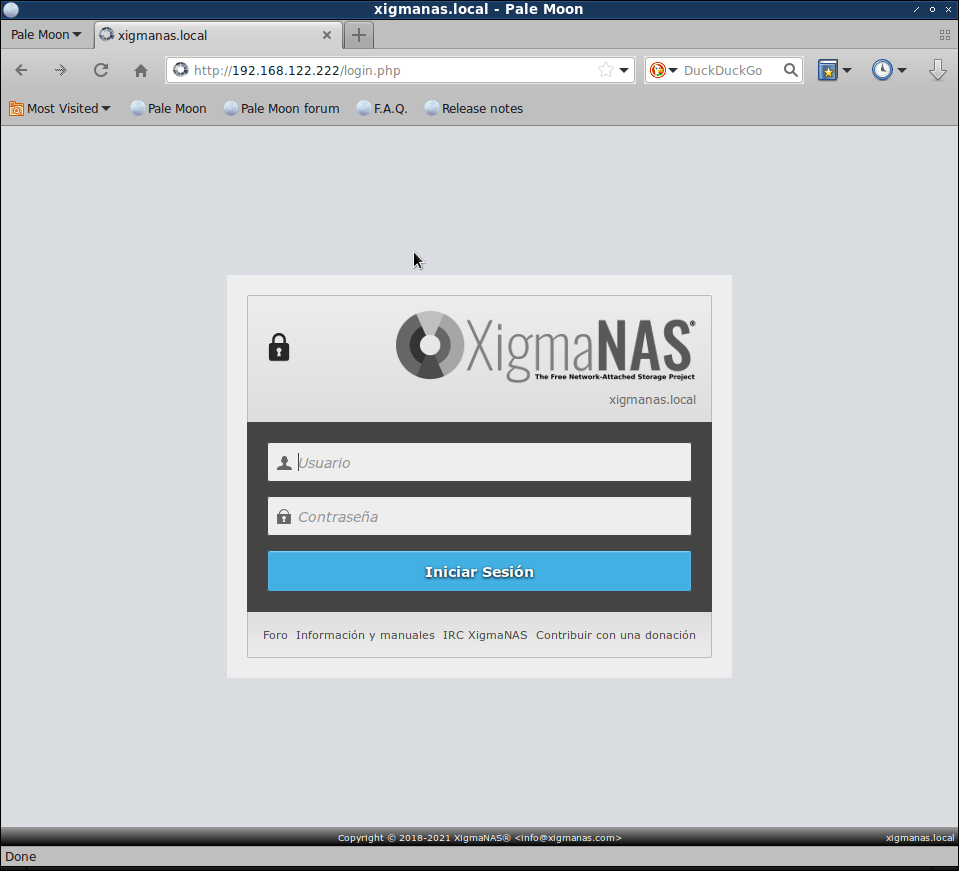
WebConfigurator
Point your browser to the ip (or hostname if you have properly setup your dns), and you will see the login screen:
After you login, the first screen shows some basic system and status information:
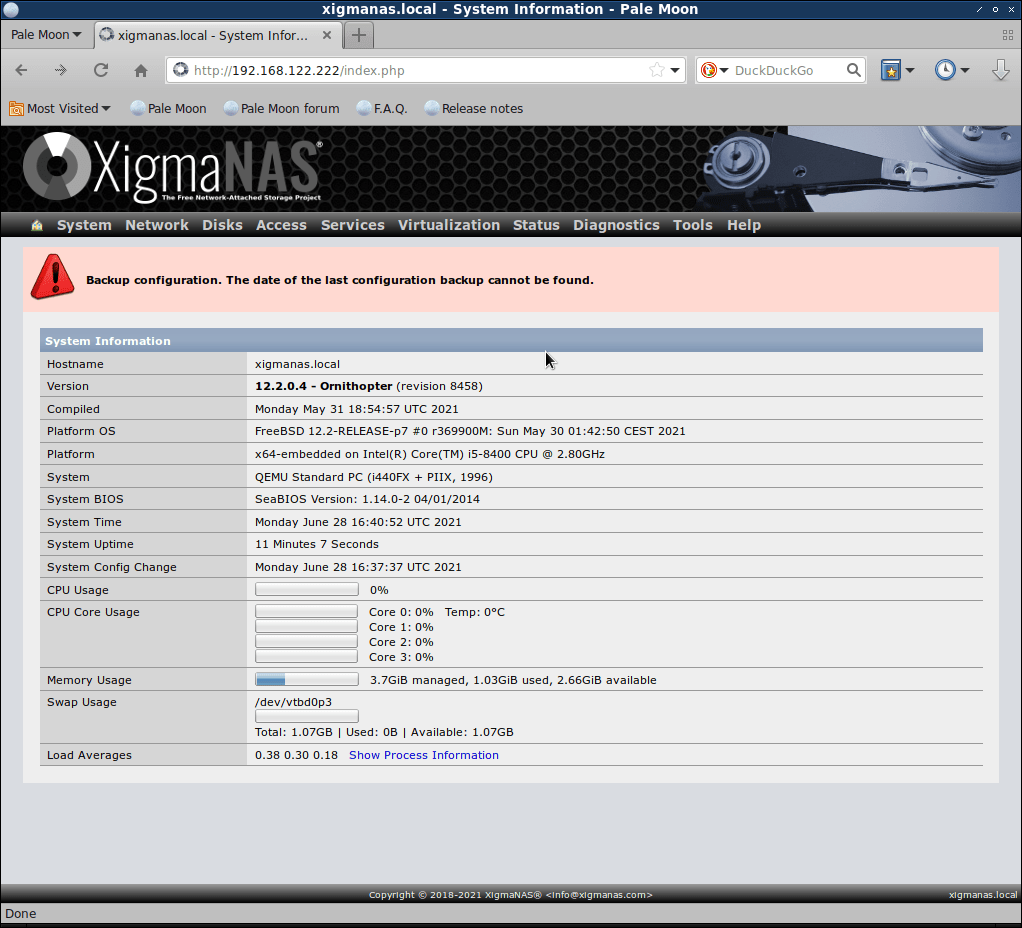
Also it shows a warning about never made configuration backup. It’s ok, because this is a fresh install. The first thing to do after the initial configuration is a backup of that.
Go to Disks → Management to start the configuration.
Where are my disks?!
The first thing you’ll notice in this screen is that the system seems to haven’t any disk installed:
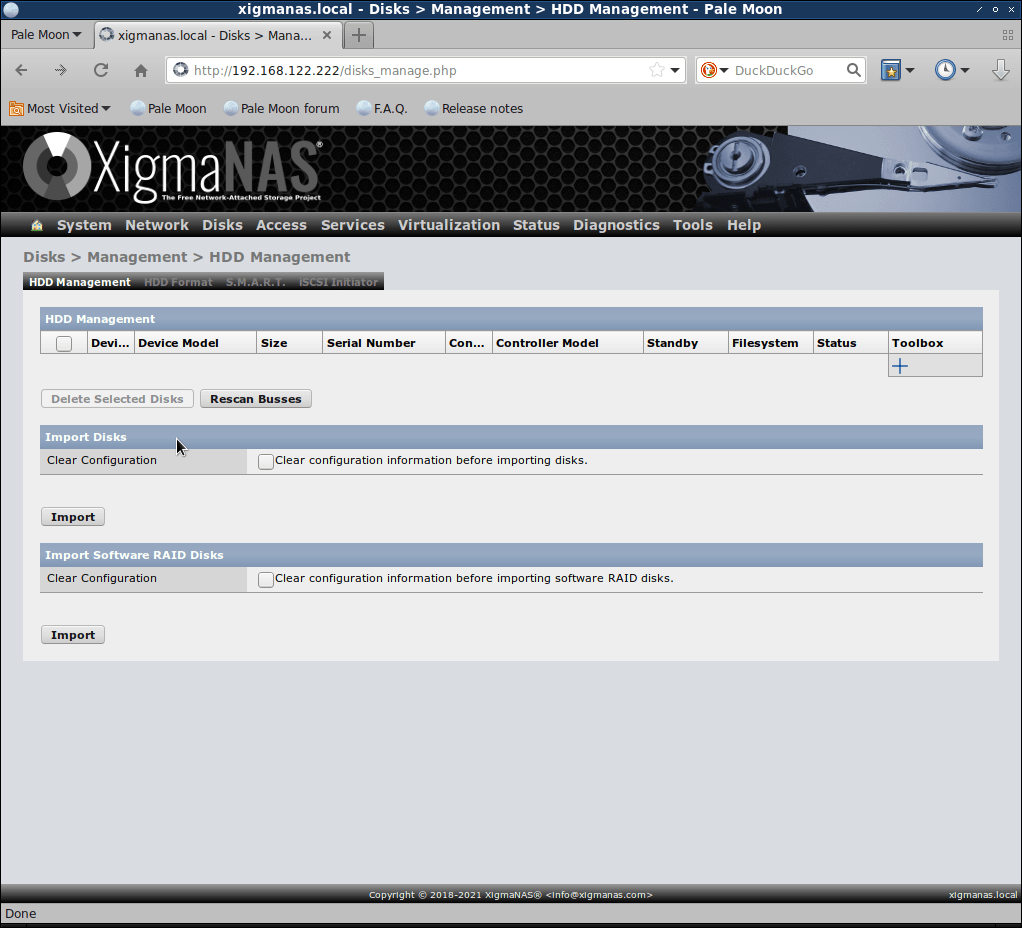
As I said before, I’ve created my VM with 4 really smalls disks only for demonstration purposes and another one for the system:
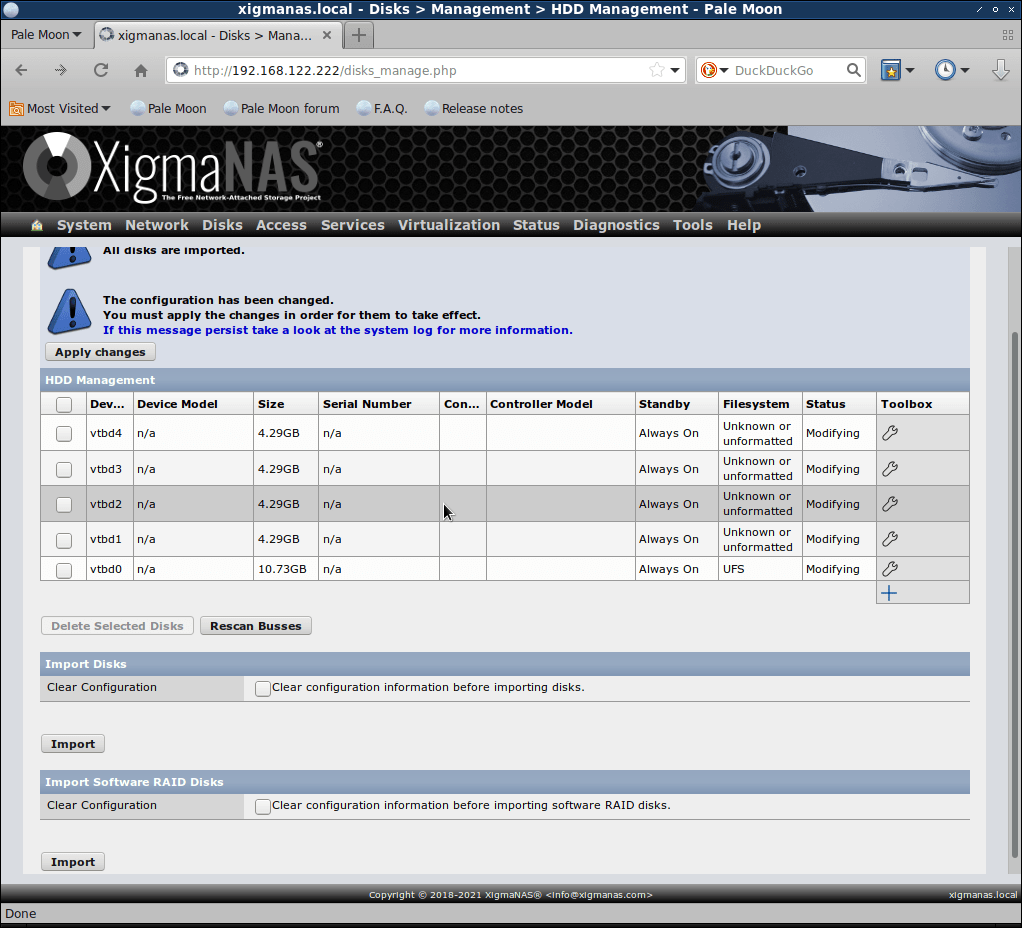
Click on Apply changes and let’s format the disks.
Formatting disks
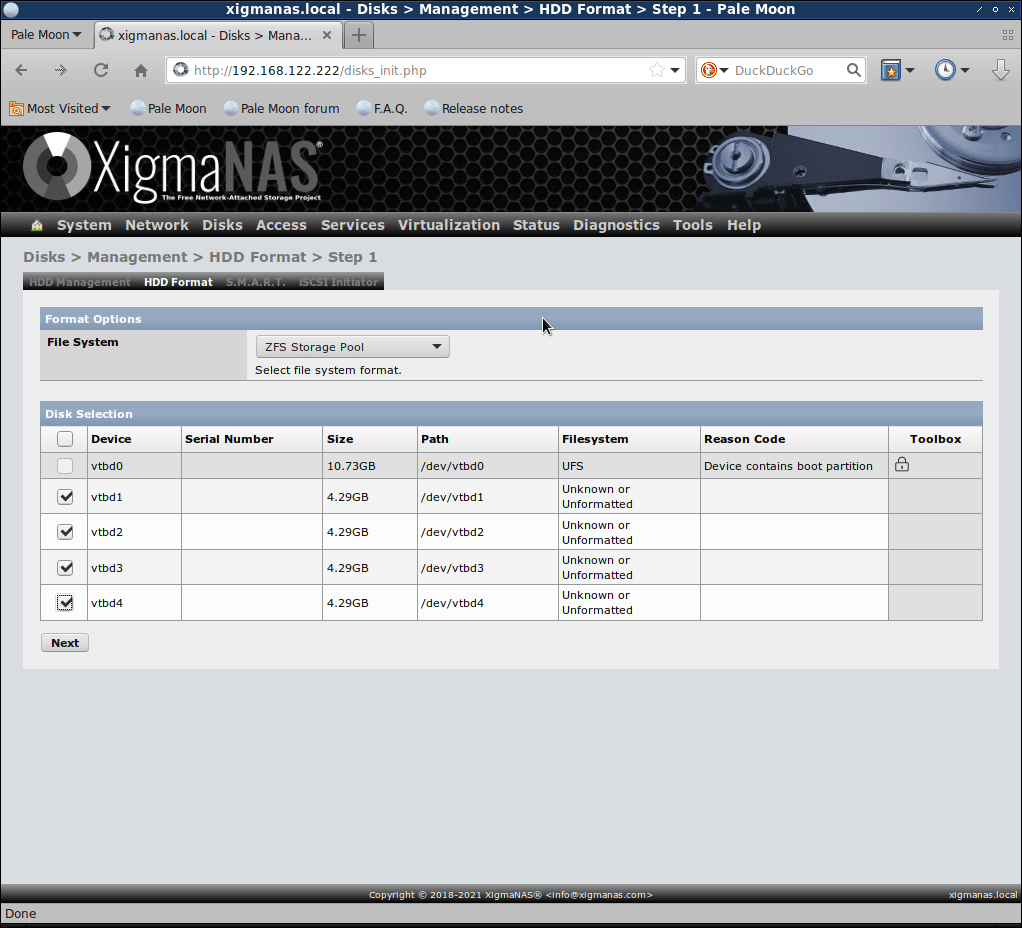
Go to the HDD Format tab, select all the data disks, choose ZFS Storage Pool as File system and click Next:
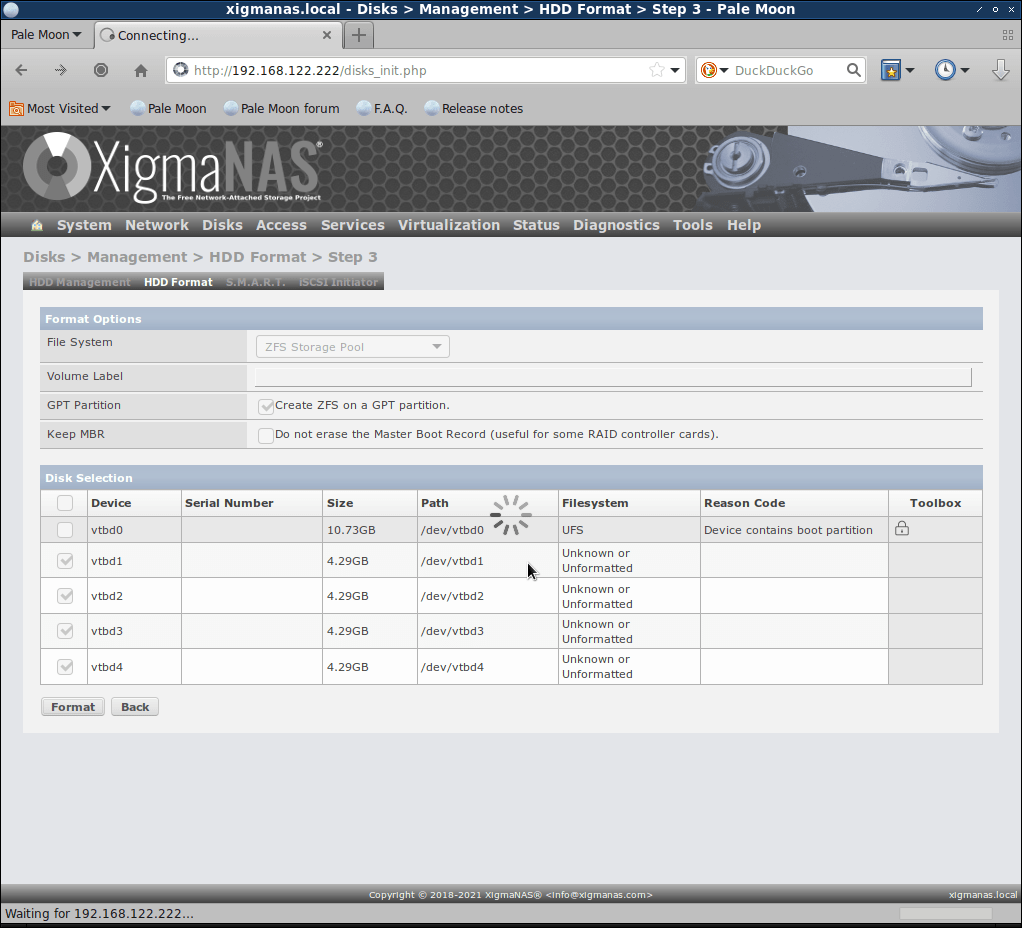
On the next screen choose GPT partition, a volume name if you want and click next. Then confirm the format by clicking in Format:
Before going to the next section, it would be a great idea to enable SMART so the system can warn you when a disk is about to fail (disks will fail, maybe you replace before and didn’t see them failing, but they will fail) so you can replace soon enough to keep your data safe. Just go to the S.M.A.R.T. tab and enable it.
ZFS
The next task to do is configure ZFS pools and datasets to store your data. ZFS is a file system and volume manager originally developed for Solaris. The number of features is so big that I’m only linking to the wikipedia article: https://en.wikipedia.org/wiki/ZFS.
Virtual Device
Before we can add a pool we need to create the virtual devices. Go to Disks → ZFS and choose Virtual Devices under the Pool tab and then click the big + sign on the right.
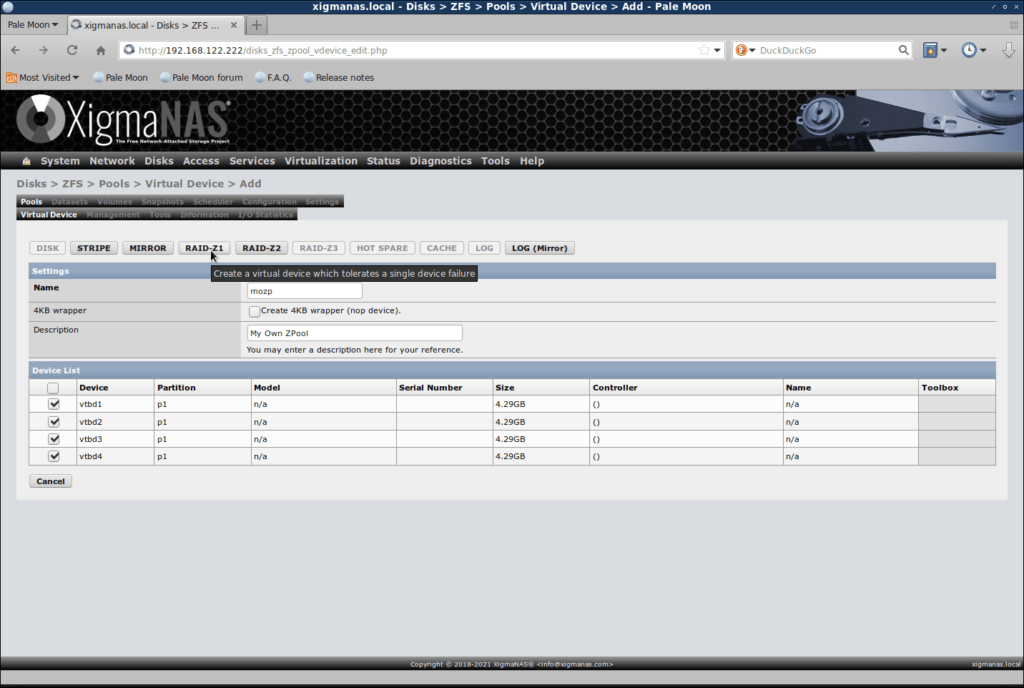
Choose a good name and description, select all the disks and create a raidz1, which is similar to raid5 (tolerates one device failure) with the advantages of ZFS.
The other options are:
- Disk: creates a vdev containing a single device. Unless you have just one disk, I don’t see the point in choosing this.
- Stripe: creates a vdev containing concatenated devices.
- Mirror: creates a vdev containing mirrored devices
- Raid-Z2: creates a vdev which tolerates a 2 device failure
- Raid-Z3: creates a vdev which tolerates a 3 device failure
zpool
With our virtual device created, now we can add our zpool. Go to the Management tab under Pools tab and click on the big + sign to create one.
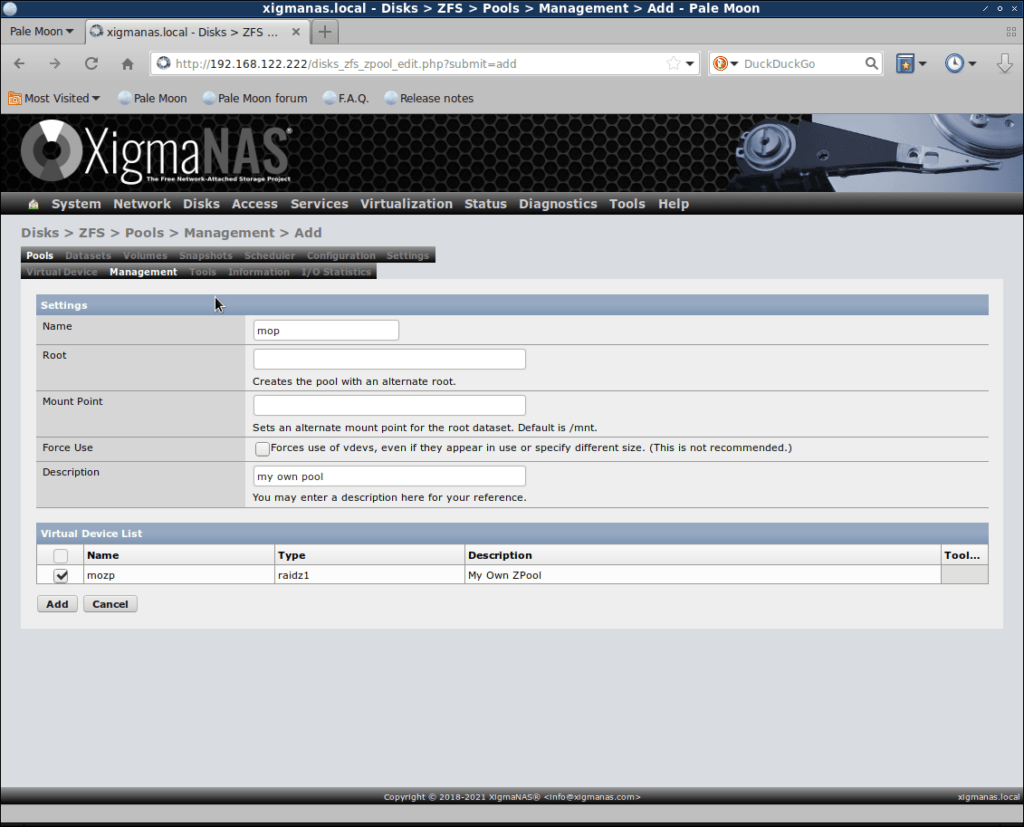
In this screen the most important options are the name of the pool and which device is assigned to. By default the pool will be mounted on /mnt/<poolname>, you can change to other path with the mountpoint option.
Dataset
Finally, let’s create a couple of datasets and we will be ready to share to the network.
Go to the Dataset tab and click on the big + sign to see this screen:
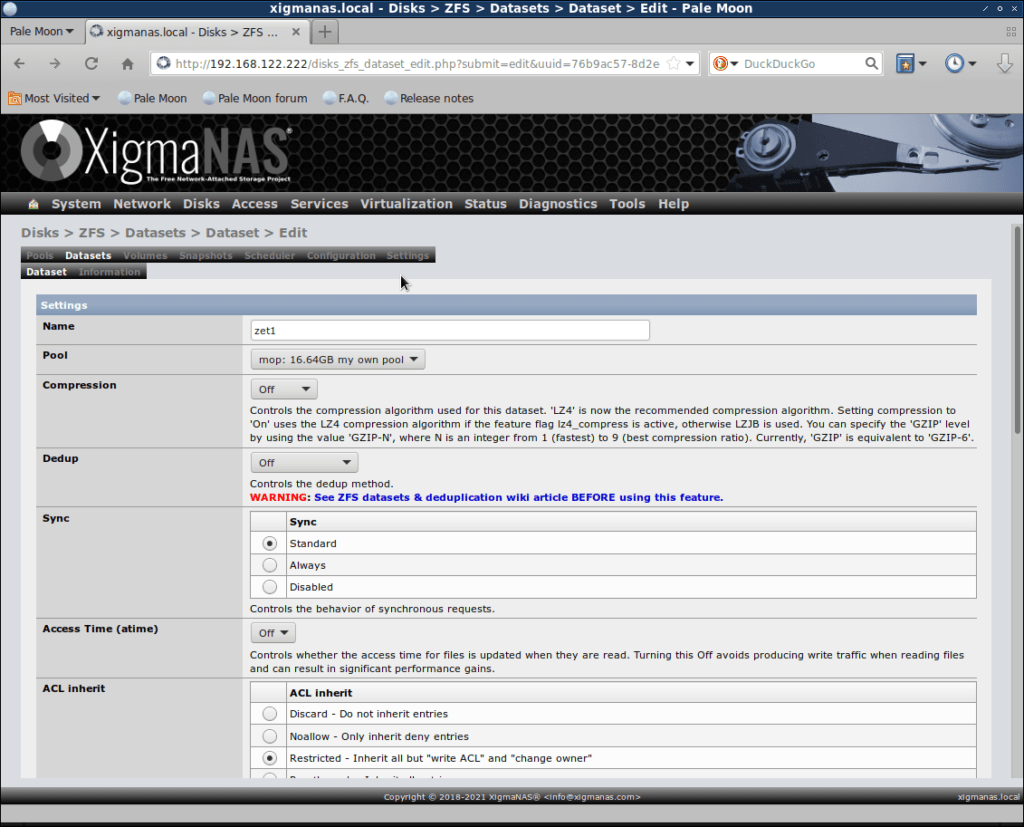
Most options are ok in the default values, others like name or the zpool where the dataset will be created speak by themselves.
To save space you can set some quota to prevent user abuses. You can also set compression, at cost of performance. And lastly, you can set deduplication to save space, but don’t do it unless you have read the warning in the XigmaNAS wiki, you have a lot of RAM and you know what you are doing.
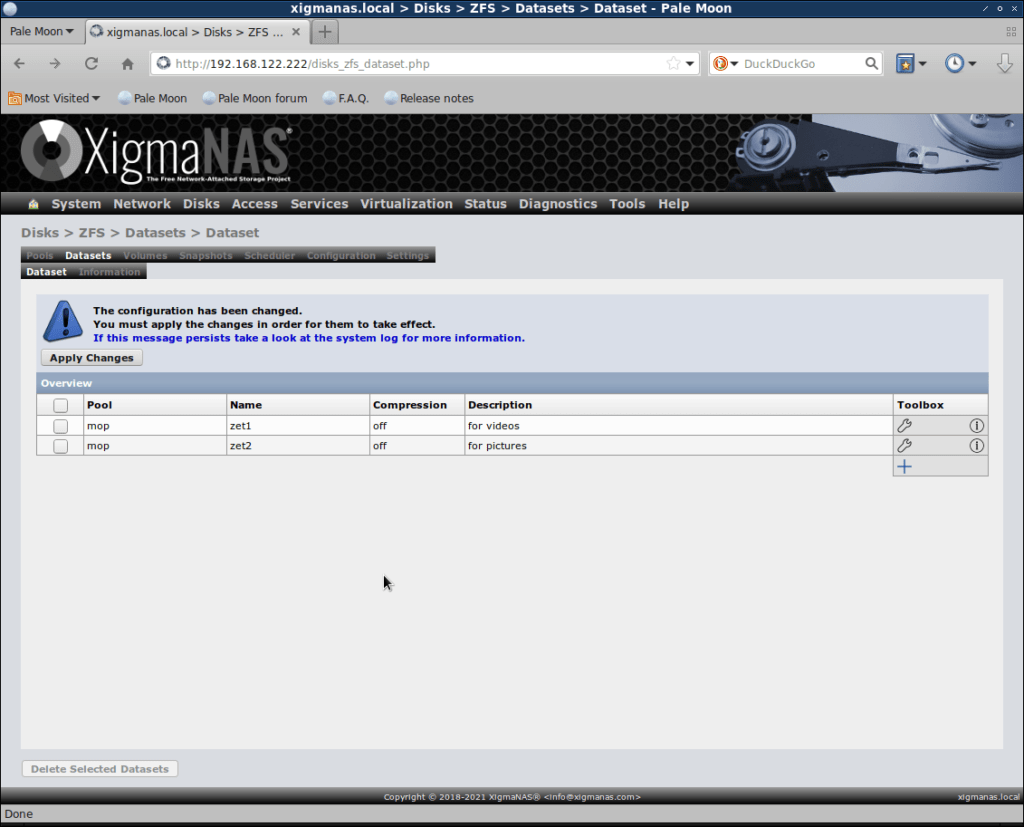
When you finish to create the datasets needed click on save, and in the previous screen, apply.
Sharing your storage space to the network
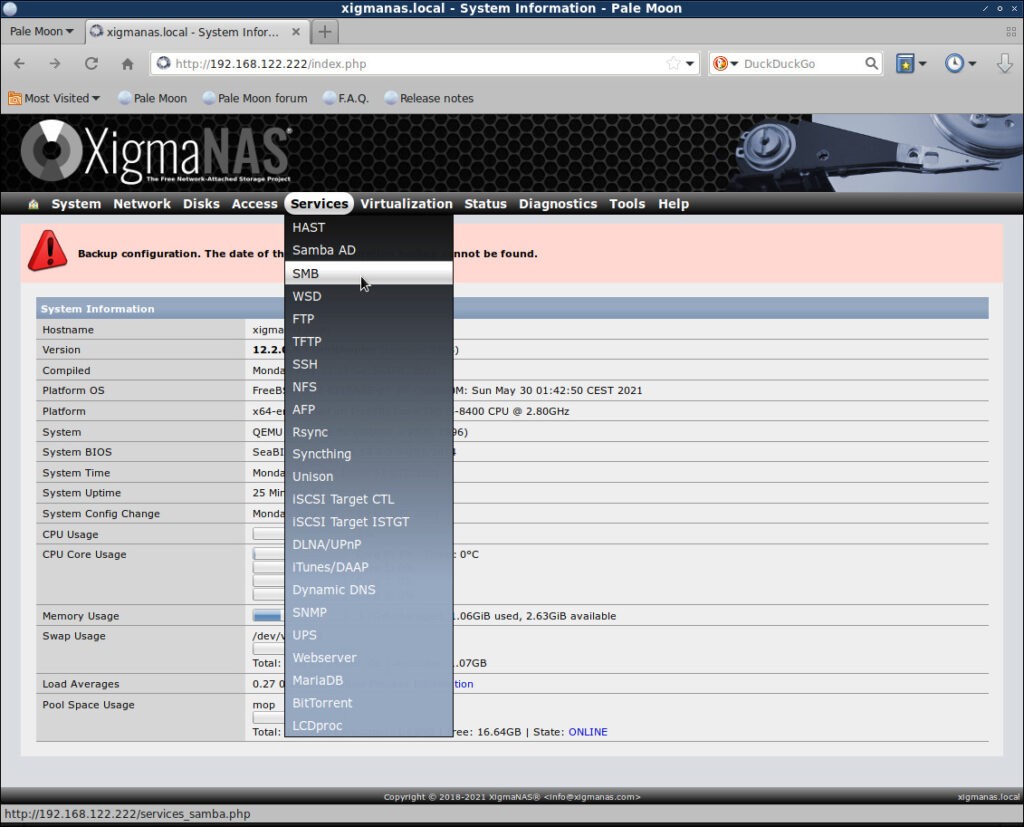
As you can see in the screenshot, XigmaNAS comes with support for several services to publish your storage space on the network
SMB
Samba is one of the most common ways to share folder in a lan. You can even connect to an ActiveDirectory but now I’ll show you with workgroup.
Go to Services → SMB and click on enable and then on Edit.
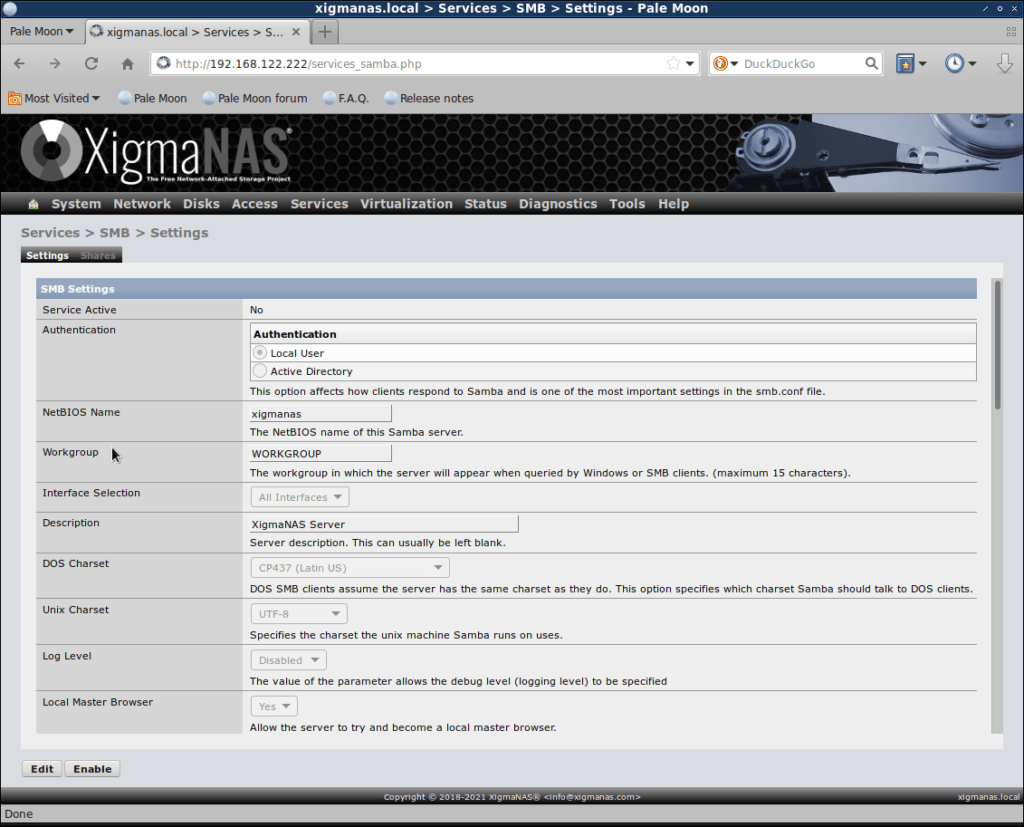
The most important options are netbios name (how your xigmanas server will bee seen on the network, workgroup and authentication method. If you choose Local user (the easiest) you need to add users and groups by going to Access → User and Groups.
After you click apply and then click on apply the changes, go to Shares tab to create a share by clicking the big + sign:
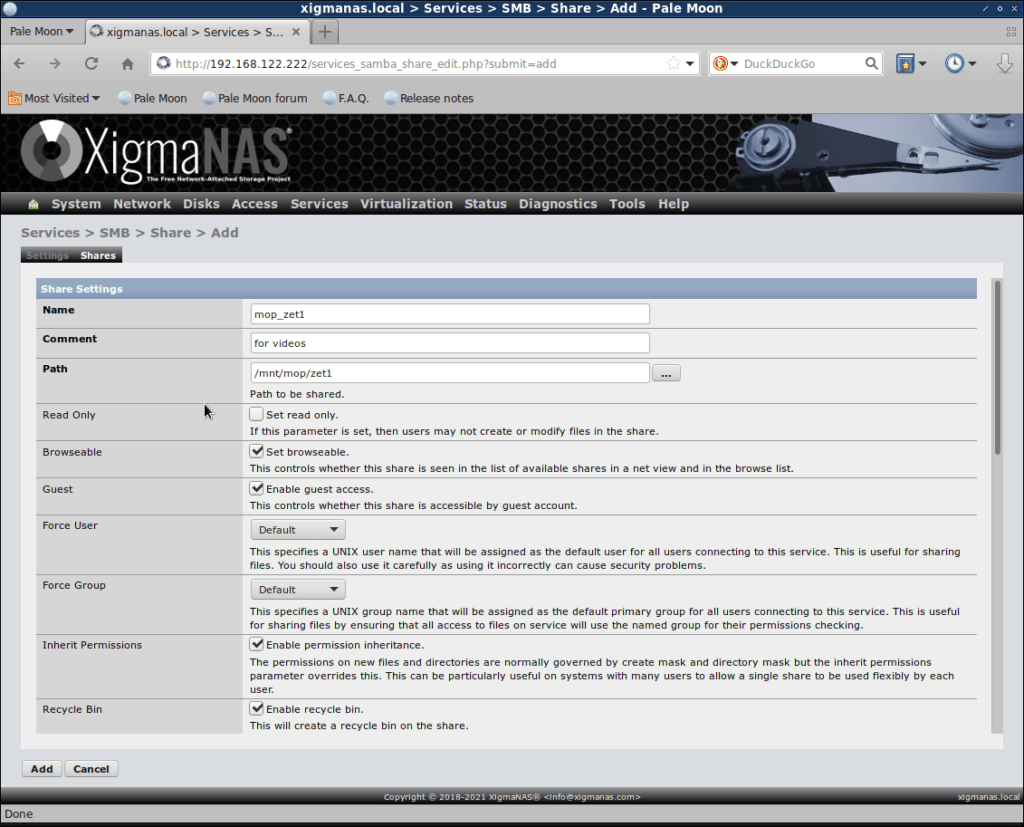
Choose any name you want, the path to your zfs dataset and take a look at the other options.
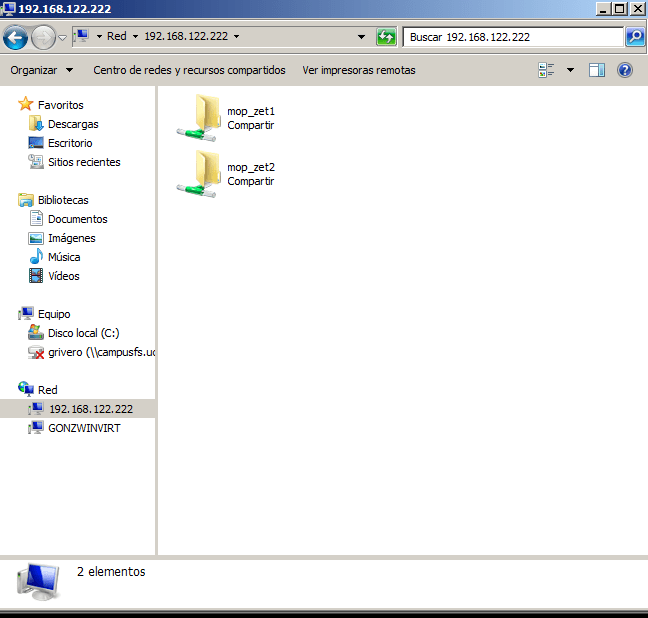
To check if every thing is properly configured, go to \\xigma netbios name\sharename in a windows machine:
DLNA/UPnP
This NAS was intended to share multimedia among the devices I have at home. This is pretty much the same procedure as with samba, but you can choose between Fuppes and MiniDLNA as service providers.
I’ve choose MiniDNLA for no particular reason:
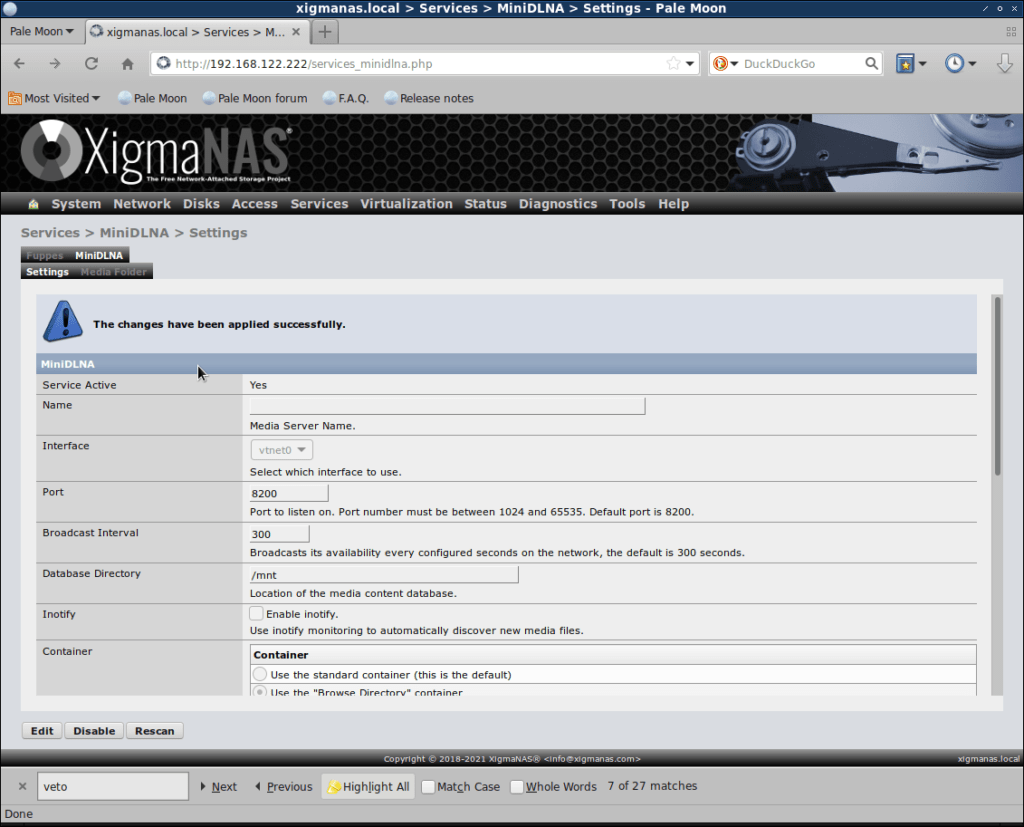
Go to Services → DLNA/UPnP → MiniDLNA, click on enable then edit. Finally choose the path to share and click on apply to save and enable changes.
And that’s it. You can see your ‘new’ device on the network:
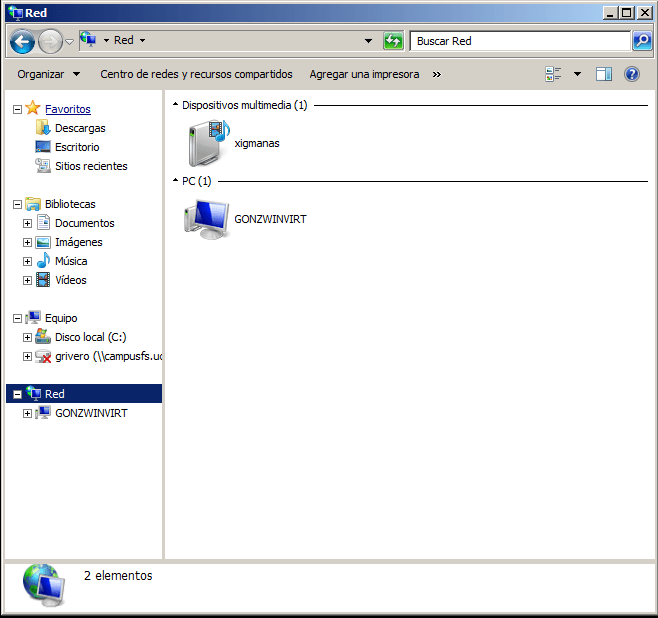
If I double click on the multimedia device shown, windows 7 starts windows media player:
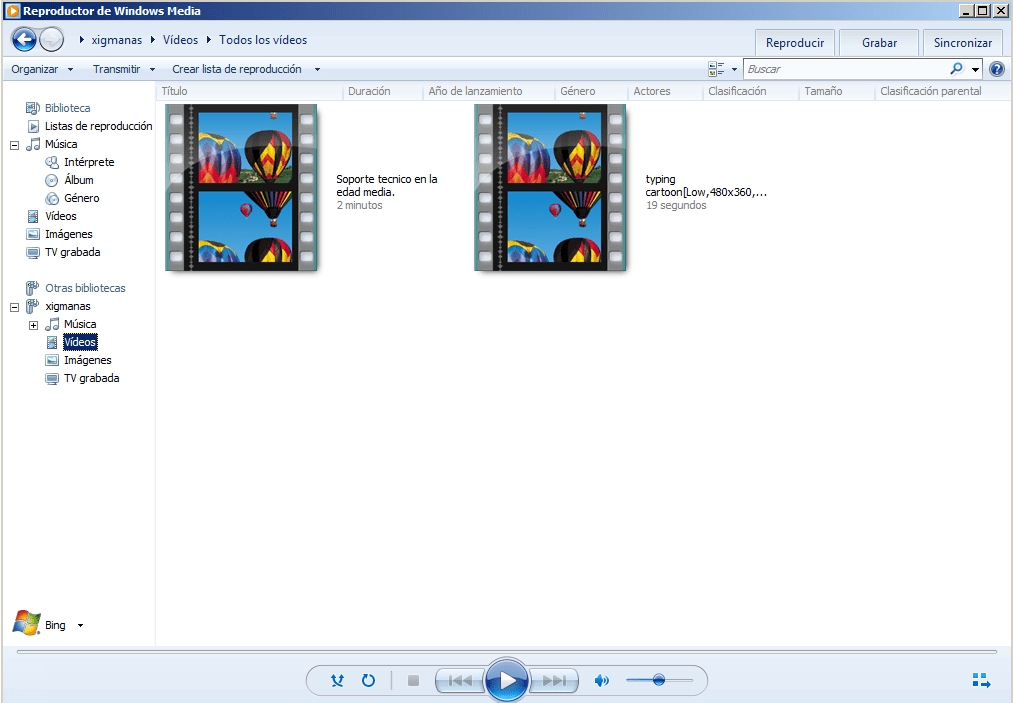
And this is it all for now. Explore the other services as needed and don’t forget to backup your data.
*PLEASE* put the date on all articles. We have no idea if this document is 10 days old, or 10 years. An awful lot has changed in each update of xigmanas.
That helped me a lot man! Never had to deal with ZFS RAID before. Thanks for the good tutorial!
What about encryption of the ZFS pool? I could not see any option for encryption.