
Introduction
Yarn is a JavaScript package manager compatible with npm that helps you automate the process of installing, updating, configuring, and removing npm packages. It caches every download package and speeds up the installation process by parallelizing operations.
In this tutorial, we will show you how to install Yarn in Ubuntu 20.04.
Installation of Yarn
Just follow the steps below to get start with yarn:
- Import the repository’s GPG key
curl -sS https://dl.yarnpkg.com/debian/pubkey.gpg | sudo apt-key add -
- Add the Yarn APT repository to your system
echo "deb https://dl.yarnpkg.com/debian/ stable main" | sudo tee /etc/apt/sources.list.d/yarn.list
- Update the package list then install Yarn
sudo apt update -y && sudo apt install yarn -yNOTE: The command above apt install yarn also install Node.js . If you installed Node trough nvm, So to skip the Node.js installation you can run the command below
sudo apt install --no-install-recommends yarn- Verify the installation by checking the Yarn version
yarn --version
So, we have successfully installed Yarn on your Ubuntu machine.
Using Yarn
Here’s some of the Yarn commands in this section.
Create a new project
Use the yarn init command followed by the project name to create a new project with yarn.
For example:
yarn init unixcop_projectThe script will ask you questions as follows

The command will create a basic package.json file containing the information you provided.
NOTE: You can also initiate a Yarn project in an existing directory. to do that, navigate to the directory and execute the yarn inint command
yarn initAdd dependency
Run yarn add followed by the package name to add a package as a dependency to the project
yarn add [package name]The command will install the package and update the project’s package.json and yarn.lock files.
NOTE: To install a specific version or tag for the packages update, use the syntax belwo:
yarn add [package name]@[version or tag]Upgrade dependencies
To upgrade the packages, run the following commands below:
yarn install
yarn upgrade
yarn upgrade [package name]
yarn upgrade [package name]@[version or tag]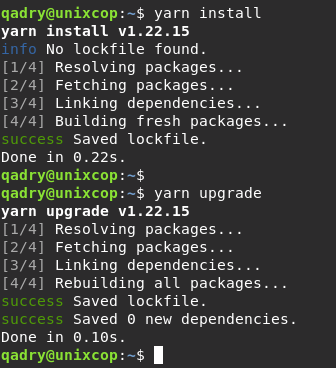
Remove dependency
To remove a package from the project’s dependencies, run
yarn remove [package name]The files package.json and yarn.lock files will be also updated with the removed packages
Install dependencies
Just run yarn command to install all the dependencies of your project
yarn
OR
yarn install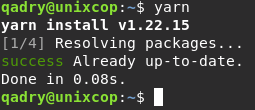
Conclusion
That’s it
In this tutorial, We illustrated how to install yarn in Ubuntu 20.04 and showed you some of yarn commands.
Also you can visit this article to install Yarn on CentOS System. How to install yarn on CentOS 8
Thanks