
Introduction
WordPress (WP) is a widely used content-management system.Its ease of use, numerous themes, and plugins, as well as strong community support, have made it the number one solution in the world. WordPress is used for everything from simple blogs to complex websites.
In this tutorial, you will learn how to install WordPress with cPanel.
Installing WordPress in cPanel Manually
cPanel is where you administer your web hosting server account.Many control panels will come with automated WordPress installation script installers, such as Softaculous and Fantastico.
So If yours does not, you will need to install WordPress on cPanel manually.
Before we start, for sure you have to install cPanel .. if you haven’t installed it yet, you can install it from the cPanel Installation tutorial.
Download WordPress
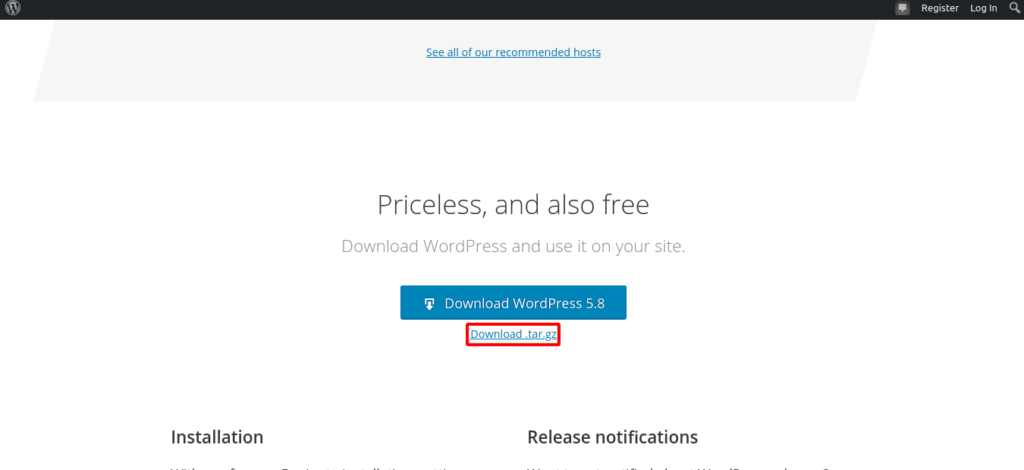
So Download the most recent official version of the CMS from the WordPress website.
So Download the tar.gz compressed file .. the latest version of wordpress right now is 5.8 .
Once the zip file has been downloaded, go to its directory and extract the entire archive.
Additionally, Note the location of the extracted content, and upload it to your web server.
Upload WordPress Install Script to Server
1. Go to your cPanel account. You will find it by browsing to your_domain_name.com/cpanel.
2. Enter your user credentials and log in.
3. Find the File Manager tool and open it.
4. Once you entered the File Manager, Look for the public_html directory. The public_html directory is your web root, the directory in which you want to store all your websites.
5. You need to decide on the location of your WordPress site. There are two options:
- In the root directory of your domain (e.g., your_domain_name.com/)
Upload all contents of the WordPress folder, but not the folder itself. After the upload, all WP files and subfolders should reside in public_html.
- In a subfolder of your domain (e.g., your_domain_name.com/site1).
Upload the entire WordPress folder. When finished, rename the WordPress folder to your desired name .
The screenshot below shows the File Manager tool on cPanel.
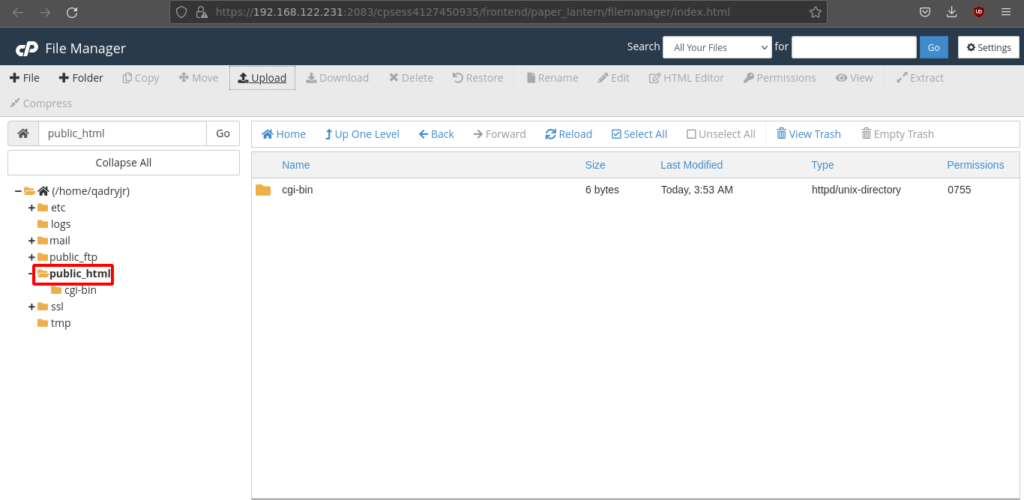
Go to public_html directory then click upload.
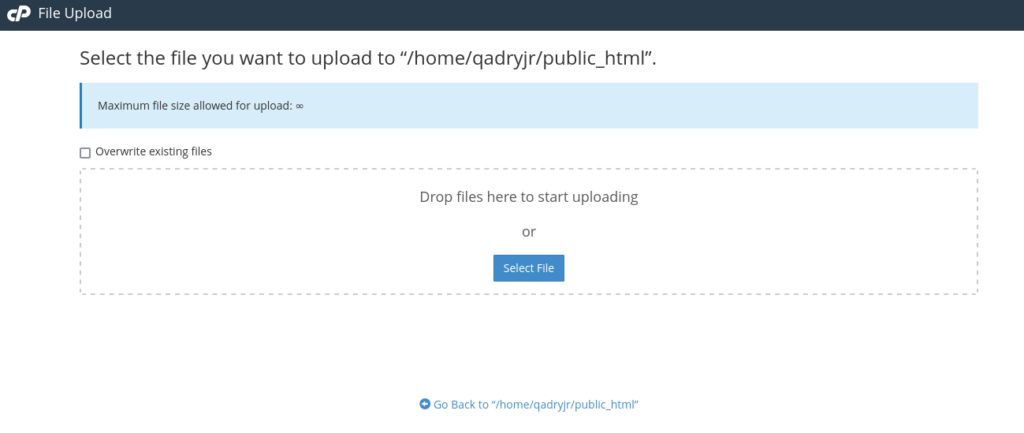
Upload the WordPress from the directory you download it to.
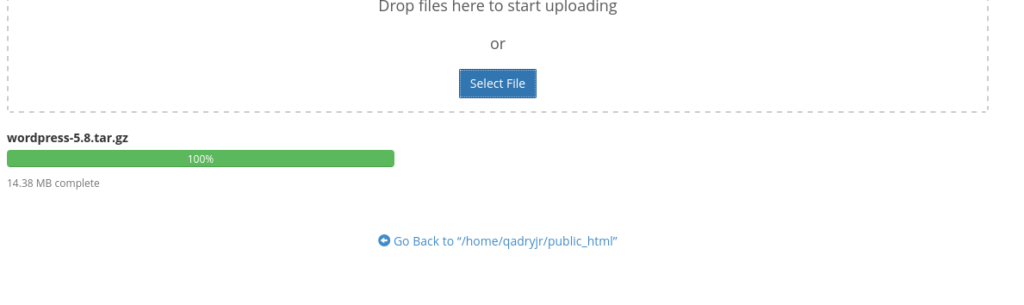
Then Extract it.

6. After you have extracted the WordPress installation archive, the files should be extracted into a folder named WordPress. All the necessary WordPress folders and files should be listed in that folder. Right now, you can initiate the WordPress install by browsing to your_domain_name.com/wordpress.
However, before proceeding to the installation procedure, you need the following:
- A MySQL Database.
- A MySQL Database User with appropriate user credentials.
- A Database host.
- Table prefix if you want to run multiple WordPress sites in a single database.
- A Unique Phrase and Salt Key.
If you haven’t created a MySQL database and database user, navigate back to cPanel to create one.
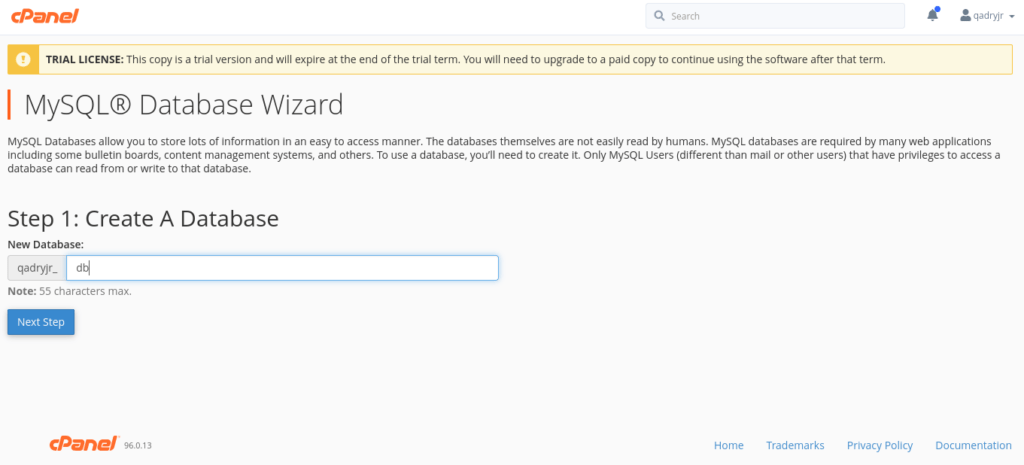
Create a MySQL Database and Database User
To accomplish this, use cPanel’s MySQL Database Wizard. Find this tool under the Database heading:
1. The first step is to create a Database. Name your database. Your hosting account name will prepend it.
2. Remember your database name. You will need it later.
3. Click Next Step to create the database.
Create Database Users
Next, the wizard will prompt you to create a database user.
1. Enter a username and a password. Ideally, you want the strength meter to turn green and read Very Strong, indicating that the password is bulletproof.So use the Password Generator to achieve that.
Your hosting account name will prepend the username.
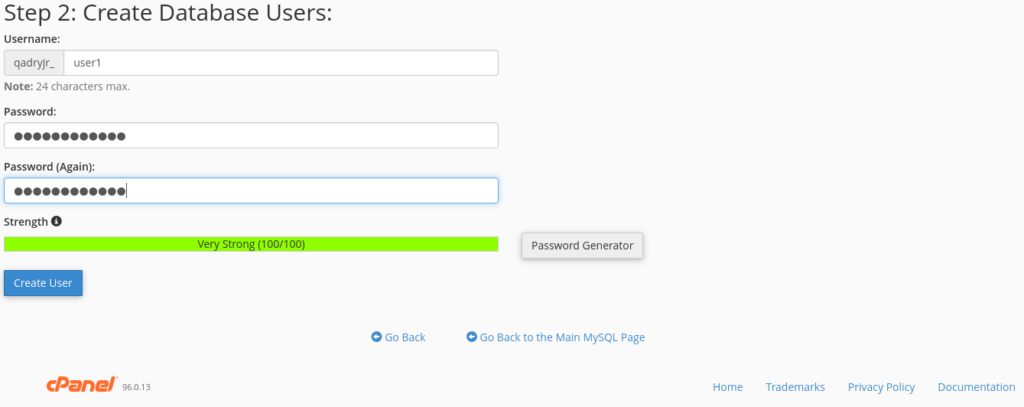
2. Note your password, or store it
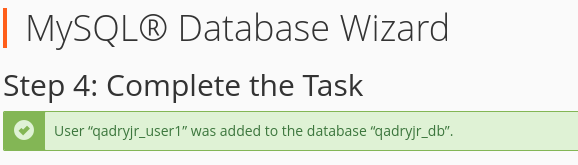
The user was created successfully as shown.
Note : “qadryjr” is the username of cPanel account that has been created.
Assign User to Database and Assign Permissions
The newly created user doesn’t have access to the database.
1. Find the Add User To Database section of the page.
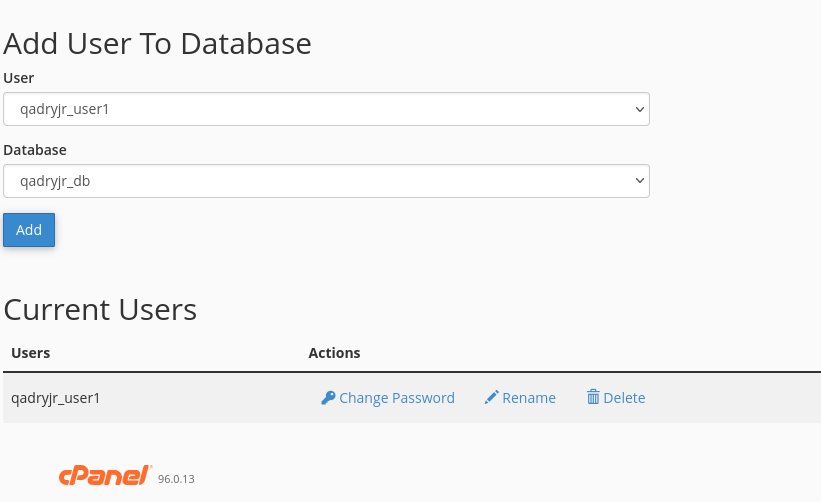
2. Under the User drop-down menu, select your newly created user.
3. Choose your newly created database under the Database drop-down menu and click Add.
4. The next step would be to assign database privileges. For the initial database user, select the All Privileges checkbox.
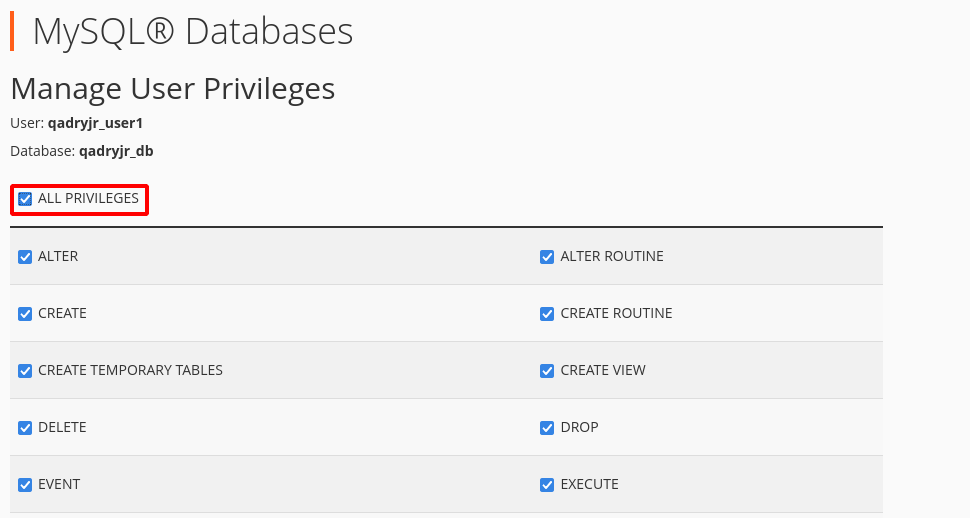
5. Click Make Changes to assign privileges to the user.
6. To verify, go back and scroll down to view current databases. There should be a database and a privileged user assigned to the database.
Edit wp-config-sample.php File
The database has been created, and the newly created superuser has been assigned to the database. To complete the process, you must edit the wp-config-sample.php file .
Admins need to insert 4 pieces of information to complete the process. In our case, The lines below in screenshot shows that, and the information you insert may look different.
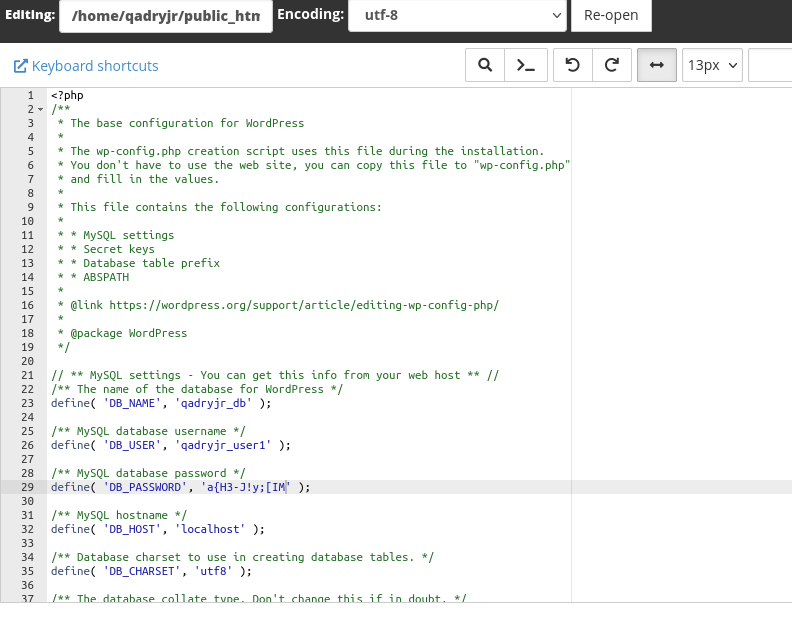
- DB_NAME. Database name.
- DB_USER. Username of the database user.
- DB_PASSWORD. This is the database user password.
- DB_HOST. In 99% of cases, it’s ‘localhost.’
Make sure to include the prepended parts when typing the value for DB_NAME and DB_USER. Additionally, bear in mind that for most cPanel hosts, the DB_HOST value is ‘localhost.’
Update Default Unique Keys and Salts (Optional-Recommended)
While still editing the wp-config-sample.php file, find the Authentication Unique Keys and Salts section of the document. Enter your Unique Key and Salt under the section mentioned above.
Create a Unique Key and Salt by visiting WordPress Secret Keys. The WP API will generate a unique phrase and key. Copy them and replace the default wp-config-sample.php keys. Then rename the wp-config-sample.php
In addition to, Save the completed file as wp-config.php. Do NOT save the file with its default name.
Potential Database Errors (Notes)
If you encounter database connection errors, verify that the information typed into the wp-config.php file is correct.
When doing a document root installation, the wp-config.php file is located in the /home/cPanelAccountName/public_html directory.
Run WordPress Install Scripts
To finish the installation, run the install script by browsing to your WP’s directory.
- If you uploaded the files to the root directory, browse to http://your_domain_name.com/wp-admin/install.php
- If you uploaded WP installation files to a subfolder(e.g. ”site1”), browse to http://your_domain_name.com/site1/wp-admin/install.php
In each case, once the install scripts are initiated, WordPress will prompt you to enter database details and write them in a new wp-config.php file. If this fails, you can go back and edit and upload the wp-config.php file yourself.
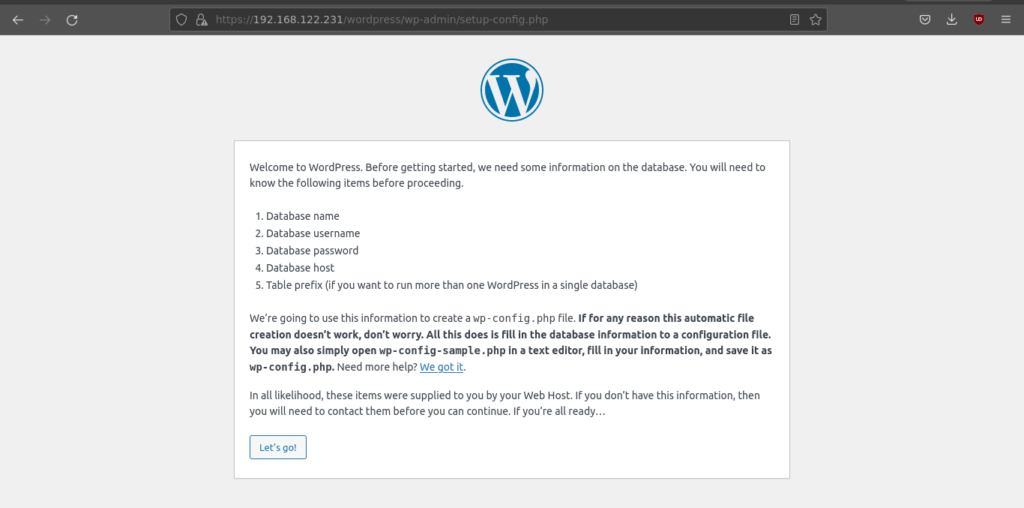
Enter Let’s go button to start the Installation.
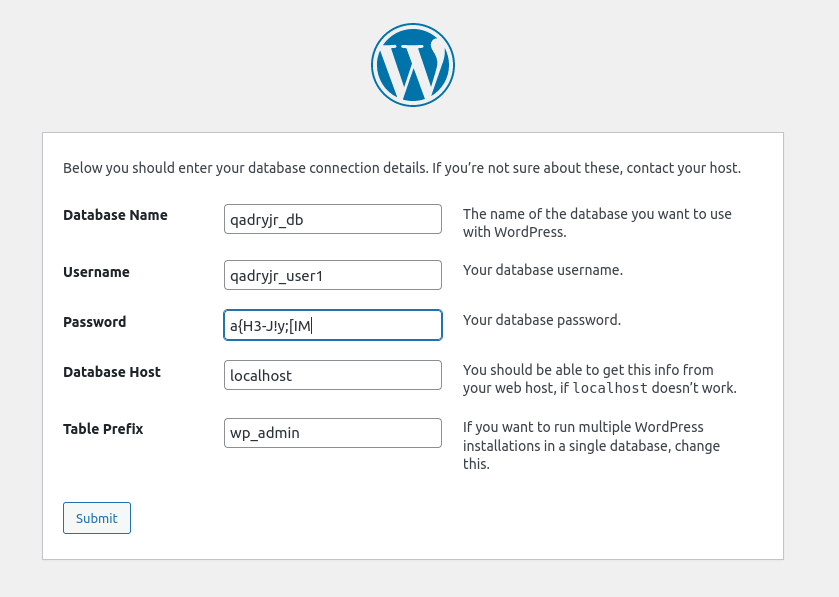
Enter your Database information in addition to the Table Prefix then click submit.
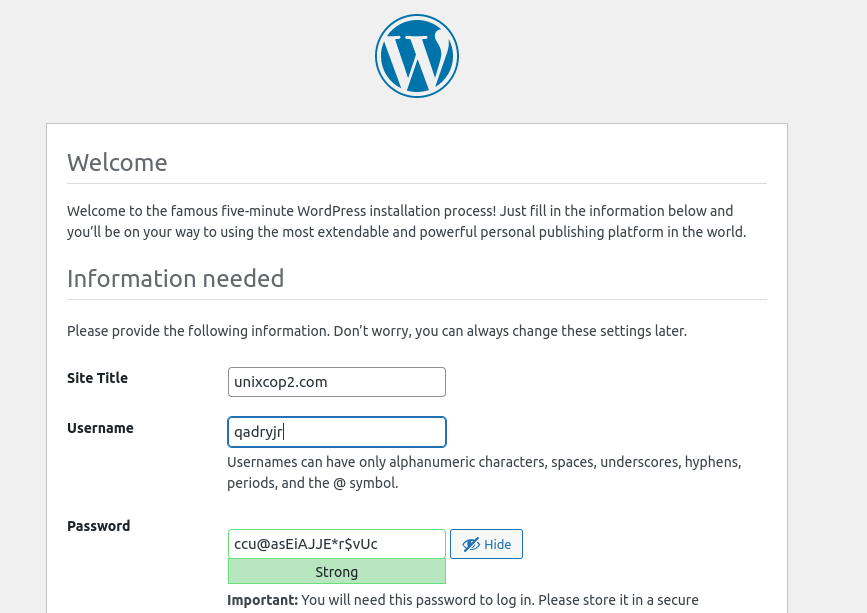
Complete the WordPress Installation
The next step is the well-known WP installation procedure. Enter details such as Site Title, your desired WordPress Username and Password, and your Email Address. Please note that the username and password are for this instance of WordPress only.
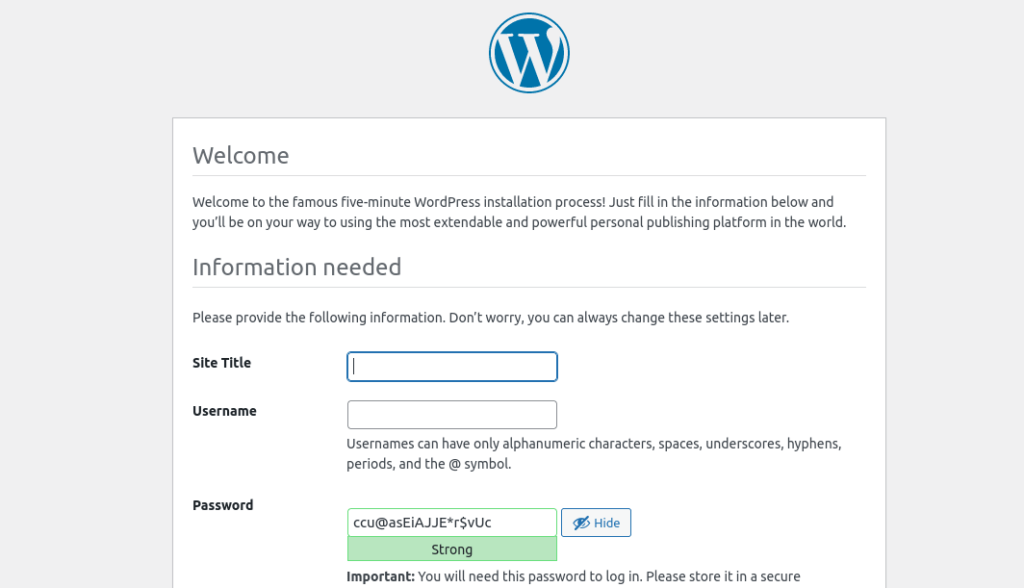
Do not enter the same username and password you used for your database user.
All of this information can be changed later in the WordPress Admin.
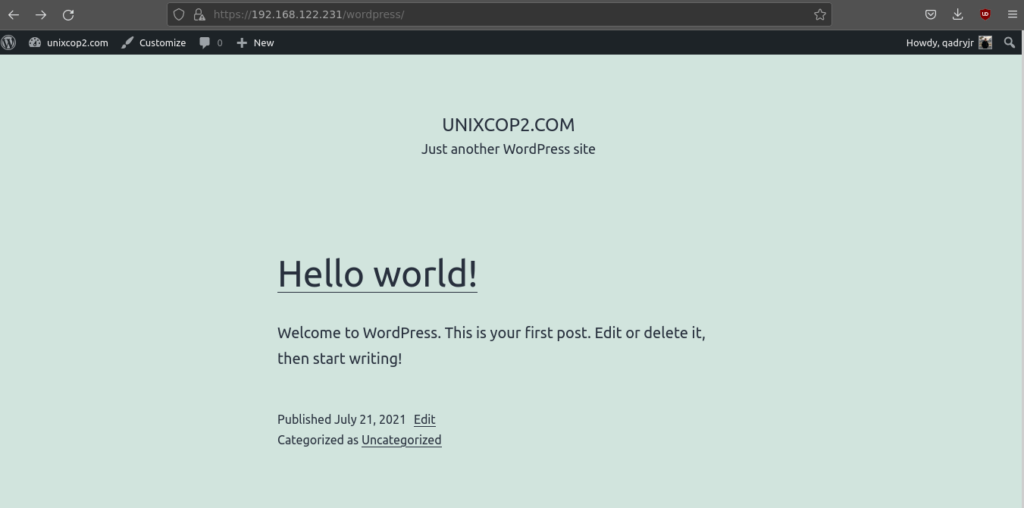
Once you are finished, click Install WordPress. When the installation procedure is completed, WP will redirect you to the login screen.
Conclusion
If you have followed this tutorial step-by-step, you should have accomplished the following:
- Downloaded and extracted the latest version of WordPress installation files.
- Uploaded the files to your desired directory.
- Created a MySQL database and database user.
- Successfully updated the wp-config-sample.php file and renamed it to wp-config.php.
- Run WordPress installation scripts, created your first WordPress admin user and named your website.
- Installed and logged into WordPress.
If you are confused by the WordPress admin console and unsure what to do next, we recommend you start by choosing a WordPress theme. This will set the visual appearance of your website and get things going.