
WikiJS is a modern Wiki Engine based on Git, NodeJS & Markdown, It is one of the open-source, and powerful Wiki Engines. It supports various databases engine like MySQL, MariaDB, MSSQL, and PostgreSQL. It is fairly easy to use and supports multi-lingual content. It also has a backup and synchronization feature and comes with a responsive GUI to manage your data easily :
Requirements :
- 1-2GB or more RAM (The more the better performance)
- 2vCore or more CPU (The more the better performance)
- 5-10GB or more Disk (Depending on how much content you wish to store
- Ubuntu 18.04 or more
Step 1: Update your server
The first step is to update your server and look for newer packages and security releases for your distribution :
apt-get update -y
apt-get upgrade -y
Step 2: Install GIT
The platform is based on Git so we need to install it :
apt-get install software-properties-common
add-apt-repository -y ppa:git-core/ppa
apt update
apt install git
Confirm the installation using the following command :
git –version
Step 3 : Install NodeJS
Thsi tool is based on NodeJS, In order to run the engine we need to install it. Run the following commands to install it :
curl -fsSL https://deb.nodesource.com/setup_lts.x | sudo -E bash –
apt-get install -y nodejs
Verify the installation using the following command :
node -v && npm -v
Step 4: Install & Configure MariaDB
Here we will be installing MariaDB for our Database. It uses MariaDB to store all of its content, Run the following command to install :
apt-get update
apt install mariadb-server mariadb-client
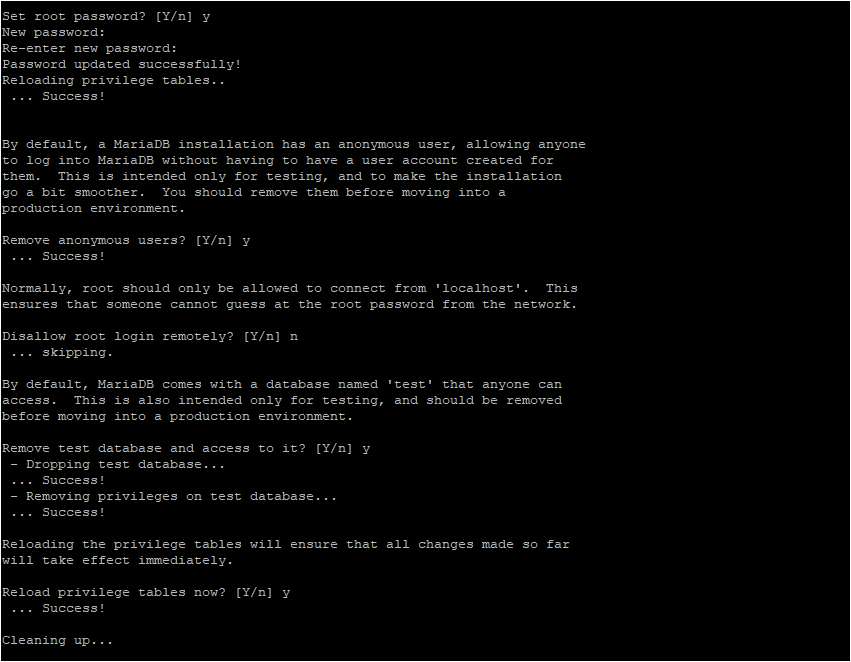
mysql_secure_installation
Copy the steps as shown in the picture :
mysql -u root -p
CREATE DATABASE wikidb;
CREATE USER ‘wikidbuser’@’localhost’ IDENTIFIED BY ‘wikipassword’;
GRANT ALL ON wikidb.* TO ‘wikidbuser’@’localhost’ WITH GRANT OPTION;
FLUSH privileges;
EXIT
Step 4 : Installing WikiJS on Ubuntu
We have everything installed to configure WikiJS on our machine, Now we can get the files from the GitHub page of WikiJS
adduser wikijs
Create directory and set permissions for the User :
mkdir -p /var/www/wikijs
chown wikijs:wikijs /var/www/wikijs
Switch to user and download WikiJS :
su – wikijs
cd /var/www/wikijs
wget https://github.com/requarks/wiki/releases/download/v2.5.295/wiki-js.tar.gz

Extract the downloaded file :
tar xzf wiki-js.tar.gz
rm wiki-js.tar.gz
Change the sample config file to config.yml
cp config.sample.yml config.yml
Edit the config.yml and edit the database fields according to the details you created above :
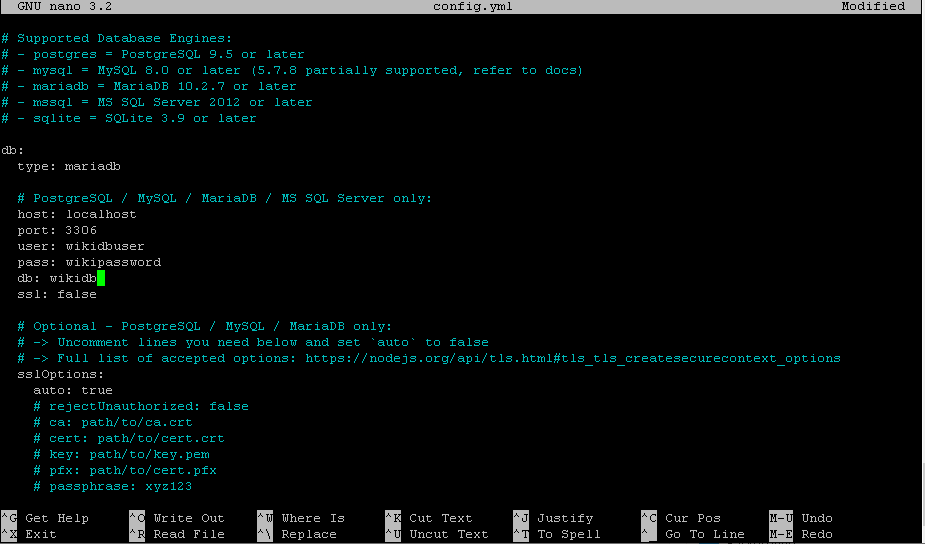
nano config.yml
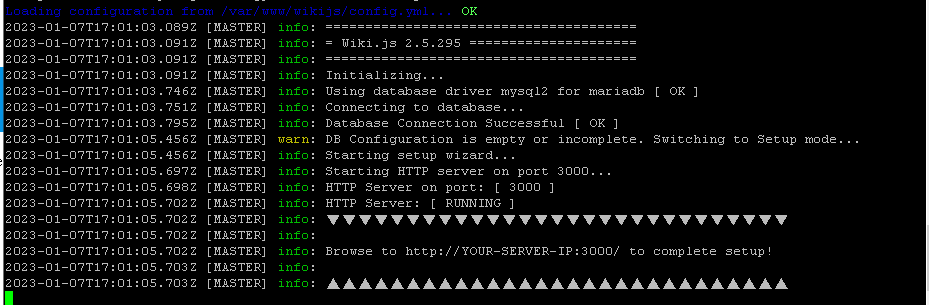
Next is to start the server and check whether the changes we have made is correct :
Now, CTRL+C to stop the server and login as root :
Create a systemd service file :
nano /etc/systemd/system/wikijs.service
Paste the following content :
[Unit]
Description=Wiki.js
After=network.target
[Service]
Type=simple
ExecStart=/usr/bin/node server
Restart=always
User=wikijs
Environment=NODE_ENV=production
WorkingDirectory=/var/www/wikijs
[Install]
WantedBy=multi-user.target
The next step is to configure NGINX :
apt install nginx
nano /etc/nginx/conf.d/wikijs.conf
Paste the following content and change the domain according to yourself :
server {
listen 80;
server_name wiki.example.com;
root /var/www/wikijs;
location / {
proxy_pass http://127.0.0.1:3000;
proxy_http_version 1.1;
proxy_set_header Upgrade $http_upgrade;
proxy_set_header Connection “upgrade”;
proxy_set_header Host $host;
proxy_set_header X-Real-IP $remote_addr;
proxy_set_header X-Forwarded-For $proxy_add_x_forwarded_for;
proxy_set_header X-Forwarded-Proto $scheme;
}
}
nginx -t
systemctl restart nginx
systemctl enable nginx
Access the WikiJS through your domain name or IPADDRESS:3000
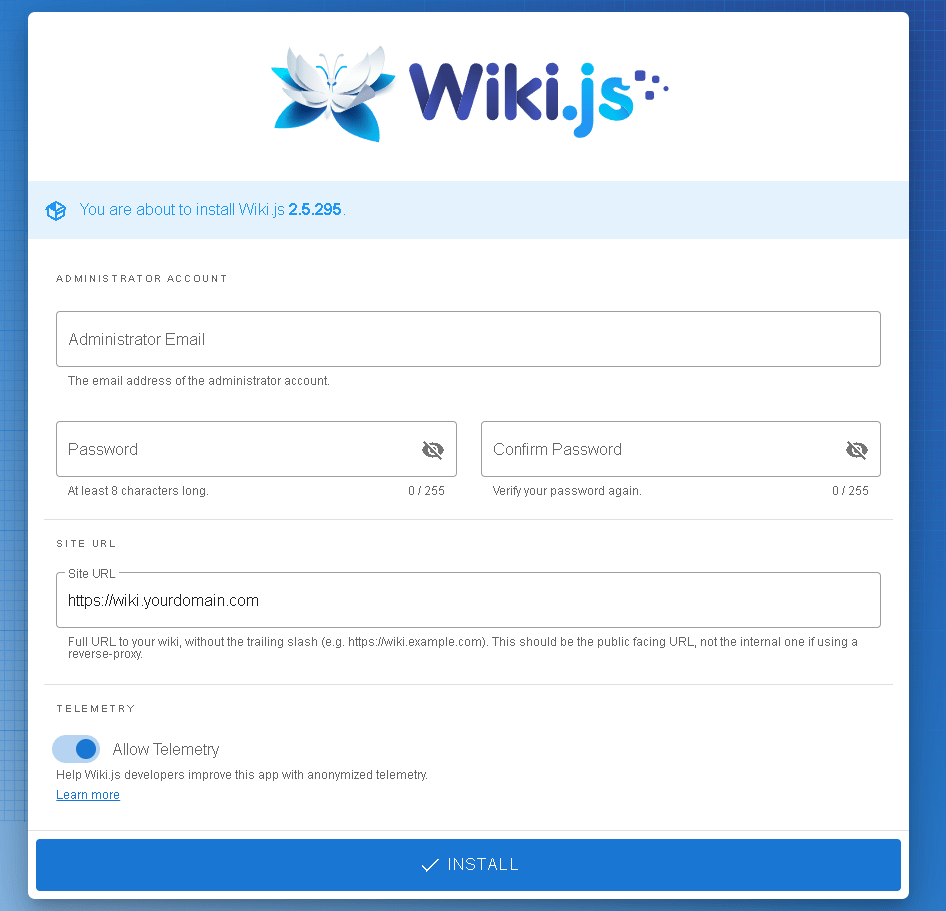
Login with the credentials you used :
Conclusion :
You have installed WikiJS on your server, This tutorial assumes that you are root!