
Introduction
Keeping an eye on your system’s performance is one of the essential tasks that any Linux user should undertake from time to time.This helps in diagnosing any bottlenecks that are likely to impact performance.
Webmin is a free and open-source front-end monitoring and administration tool that helps Linux users have a glance at various system metrics and perform administration tasks without the need of running commands on the terminal.
Webmin provides an intuitive and simple UI that provides metrics such as CPU, RAM, and Disk utilization. It also provides basic information such as the Operating system of the server, hostname, kernel version, uptime, Load average, running processes, and processor information to mention a few. Additionally, you can execute sysadmin tasks such as:
- Set up / remove user accounts.
- Change user account passwords.
- Installing, updating, upgrading & removing packages.
- Configuring firewall rules.
- Rebooting/shutting down.
- Viewing log files.
- Schedule cron jobs.
- And so much more.
In this guide, we touch base on how to install Webmin on CentOS Linux.
Step 1: Create a repo to download Webmin
If you like to install and update Webmin via Yum package manager, create the /etc/yum.repos.d/webmin.repo file.
# vim /etc/yum.repos.d/webmin.repoAdd the following repository information into the file.
[Webmin]
name=Webmin Distribution Neutral
#baseurl=https://download.webmin.com/download/yum
mirrorlist=https://download.webmin.com/download/yum/mirrorlist
enabled=1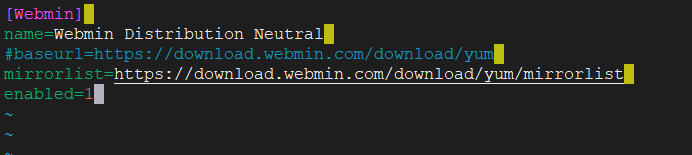
Next, download and add the Webmin GPG key with which the packages are signed as shown.
# wget https://download.webmin.com/jcameron-key.asc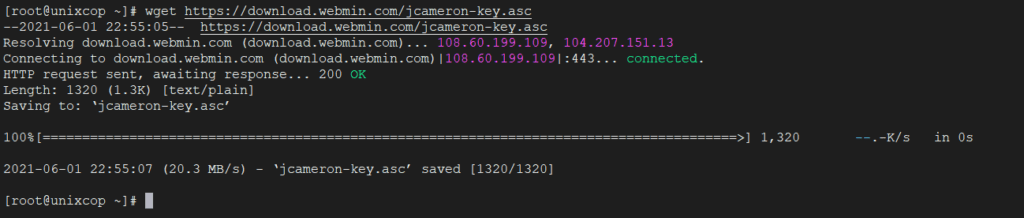
Then import the key with this command :
# rpm --import jcameron-key.ascStep 2: Install Webmin on CentOS
With the installation of dependencies complete, let’s now install Webmin with the command.
# yum install webmin -y
All dependencies should be resolved automatically and the installation will get underway and will take a couple of minutes to complete.
Upon completion, you can verify if Webmin is running by executing the old SysV init script as shown.
# /etc/init.d/webmin status
The output indicates that Webmin is up and running.
Step 3: Open Webmin Port on CentOS Firewall
By default, Webmin listens on TCP port 10000 and you can confirm this by running the netstat command as shown.
# netstat -pnltu | grep 10000
If you are behind a firewall, you need to open the TCP port 10000 as shown.
# firewall-cmd --add-port=10000/tcp --zone=public --permanent
# firewall-cmd --reload
As shown you may notice the WARNING because i enabled it before .
Step 4: Accessing Webmin Control Panel
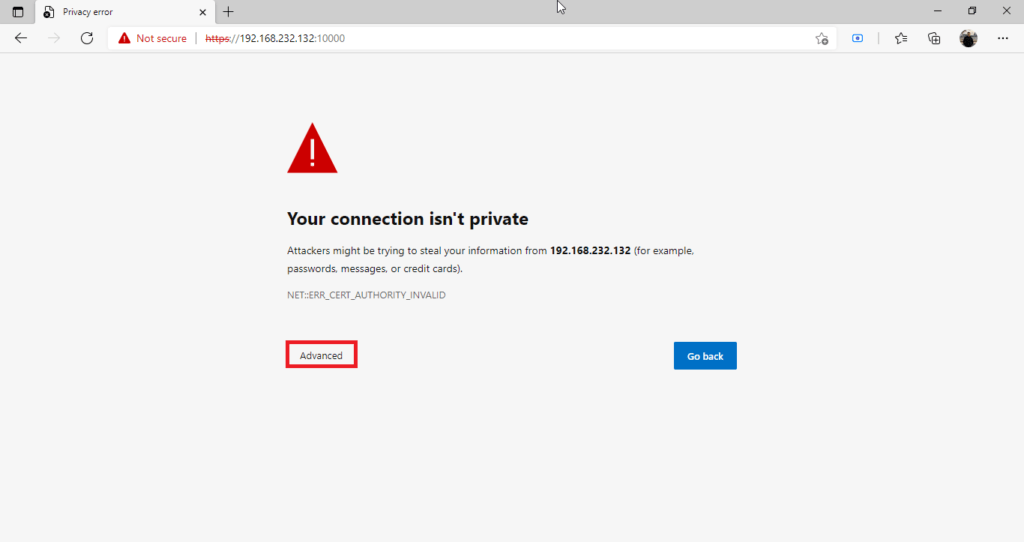
So far, we have installed Webmin and verified its status. The only thing remaining is to log into Webmin and manage our system. So, launch your favorite browser and browse the URL below.
https://serverIP:10000/When you browse the URL for the first time, you will get a “Your connection isn’t private” alert on the browser. Nothing to worry about. This is due to the fact that Webmin comes with a self-signed SSL certificate which is not signed by the CA authority.
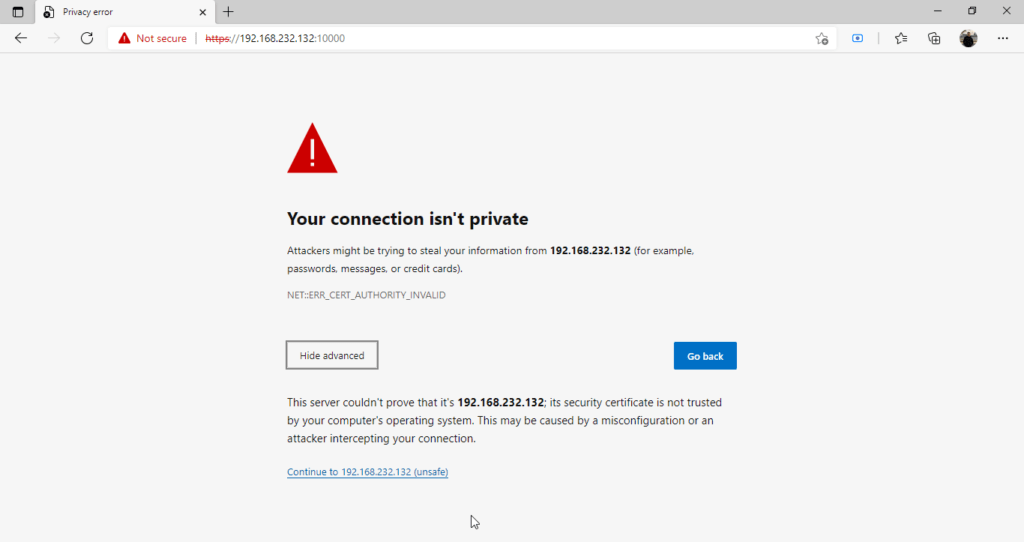
As a workaround, click on the ‘Advanced’ button as shown.
Then click to proceed to the server and click continue with unsafe mode.
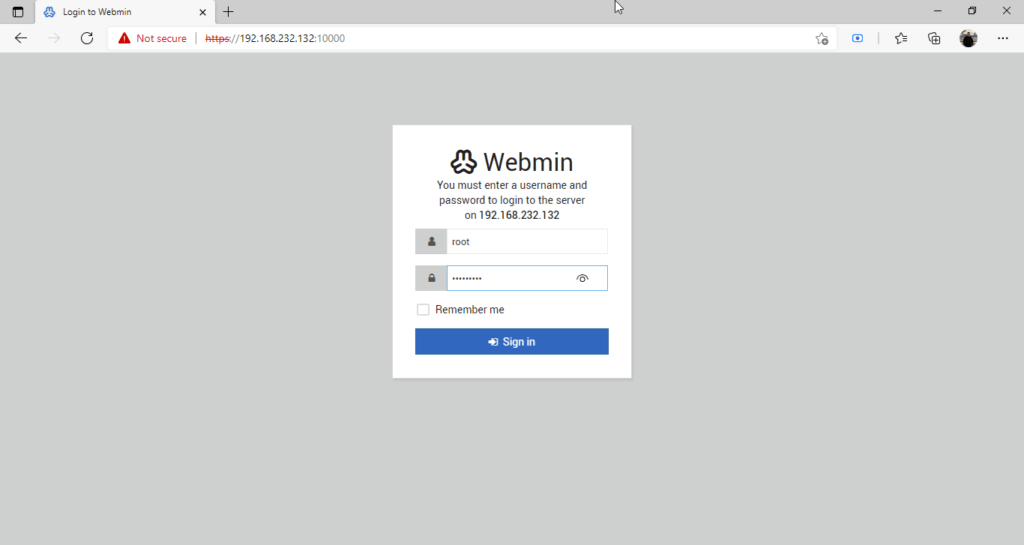
You will get the login page below. Use root credentials and click on ‘Sign In’ to log in.
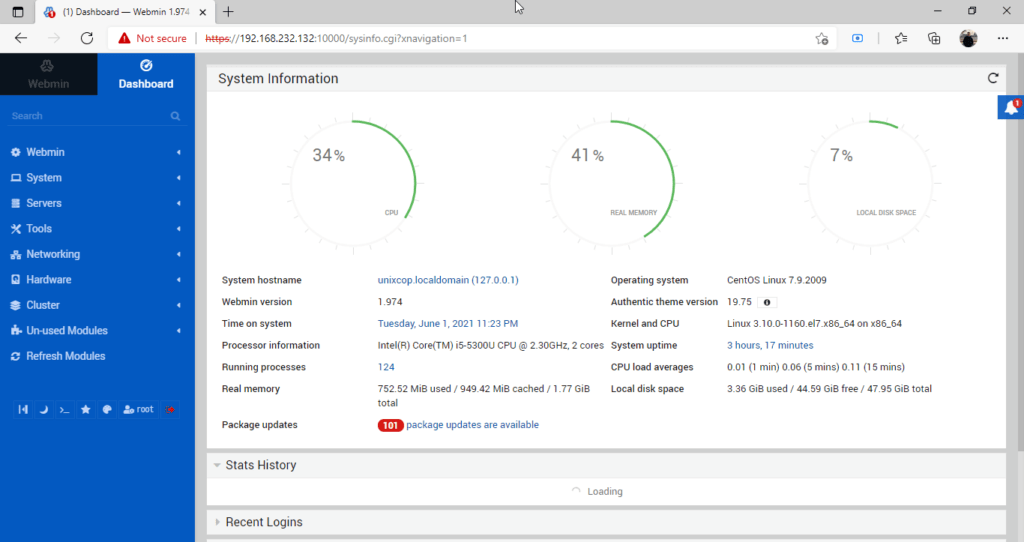
Finally, you will get the Webmin dashboard that gives you a glance at your system’s metrics, and at the left pane, you will see administrative options at your disposal.
I hope it made your work easy in installing Webmin on CentOS Linux.