
Varnish cache is also known as a caching HTTP reverse proxy. Varnish cache will boost your server to load web pages very fast, and this is the one of the key factor by Google to rank higher. It is an open-source, high-performance HTTP accelerator designed for speeding up web servers.
Hi guys ! In this tutorial, you’ll learn how to Install Varnish Cache for Nginx on CentOS 8. Varnish cache is used to increase the speed or accelerate web servers to serve the web pages. So, Varnish cache is a free web application accelerator. Varnish cache saves the web pages in-memory so that every time when a user request/access any web pages it will be loaded from in-memory instead of a refresh.
Varnish is an HTTP accelerator designed for content-heavy dynamic web sites as well as APIs. In contrast to other web accelerators, such as Squid, which began life as a client-side cache, or Apache and nginx, which are primarily origin servers,
We will go with Nginx in this tutorial. Let’s begin !
Install Varnish Cache
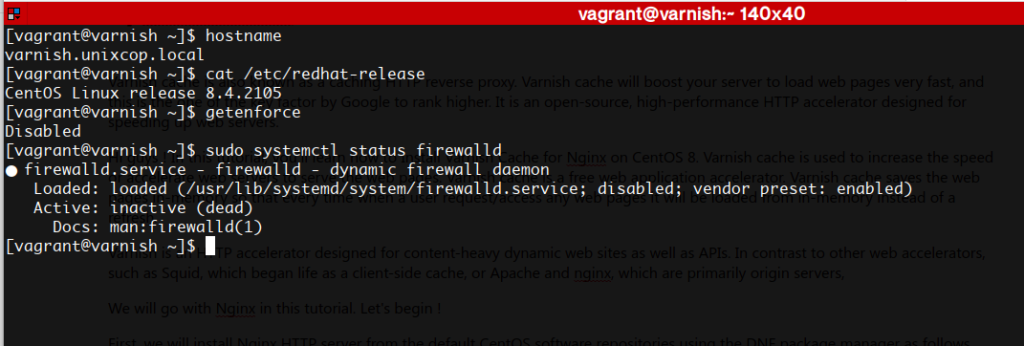
This is the pre-setup for my server
First, we will install Nginx HTTP server from the default CentOS software repositories using the DNF package manager as follows.
sudo dnf install nginx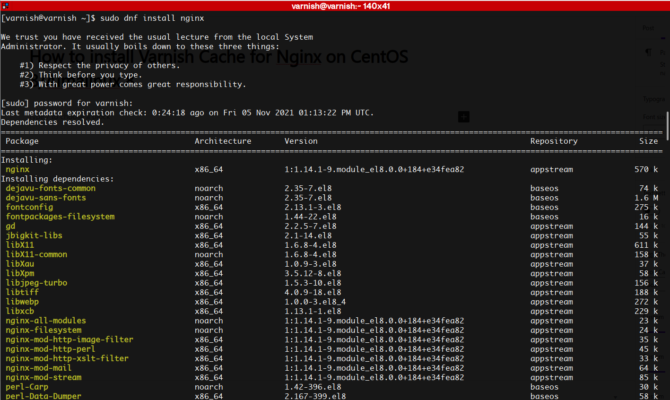
When the installation completes, start the Nginx service for now and enable it to start automatically at system boot.
Also see the status of the service by typing the following command
sudo systemctl status nginx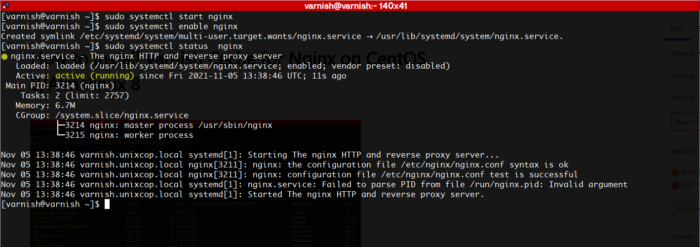
Now, let’s install varnish. It’s can be installed with the package manager
sudo dnf install varnish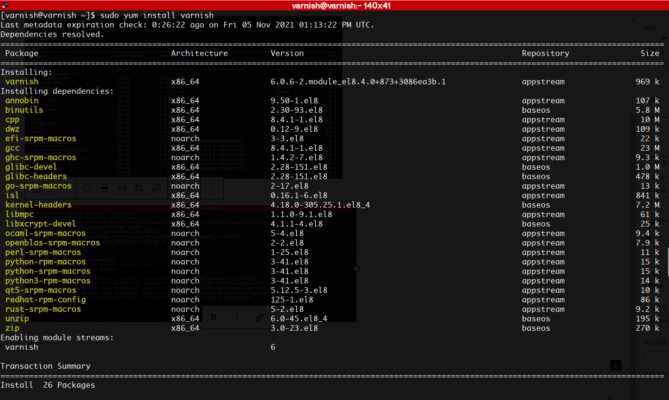
After a while, installation process is done. let’s check if it has installed successfully using the version
Run the following & you will get the installed version
varnishd -V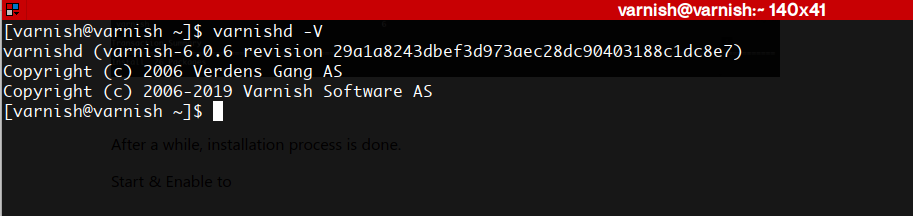
Let’s now start & enable the varnish service. Also see the status of the service if it’s running.
Run the following commands
sudo systemctl start varnish
sudo systemctl enable varnish
sudo systemctl status varnish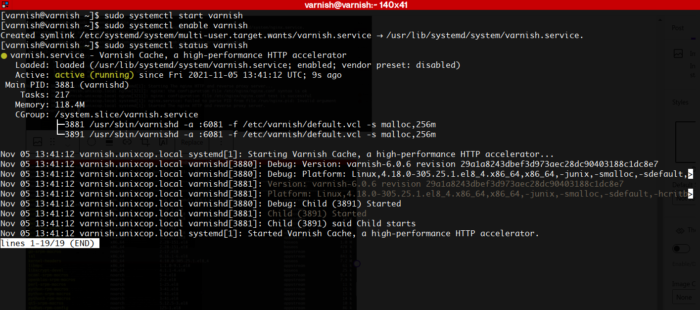
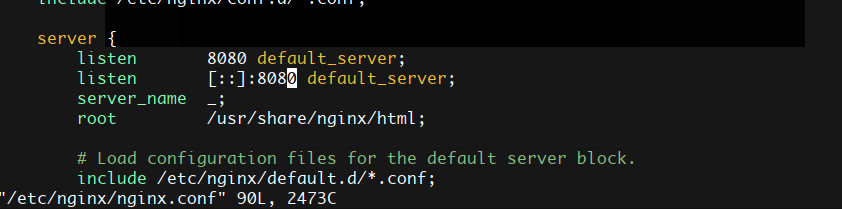
In this step, you need to configure Nginx to work with Varnish Cache. By default Nginx listens on port 80, you should change the default Nginx port to 8080 so it runs behind Varnish caching.
Open the Nginx config file /etc/nginx/nginx.conf and find the line listen 80 and change it to listen 8080 as in the server block shown in the screenshot below.
Next, open the varnish service configuration file and find the parameter ExecStart which specifies the port Varnish listens on, and change its value from 6081 to 80.
The line should be like this
ExecStart=/usr/sbin/varnishd -a :80 -f /etc/varnish/default.vcl -s malloc,256m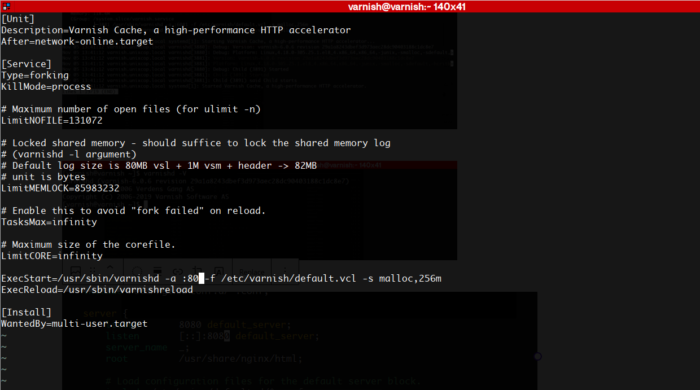
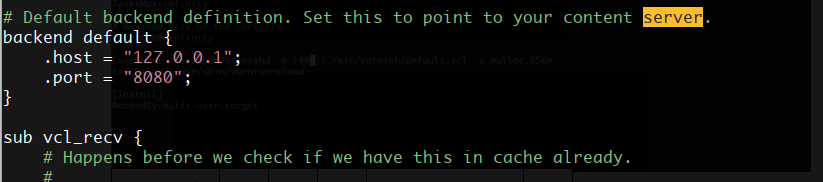
Next, set up Nginx as a backend server for Varnish proxy, in the /etc/varnish/default.vcl configuration file.
Ad set the backend default like this
After performing all the necessary configurations, restart Nginx HTTPD and Varnish cache to effect the above changes.
sudo systemctl daemon-reload
sudo systemctl restart nginx
sudo systemctl restart varnish
Finally, test if Varnish cache is enabled and working with the Nginx service using the curl command below to view the HTTP header.
curl -Ivv http://localhost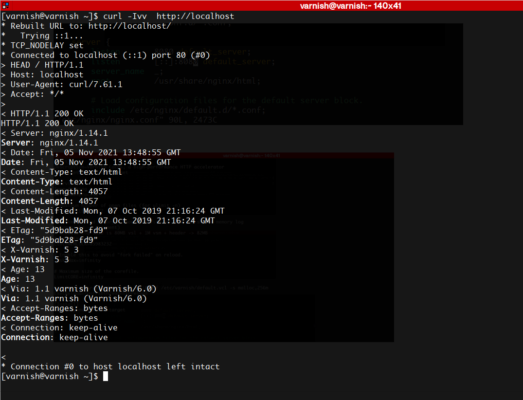
Access the server & run the following command in a separate terminal to view the logs
varnishncsa