
Introduction
Developed by Facebook in 2011, React (also referred to as ReactJS) is a Javascript library used for creating fast and interactive user interfaces. So At the time of writing, it’s the most popular Javascript library for developing user interfaces. React trounces its counterparts – Angular and Vue JS in terms of functionality and popularity.
Its popularity stems from its flexibility and simplicity and this makes it the first choice in the development of mobile apps and web applications. More than 90,000 sites use React including tech giants such as Facebook, Netflix, Instagram, Airbnb, and Twitter to list a few.
In this article, you will learn how to install ReactJS on Ubuntu 21.04 and Ubuntu 20.04.
Step 1: Installing NPM in Ubuntu
We begin the installation of React JS by installing npm – short for the node package manager, is two things. Firstly, it is a command-line tool that is used for interacting with Javascript packages, which allows users to install, update, and manage Javascript tools and libraries.
Secondly, npm is an online open-source software registry that hosts over 800,000 Node.JS packages. Npm is free and you can easily download software applications that are publicly available.
To install npm on Ubuntu Linux, login into your server as a sudo user and invoke the command below:
$ sudo apt install npm -y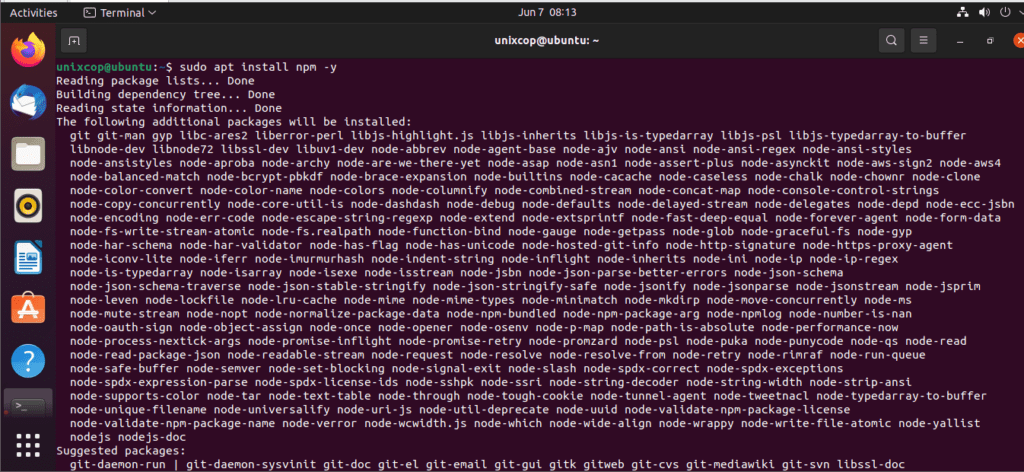
Once the installation is complete, you can verify the version of npm installed using the command:
$ npm --version
The latest version at the time of writing this is v7.5.2 as captured in the output.
The installation of npm also installs node.js and you can confirm the version of node installed using the command:
$ node --version
Step 2: Installing create-react-app Utility
create-react-app is a utility that enables you to set up all the tools required to create a React Application. It saves you a great deal of time and energy setting everything from scratch and gives you the head start needed.
To install the tool, run the following npm command:
$ sudo npm -g install create-react-app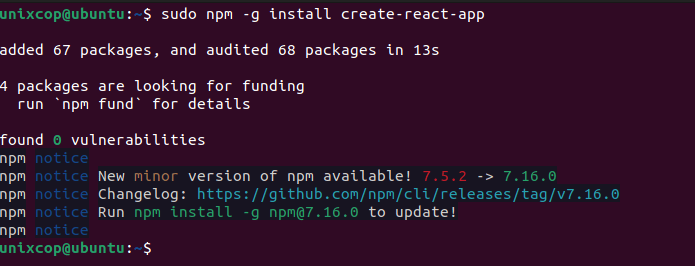
Once installed, you can confirm the version of installed by running:
$ create-react-app --version
Step 3: Create & Launch Your First React Application
Creating a React application is quite simple & straightforward. We are going to create a react app called tecmint-app as follows.
$ create-react-app unixcop-appThis takes roughly 5 minutes to install all the packages, libraries, and tools needed by the application. Some patience will come in handy.

If the creation of the application was successful, you will get the notification below giving the basic commands that you can run to start managing the application.
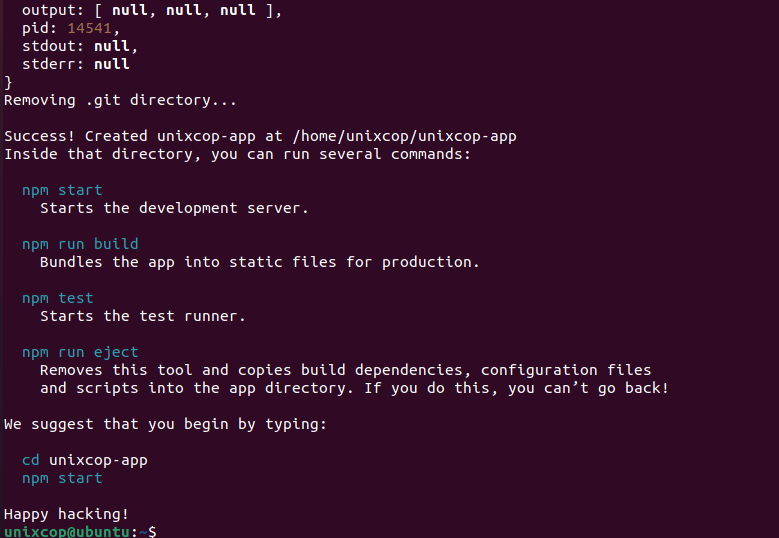
If the creation of the application was successful, you will get the notification below giving the basic commands that you can run to start managing the application.
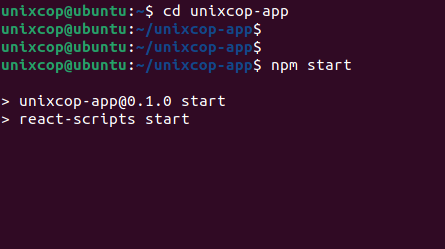
To run the application, navigate into the app directory
$ cd unixcop-appThen run the command:
$ npm start
You will end up getting the output you how to access the application on the browser but if you have the shown message below you have to enter Y to change the listening port because the the default port 3000 is taken and something is already running on it.

Fire up your browser and browse your server’s IP address
http://server-ip:3000
or
http://localhost:3000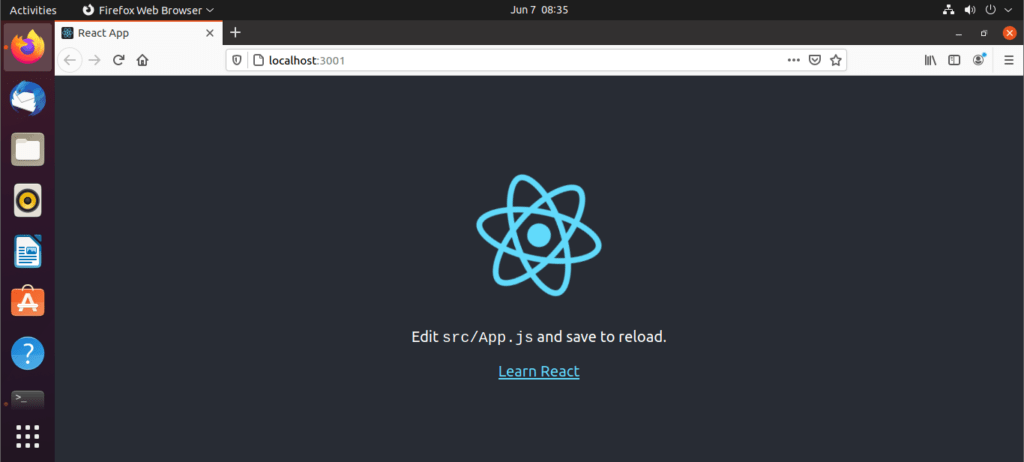
In my case i let the app to choose another port than default port .
It was 3001 as shown
Conclusion
This shows that the default React app is up and running. In this guide, we have successfully installed React JS and created an application in React.