
Pterodactyl is another open-source game server management panel. It is based on PHP – Go – React. Also, ithas a really amazing control panel. Moreover, It comes with amazing features, Console Viewer for all servers, Databases management backups and advanced server settings or for each server and it is easy to use. All the servers runs in an Docker Container. It provides support for major Source Dedicated Servers, Minecraft etc. Lets start with the tutorial!
Requirements :
- A FQDN (Fully-Qualified-Domain-Name), Pterodactyl runs on a FQDN it also can run on a bare IP Address but it’s better to have a FQDN for the panel
- A VPS Server with atleast 2-3GB of RAM (Might need to increase if you are running heavy servers)
Step 1 : Installing the required dependencies
First, We need to install the Pterodactyl required dependencies for it to work.
-- Updating the server

apt update -y

-- Installing MariaDB Server

apt install -y mariadb-common mariadb-server mariadb-client
Step 1(b) : Installing PHP & other dependencies
Then we will install our web server in this case we are installing nginx and setup PHP!
apt-get install nginx
add-apt-repository ppa:ondrej/php
apt-get update
apt install -y php8.0php8.0-{cli,gd,mysql,pdo,mbstring,tokenizer,bcmath,xml,fpm,curl,zip}
apt install -y redis-server
apt install -y certbot
systemctl enable php8.0-fpm
systemctl start php8.0-fpm
curl -sS https://getcomposer.org/installer | php -- --install-dir=/usr/local/bin --filename=composer
After you install using the above link you should get the following output:

Step 2 : Starting up and configuring the installed dependencies
— This will start the installed MariaDB Server
systemctl start mariadb
systemctl enable mariadb
— This will start the Redis Server
systemctl start redis-server
systemctl enable redis-server
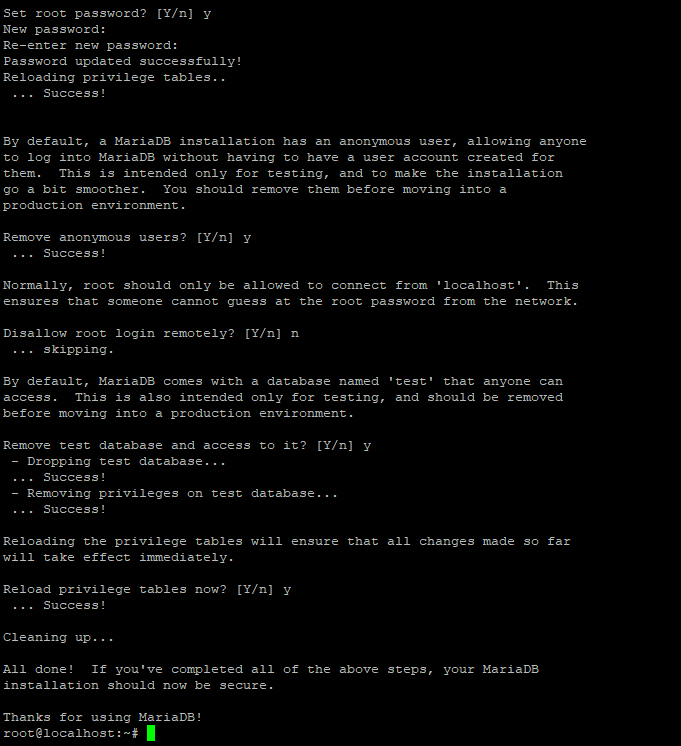
Then, We can move on to configuring our MariaDB Server
Set root password? [Y/n] Y
Remove anonymous users? [Y/n] Y
Disallow root login remotely? [Y/n] n
Remove test database and access to it? [Y/n] Y
Reload privilege tables now? [Y/n] Y
So, If you have done the following steps you will have a output like this:
Finally, We have finally installed the required packages and dependencies required for the panel and now we can further move on installing the panel
Step 3 : Installing Files
First we have to create a directory for our panel. Do the following Steps:
mkdir -p /var/www/pterodactyl
cd /var/www/pterodactyl
Then, We have to download the game panel latest files using curl
curl -Lo panel.tar.gz https://github.com/pterodactyl/panel/releases/latest/download/panel.tar.gz
tar -xzvf panel.tar.gz
chmod -R 755 storage/* bootstrap/cache/
Step 4 : Creating a Database for the panel
so, We need to create a database for the panel!
mysql -u root -p
After that, you do this step, This will ask you to enter a password, Use the password you entered in the Step 2 Configuraion
CREATE USER ‘pterodactyl’@’localhost’ IDENTIFIED BY ‘EnterYourPasswordHere’;
CREATE DATABASE gpanel;
GRANT ALL PRIVILEGES ON gpanel.* TO ‘pterodactyl’@’localhost’ WITH GRANT OPTION;
exit
Step 5 : Finalizing Panel Installation
cp .env.example .env
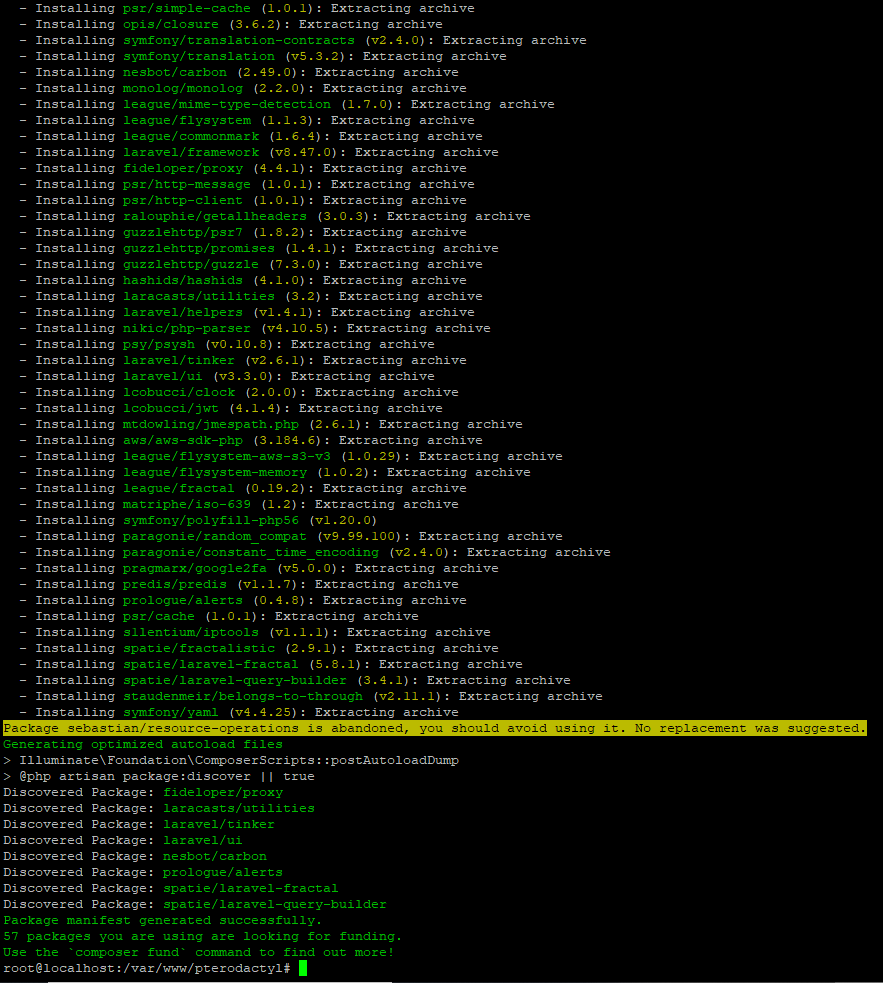
composer install –no-dev –optimize-autoloader
After doing the following command you should see an output like this
Run the following command once, If you are installing the panel for the first time and do not have any data stored in the Panel Database
php artisan key:generate --force
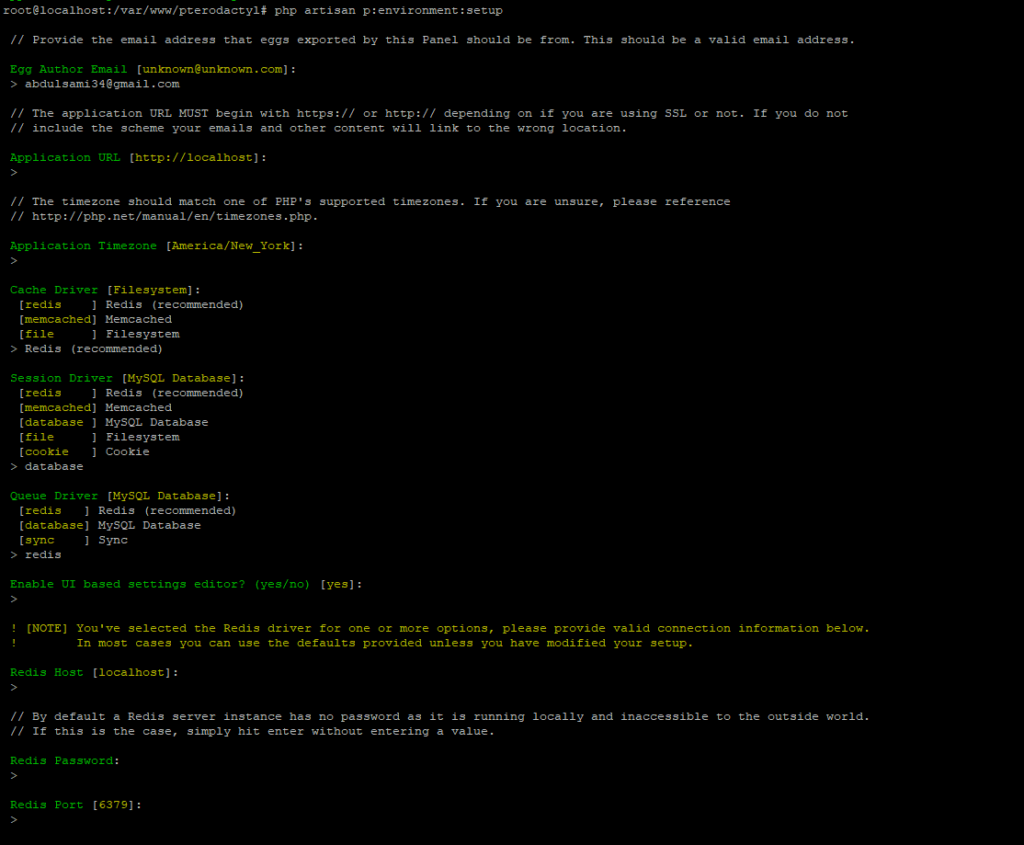
php artisan p:environment:setup
After that, you should see a screen like this, You need to follow the setup as shown in the picture or just copy as step by step:
1. Enter your email Addresss
2. Press Enter
3. Enter your timezone or press enter
4. Redis
5. database
6. redis
7. Enter
8. Set your password
9. Enter
php artisan p:environment:database
php artisan p:environment:mail
After doing the mail, It would give you multiple options to set your mail server as shown in the picture. Pick what suits you best or just enter mail if you do not intend to use the mail server.

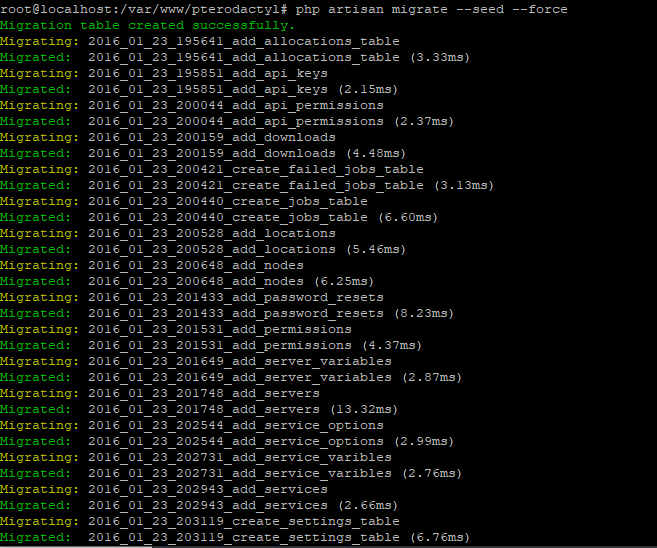
So, Now we can further continue on the database setup. The below command might take some time, So do not exit your connection. This will setup everything in the database for the panel.
php artisan migrate –seed –force
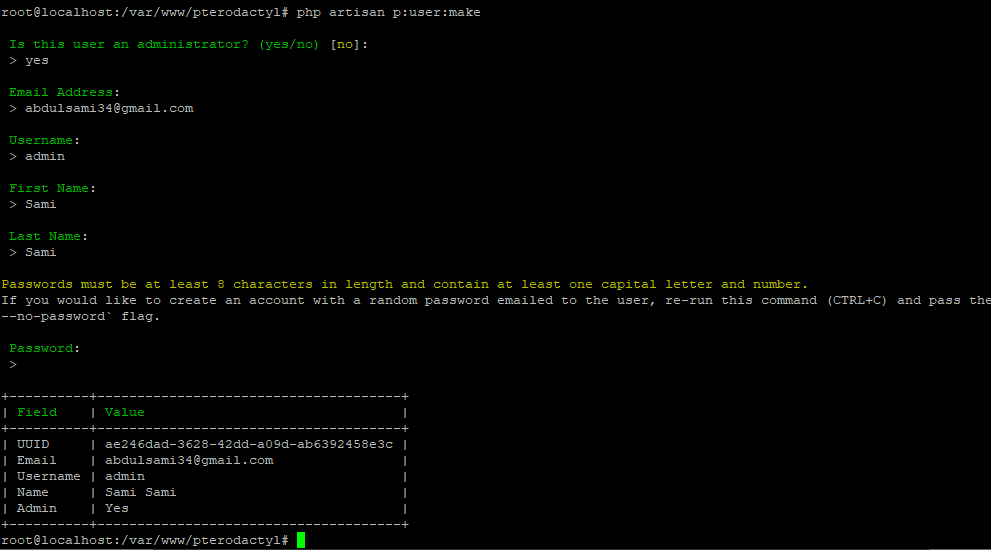
Then, we have to create a administrator user for the panel
php artisan p:user:make
then, step will be settting permissions for the files!
chown -R www-data:www-data /var/www/pterodactyl/*
Step 6 : Creating Queue Worker for Panel
So, We have to create a cronjob that will run every minute which will manage the Panel Taskks.
crontab -e
* * * * * php /var/www/pterodactyl/artisan schedule:run >> /dev/null 2>&1
cd /etc/systemd/system
nano pteroq.service
So, Paste the following content into the new file:
[Unit]
Description=Pterodactyl Queue Worker
After=redis-server.service
[Service]
Group=www-data
Restart=always
ExecStart=/usr/bin/php /var/www/pterodactyl/artisan queue:work –queue=high,standard,low –sleep=3 –tries=3
StartLimitInterval=180
StartLimitBurst=30
RestartSec=5s
[Install]
WantedBy=multi-user.target
Step 7 : Configuring Web Server
also, we need to configure our webserver, For this we need to remove the default nginx configuration file
rm /etc/nginx/sites-enabled/default
cd /etc/nginx/sites-enabled/
nano pterodactyl.conf
So, Paste the following content into the file:
server {
    listen 80;
    server_name replacethiswithyoudomain;

    root /var/www/pterodactyl/public;
    index index.html index.htm index.php;
    charset utf-8;

    location / {
        try_files $uri $uri/ /index.php?$query_string;
    }

    location = /favicon.ico { access_log off; log_not_found off; }
    location = /robots.txt  { access_log off; log_not_found off; }

    access_log off;
    error_log  /var/log/nginx/pterodactyl.app-error.log error;

    # allow larger file uploads and longer script runtimes
    client_max_body_size 100m;
    client_body_timeout 120s;

    sendfile off;

    location ~ \.php$ {
        fastcgi_split_path_info ^(.+\.php)(/.+)$;
        fastcgi_pass unix:/run/php/php8.0-fpm.sock;
        fastcgi_index index.php;
        include fastcgi_params;
        fastcgi_param PHP_VALUE "upload_max_filesize = 100M \n post_max_size=100M";
        fastcgi_param SCRIPT_FILENAME $document_root$fastcgi_script_name;
        fastcgi_param HTTP_PROXY "";
        fastcgi_intercept_errors off;
        fastcgi_buffer_size 16k;
        fastcgi_buffers 4 16k;
        fastcgi_connect_timeout 300;
        fastcgi_send_timeout 300;
        fastcgi_read_timeout 300;
    }

    location ~ /\.ht {
        deny all;
    }
}
Create a symlink for the nginx server:
sudo ln -s /etc/nginx/sites-available/pterodactyl.conf /etc/nginx/sites-enabled/pterodactyl.conf
Restart the nginx server:
systemctl restart nginx
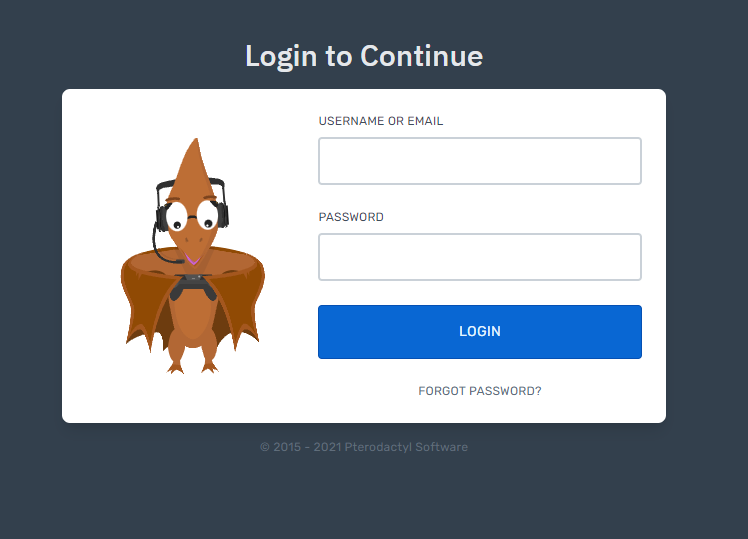
Panel should be installed by now, and you can access it on your domain! which would show you a login screen like this!
Note : This tutorial was also step by step tested again on a fresh Ubuntu 18.04. It’s better to install PHP8.0 rather than installing PHP 7.X, It will work but might give some error like 502 Bad Gateway and etc.