
Open Computer and Software Inventory Next Generation (OCS inventory NG) is free software that enables users to inventory IT assets. OCS-NG collects information about the hardware and software of networked machines running the OCS client program (“OCS Inventory Agent”). It can visualize the inventory through a web interface. Furthermore, it also includes the capability of deploying applications on computers according to search criteria. Agent-side IP Discover makes it possible to discover the entirety of networked computers and devices.
Features:
Web Based friendly interface.
Web service accessible through the SOAP interface
Support plugins through APIs
Advanced broadcasting system for deploying software installations or executing scripts and commands on computers without overloading the network
Relevant inventory information
Network discovery
Step 1: Install Necessary packages
We need to install epel and remi Repositories before installing OCS Inventory Management server so use below commands to install them.
dnf install epel-release -y
dnf install https://rpms.remirepo.net/enterprise/remi-release-8.rpm -y
Now install dnf-utils and enable powertools
dnf install dnf-utils -y
dnf config-manager --set-enabled powertools
Step 2: Install LAMP on CentOS 8
Now install Apache, Mariadb, PHP and some necessary packages for OCS using below commands
dnf install httpd mariadb-server -y
Then enable remi php repo, rest php module and install php using below commands
yum-config-manager --enable remi
dnf module reset php
dnf module install php:remi-7.3
Finally install php 7.3 with additonal packages required by OCS Inventory using below commands
dnf install php php-curl php-zip php-gd php-soap php-xml php-mbstring php-fpm mod_perl unzip curl -y
Now start and enable LAMP services on system boot.
systemctl start httpd mariadb php-fpm
systemctl enable httpd mariadb php-fpm
Secure MariaDB database engine using below command
mysql_secure_installation
Once you execute above command a script will run and you need to perform following steps.
Enter current password for root (enter for none): (If you did not set the password for MariaDB just press enter, you can set the password in next step)
Set root password? [Y/n] y
Remove anonymous users? [Y/n] y
Disallow root login remotely? [Y/n] n
Remove test database and access to it? [Y/n] y
Reload privilege tables now? [Y/n] y
Configure firewall to allow requests on Apache web server
firewall-cmd --permanent --add-service=http
firewall-cmd --permanent --add-service=https
firewall-cmd --reload
It is necessary to enable rewrite module for Apache to work OCS inventory properly. so edit httpd.conf file using below command
vi /etc/httpd/conf/httpd.conf
and add below lines at the end of this file.
LoadModule rewrite_module modules/mod_rewrite.so
Then save changes to file.
Now configure PHP.INI file to make necessary changes for OCS Inventory Management server
vi /etc/php.ini
and add below lines in it
upload_max_filesize = 20M
post_max_size = 20M
max_execution_time = 300
max_input_time = 300
memory_limit = 256M
restart Apache using below command to load new changes.
systemctl restart httpd
Step 2: Install OCS Inventory Server
We need to install OCS repository in order to download it so use below command to install its repo
dnf install https://rpm.ocsinventory-ng.org/ocsinventory-release-latest.el8.ocs.noarch.rpm -y
Now use following command to install OCS
dnf install ocsinventory -y
Once OCS Inventory installed, create database for OCS. Always create database named ocsweb for OCS because it is used this database name by default. If you use another name for OCS database then you need to make some changes in configuration of OCS server files.
mysql -u root -p
CREATE DATABASE ocsweb;
GRANT ALL ON ocsweb.* TO 'ocs'@'localhost' IDENTIFIED BY 'yourpassword';
FLUSH PRIVILEGES;
Exit;
use below command to import OCS database.
mysql -u root -p ocsweb < /usr/share/ocsinventory-reports/ocsreports/files/ocsbase.sql
Step 3: Access OCS Inventory Web Interface
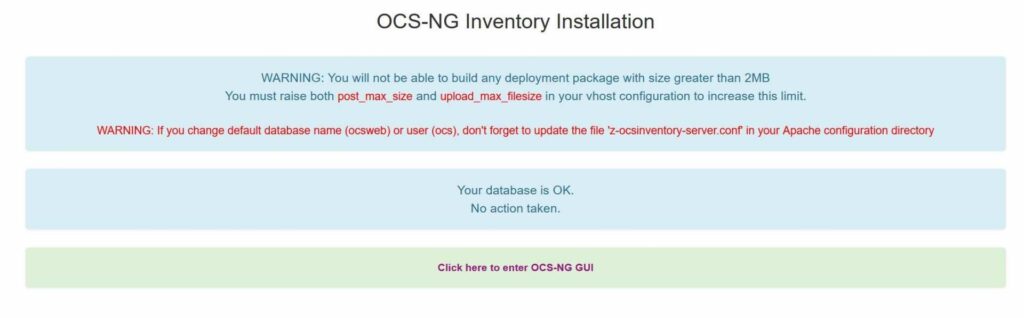
Open your web browser and access the OCS web interface using below URL. Do not forgot to replace your IP Address
http://YOUR-SERVER-IP/ocsreports/install.php
Click on “Click here to enter OCS-NG GUI” to move on next page.
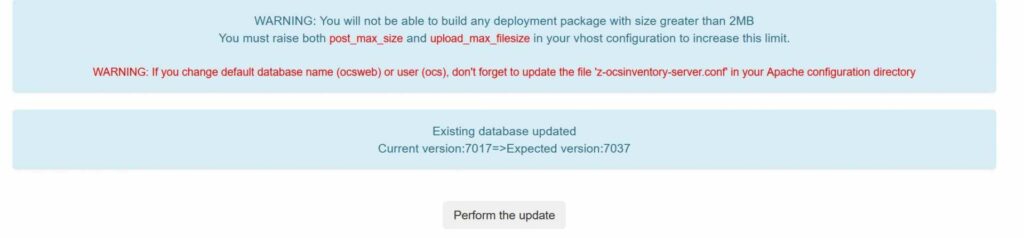
Then you will see below page, click on “Perform the update” to install latest updates.
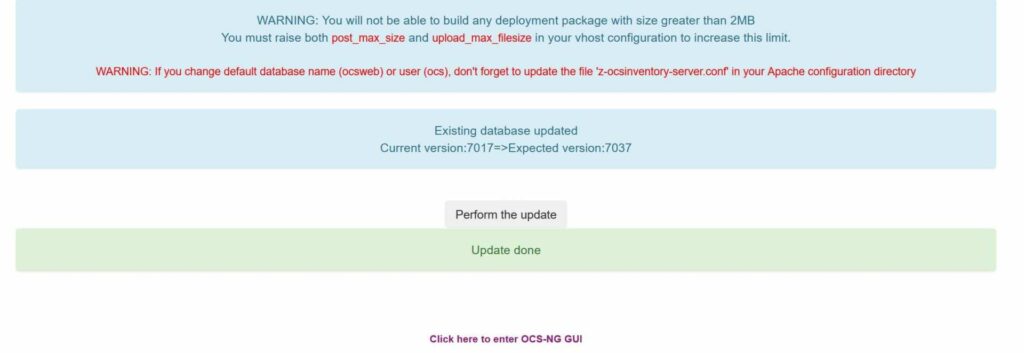
Once updates installed click again on “Click here to enter OCS-NG GUI“
and you will move to login page, here enter login details. Default username and password is admin
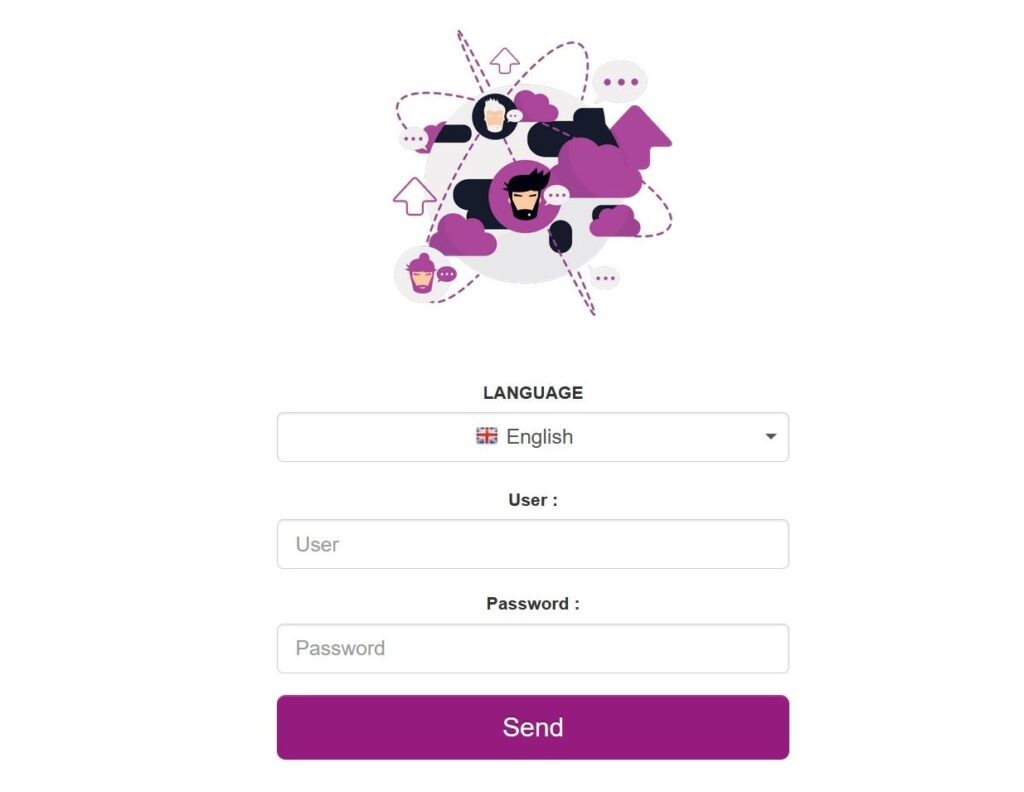
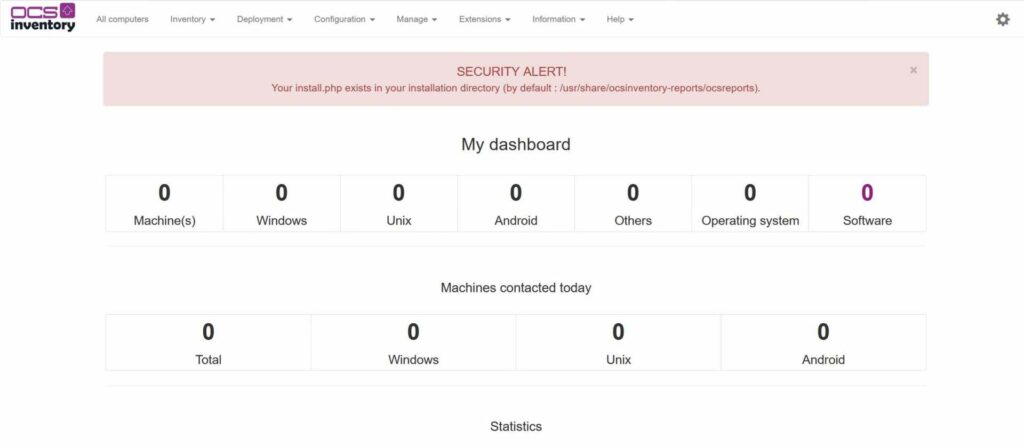
Finally you will login to OCS Inventory and see similar page.
Congratulations, you have installed OCS successfully on CentOS 8 now you can manage your IT inventory.