
Hello, friends. Today, you will learn how to install MyWebSQL on Ubuntu 20.04.
MyWebSQL is a web application created with PHP that allows us to manage an instance of MariaDB / MySQL, PostgreSQL or SQLite.
Being compatible with these tools can be of great help in many projects.
So, with MyWebSQL you can create, modify and delete data, tables, and databases all from a comfortable web interface. Let’s get started.
Install MyWebSQL on Ubuntu 20.04
Install Apache and PHP
Since this is a web tool created with PHP, we have to install these two components.
Open a terminal or SSH session and refresh the system.
sudo apt update
sudo apt upgrade
Then install Apache
sudo apt install apache
Next, install PHP, its modules and also the unzip package needed for our post.
sudo apt install php7.4 libapache2-mod-php7.4 php7.4-json php7.4-common php7.4-gmp php7.4-curl php7.4-mysql php7.4-pgsql php7.4-pgsql php7. 4-sqlite3 php7.4-intl php7.4-mbstring php7.4-xmlrpc php7.4-gd php7.4-cli php7.4-bcmath php7.4-xml php7.4-zip php7.4-imap unzip php7.4-imap unzip
Remember that in your firewall, you have to open ports 80 and 443 for Apache access.
Then apply the changes by restarting the Apache service.
Install MariaDB
In this post, we will use MariaDB to demonstrate the installation of MyWebSQL but in this step you can install PostgreSQL or SQLite and you can still take advantage of the application.
So, install MariaDB sudo apt install mariadb-server Then, change the root user’s password by using the command
sudo mysql_secure_installation
After changing the password, you will be asked a few confirmation questions that you must answer Y.
Now create a new database that will serve as a starting point for using MyWebSQL.
So, access the MariaDB shell.
sudo mysql -u root -p
Create the database with the name you consider correct.
CREATE DATABASE websqldb;
Then, a user different from the root user. Call it whatever you want, and set a secure password.
CREATE USER 'user'@'localhost' IDENTIFIED BY 'password';
Grant permissions on the new database.
GRANT ALL ON websqldb.* TO 'user'@'localhost' WITH GRANT OPTION;
Refresh permissions.
FLUSH PRIVILEGES;
Finally, exit the shell
exit;
Download MyWebSQL on Ubuntu 20.04
Create a folder to host MyWebSQL in the Apache web directory.
sudo mkdir /var/www/html/mywebsql/
Then download the latest version available. At the time of writing this post, it is 3.8.
wget https://liquidtelecom.dl.sourceforge.net/project/mywebsql/stable/mywebsql-3.8.zip -O mywebsql.zip

Now unzip the file.
sudo unzip mywebsql.zip
Move the contents of the folder to the created folder.
sudo mv mywebsql/* /var/www/html/mywebsql
Make Apache the owner of the folder,
sudo chown -R www-data:www-data /var/www/html/mywebsql/
And give it the necessary permissions
sudo chmod -R 755 /var/www/html/mywebsql/
The next step is to create a new Virtual Host for Apache to better manage the MyWebSQL site.
sudo nano /etc/apache2/sites-available/mywebsql.conf
And add the following
<VirtualHost *:80>
    ServerAdmin [email protected]
    DocumentRoot /var/www/html/mywebsql
    ServerName domain

    <Directory /var/www/html/mywebsql>
        Options FollowSymlinks
        AllowOverride All
        Require all granted
    </Directory>

    ErrorLog ${APACHE_LOG_DIR}/example.com_error.log
    CustomLog ${APACHE_LOG_DIR}/example.com_access.log combined
</VirtualHost>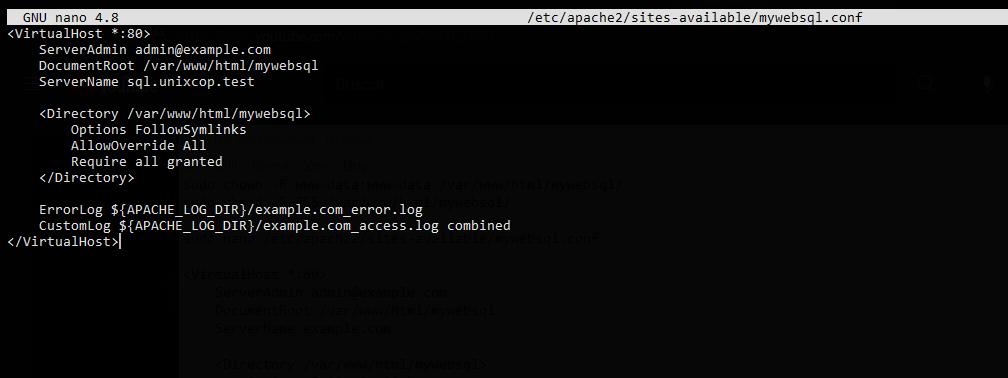
Replace the ServerName value with your domain. Save the changes and close the editor.
Enable the new configuration
sudo a2ensite mywebsql.conf
And the rewrite module
sudo a2enmod rewrite
Finally, apply all changes by restarting Apache.
sudo systemctl restart apache2
You are done.
Access to MyWebSQL
It is recommended to take a look at http://your-domain/install.php this file shows if the server meets the requirements. If it does, you can exit the page and delete it.
sudo rm /var/www/html/mywebsql/install.php
And go to http://your-domain to see the login page.

Log in with the credentials created for the new user, and finally, you will see the following image.
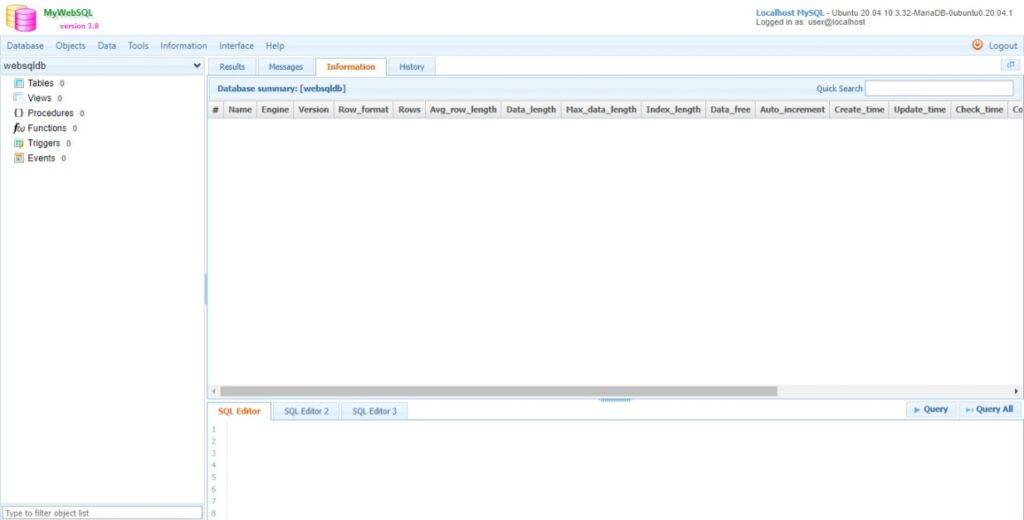
So, enjoy it.
Conclusion
MyWebSQL is a very useful tool for architects. In this post, you have learned how to install it on Ubuntu 20.04. Thank you.