
Moodle is an open source Learning Management System (LMS) that you can use to create online courses. Is used by schools, universities, workplaces and many other sites. In this article I will show you how to install moodle on FreeBSD.
Pre-requisites
Moodle can run on any webserver -like Apache, Nginx, IIS- that supports PHP. Moodle also need a database and support this databases: PostgreSQL, MySQL or MariaDB, MS SQL Server or Oracle (but they didn’t recommend to run on oracle as you can read here).
In this tutorial we will use Apache as webserver and PostgreSQL as database. In case you don’t have yet a running webserver with apache, you can check this tutorial to learn how to install Apache, PHP and MySQL no FreeBSD. To learn PostgreSQL with FreeBSD, you can follow this tutorial.
I will use PostgreSQL because I have one already running and I get better results in terms of performance. But what works for my doesn’t have to work for every one; so it’s ok if you choose MySQL, it’s practically the same installation.
Let’s get started then
Database
First we will create a database to store moodle and it’s user:
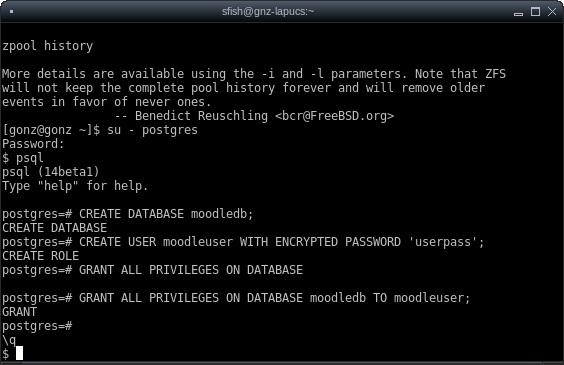
Login into postgres and run the following commands to create a database named moodledb and a user named moodleuser who will be the owner of the database:
CREATE DATABASE moodledb;
CREATE USER moodleuser WITH ENCRYPTED PASSWORD 'userpass';
GRANT ALL PRIVILEGES ON DATABASE moodledb TO moodleuser;
Data directory
Create a directory outside your webroot, that is, not being accessible via the web. Moodle needs it to store it’s files like homeworks, tests, powerpoints, notes, etc.. in general everything that doesn’t go to the database and is not a piece of code. I will choose /var/moodledata, but you can create wherever you need, just take care that the webserver will have permissions to write in there and if you choose NFS notice that it could result on a slow moodle and you should consider caching.
# mkdir /var/moodledata
# chown www:www /var/moodledata
In general, apache runs with the www user; if you have another, choose the correct one in the chown command.
Moodle installation
You download the latest release from https://download.moodle.org/ . I prefer the ports because there could be dependencies -tipically, PHP modules- that I don’t have already installed. We will back later with those php modules.
An alternative approach could be install the port just to solve the dependencies and then download and install the latest release.
There are several versions of moodle available as port, I will go with the last one (moodle 3.11):
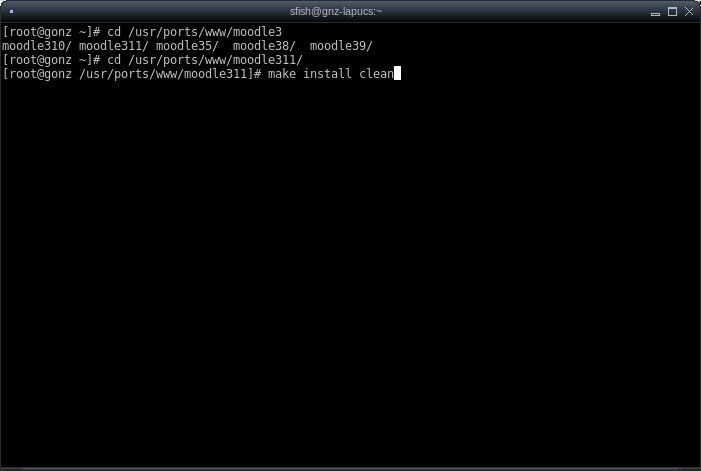
Run the next commands and follow the instructions on screen:
cd /usr/ports/www/moodle311
make install clean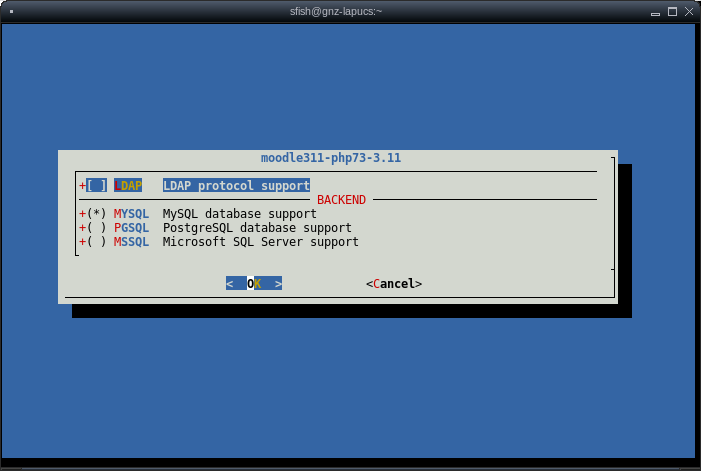
As I said before, I’lll go with PostgreSQL database. In the University I work, we have more than 20000 users among students and teachers, and a lot of others systems, so we use LDAP and in my installations I usually choose that option.
It’s done when you reach the following screen:
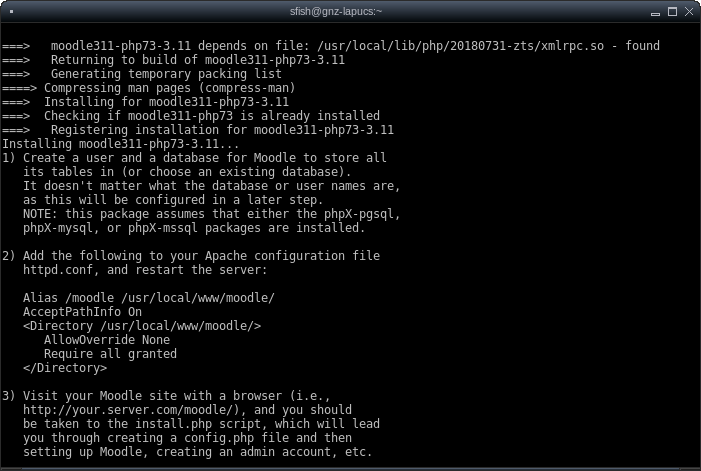
We already created the database and a user for moodle, so first step is ready. Let’s done the second step, add the following configuration to /usr/local/etc/httpd.conf and restart Apache:
Alias /moodle /usr/local/www/moodle/
AcceptPathInfo On
<Directory /usr/local/www/moodle/>
  AllowOverride None
  Require all granted
<Directory /usr/local/www/moodle/>
I’ll add another additional step: to made the moodle code directory owned and writable by Apache. Because later you could want to add plugins or themes and if you didn’t made writable, you will have to upload manually via (s)ftp. Just run:
chown -R www:www /usr/local/www/moodleNow let’s go with step 3: visit your moodle site and follow the wizard to actually install moodle.
Actual moodle installation
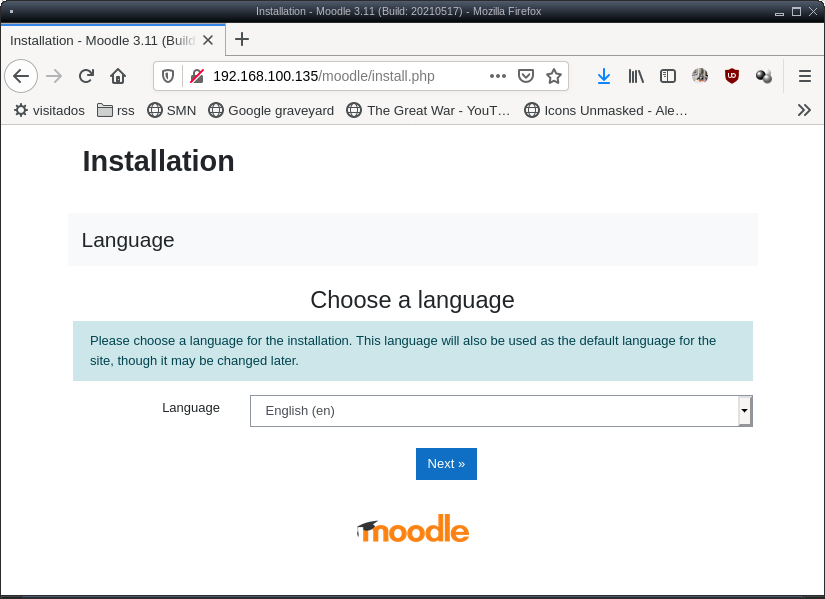
After edited the apache configuration and restarted the server, point your browser to your moodle site and this will launch the installer:
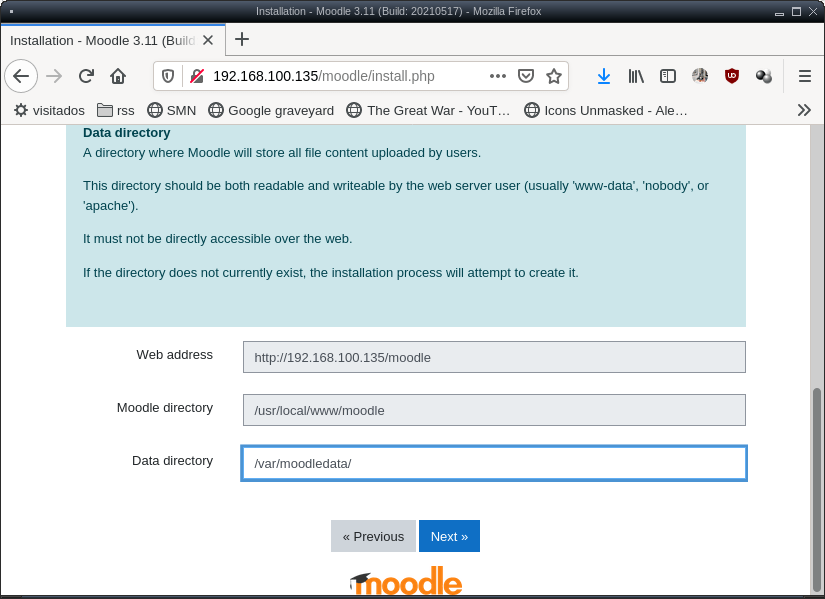
On the next screen you’ll be asked three things:
- Web address: the URL of your moodle site. You can’t change, at least for now
- moodle directory: the path where your moodle code are. You can’t change, at least for now
- Data directory: the directory we’ve created on a previous section, /var/moodledata
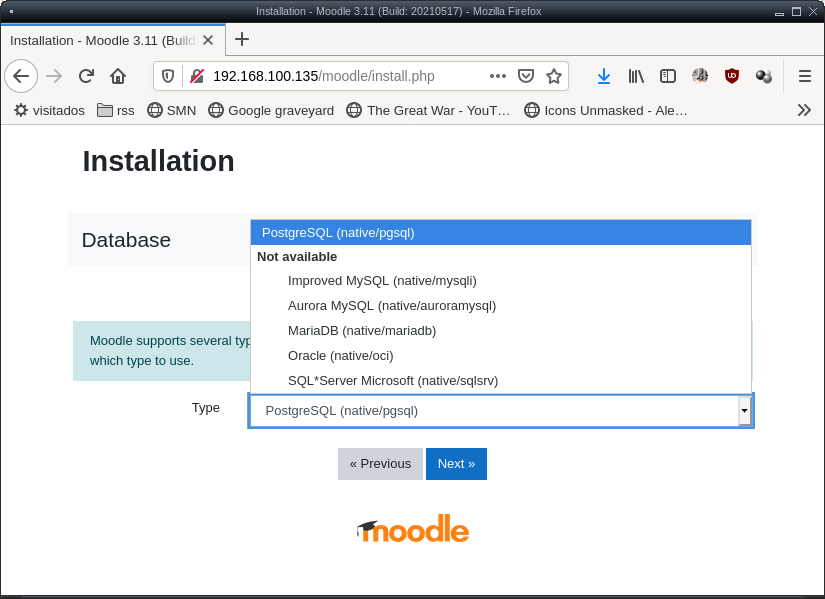
On the next screen we choose our database driver, as I only have the php module for PostgreSQL it shows me all the options under “Not available”. But I will use Postgres anyway so it’s ok.
The next screen will ask for database information:
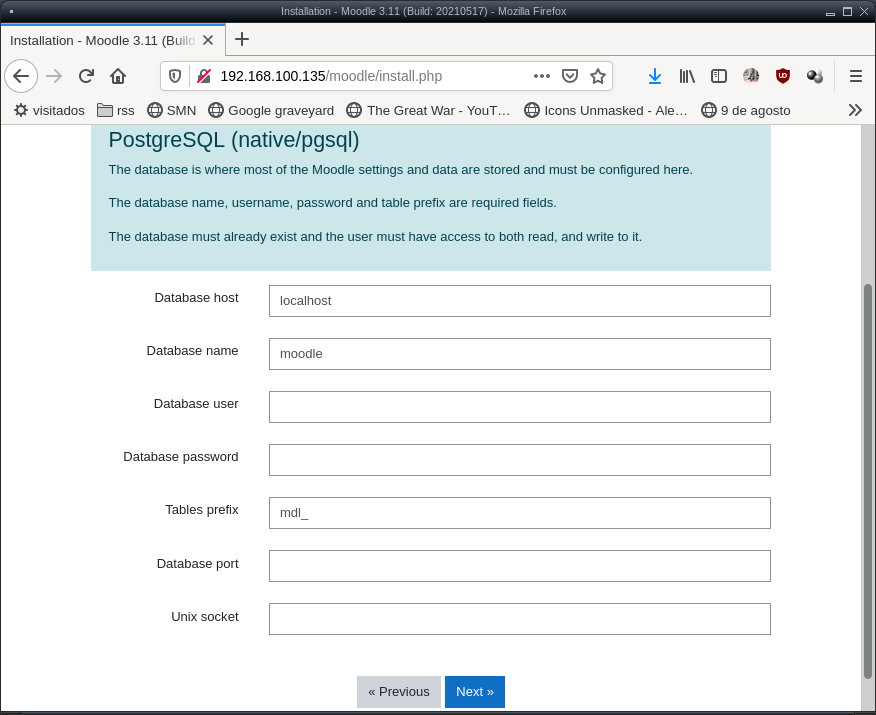
This is the information I’ll fill in this installation:
- host: localhost (if you have a remote database server, fill with the ip or fqdn name)
- database name: moodledb (as created in a previous section)
- user: moodleuser
- password: userpass
- The other options you can leave the default values
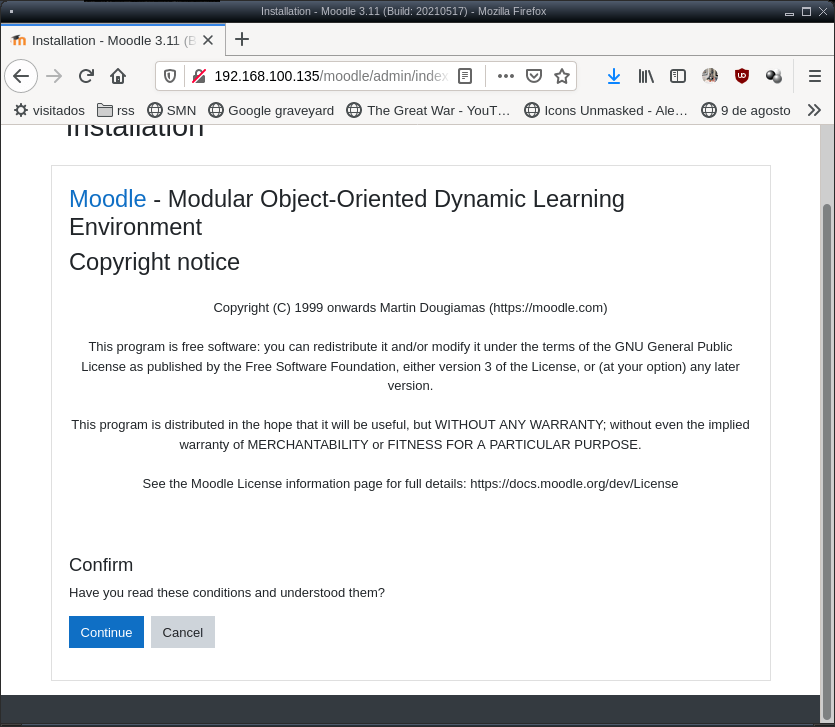
The next screen will ask you to read the license and ask for confirmation:
The installer then will check for the environment to meets the minimum requeriments:

If everything is ok, just hit continue. If there are a warning, next to that warning there are a link to help you.
In case of missing php modules, or let’s say didn’t like PostgreSQL and wants to switch to MySQL, but you didn’t have the php module for mysql, open a console, and configure the port php73-extensions, choose the missing modules and when it’s over, restart your apache and your refresh (with F5) this screen.
# cd /usr/ports/lang/php73-extensions
# make config install clean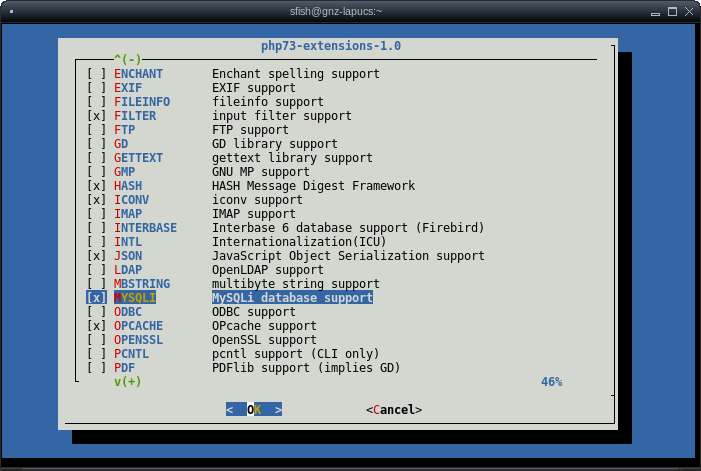
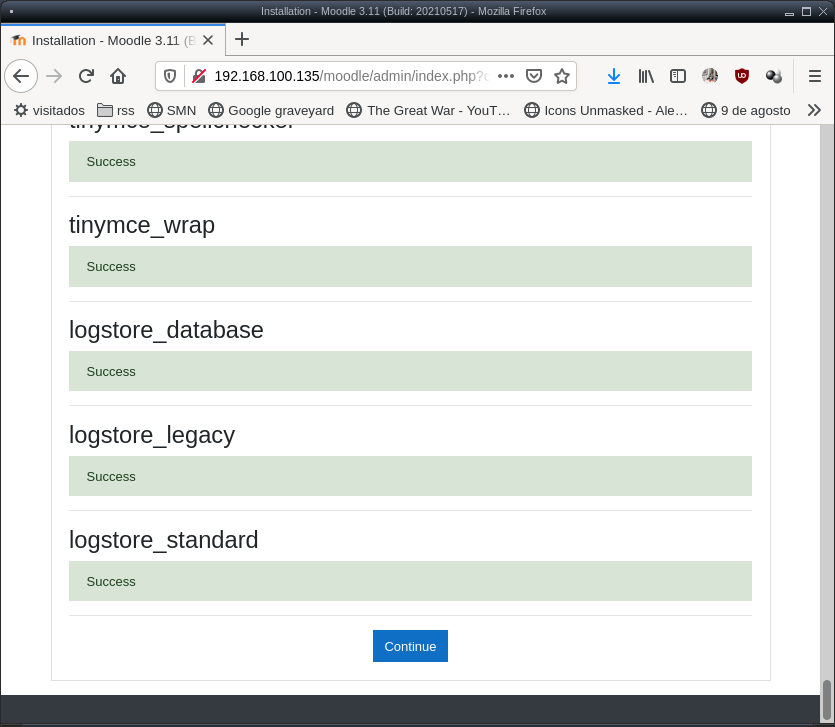
Then the moodle installer will start to create database tables and populate with basic information. Wait a while until you see this screen, it’s a long screen, scroll down to the end until you see the “Continue” button:
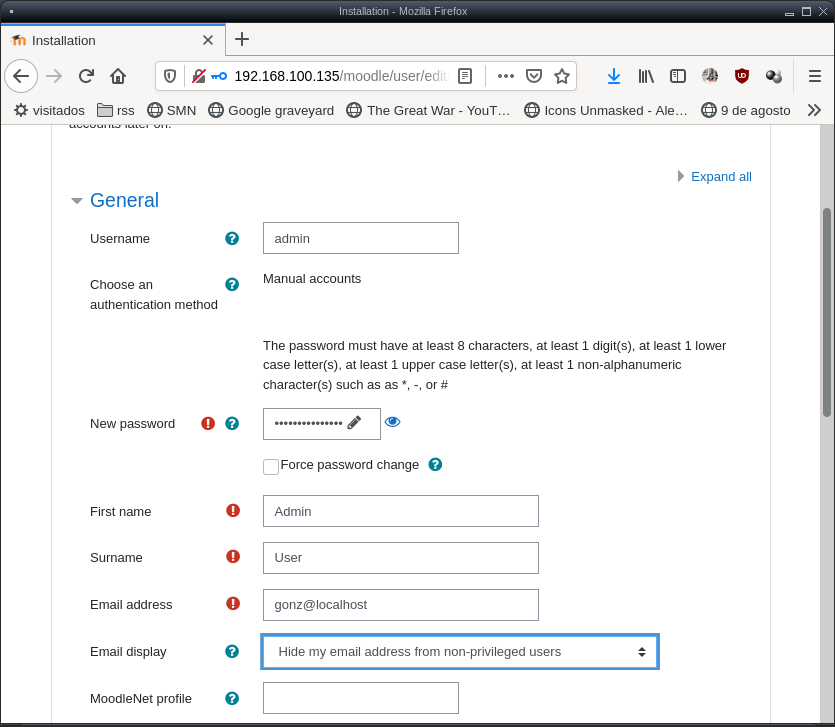
Next you will be asked about the admin super user information (username, password, e-mail, and some profile information like a description or the city you live). The fields marked with a red ! are required and can not be left blank:
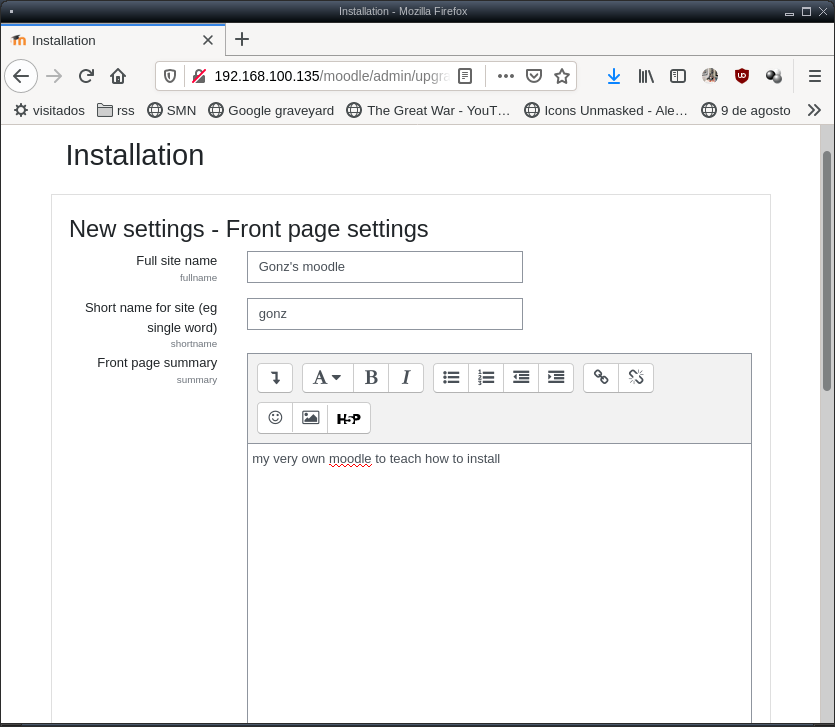
The installer ask for your site “profile”: full site name, a single word name, a little description; and other settings about timezone or if you will allow users to self register
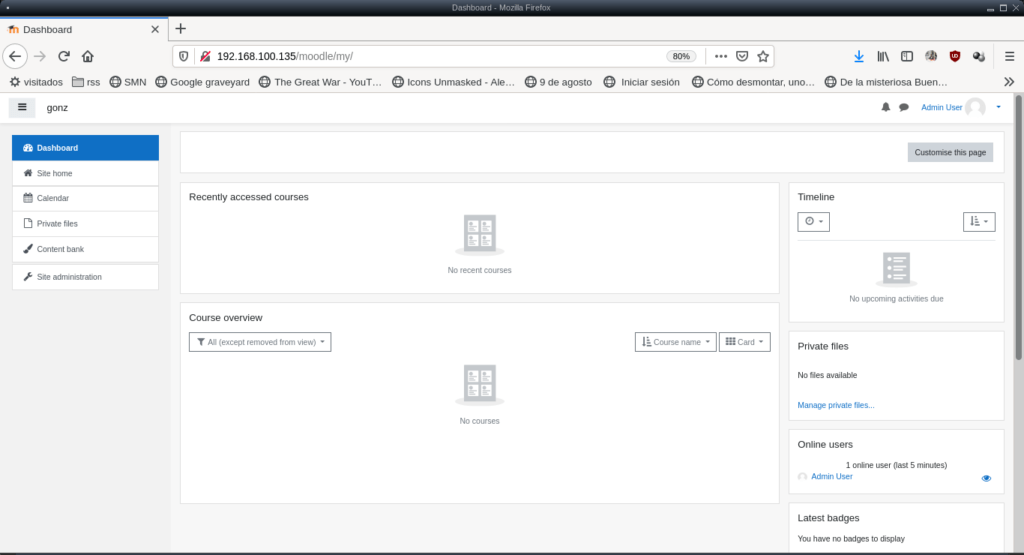
Now two things could happen: the moodle installer asks you to download a config.php and upload to your moodle directory but as previously we’ve changed the owner of the moodle directory so apache can wrote there, the config file it’s saved and you are ready to start, congratulations!
Where to go from here
You’ll find the documentation located here: https://docs.moodle.org/311/en/Main_page
You probably agree with me that this dashboard screen it’s kinda disappointing, but this is only because it’s a brand new installation that you need to customize. There is an admin quick guide here: https://docs.moodle.org/311/en/Admin_quick_guide were you will learn the minimum to start.
The you should continue with the teacher quick guide, or hand it that guide to your teachers: https://docs.moodle.org/311/en/Teacher_quick_guide