
Hello, friends. In this post, you will learn how to install GlassFish on Ubuntu 22.04
What is GlassFish?
According to the GlassFish website, we have this definition:
GlassFish is the Open Source Java EE Reference Implementation; as such, we welcome external contributions.
In other words, it is a web-based Java EE application server. Something similar to Tomcat but at another level.
Install GlassFish on Ubuntu 22.04
The GlassFish installation process is simple and can be done in a few steps. However, we have to perform a few steps to take it.
Prepare the system…
Connect via SSH to your server and once you do so, update it completely.
sudo apt update
sudo apt upgrade
After this, install the unzip package to unzip ZIP files
sudo apt install unzipThen create a new user dedicated to GlassFish.
sudo useradd -m -d /opt/glassfish -U -s /bin/false glassfishNow we can continue.
Install Java on Ubuntu 22.04
The next step is to install Java because GlassFish requires it. You can do this by running the following command:
sudo apt install default-jdkTo check that everything was successful, display the installed version of Java.
java --versionSample Output:
openjdk 11.0.16 2022-07-19
OpenJDK Runtime Environment (build 11.0.16+8-post-Ubuntu-0ubuntu122.04)
OpenJDK 64-Bit Server VM (build 11.0.16+8-post-Ubuntu-0ubuntu122.04, mixed mode, sharing)
We will be able to continue.
Download and install GlassFish on Ubuntu 22.04
Now you can download GlassFish
wget https://www.eclipse.org/downloads/download.php?file=/ee4j/glassfish/glassfish-6.2.5.zip -O glassfish.zip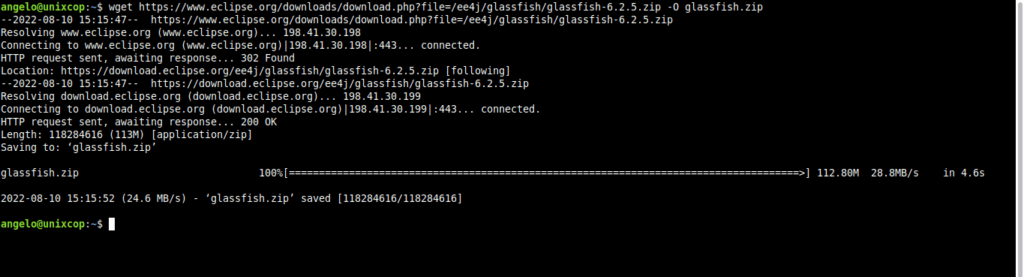
Then, unzip it to /opt/
sudo unzip glassfish.zip -d /optThe next step is to make the generated folder belong to the user we created for GlassFish.
sudo chown -R glassfish: /opt/glassfish6At this point GlassFish is already installed, but the best way to use it is through a Systemd service.
To create one for GlassFish:
sudo nano /etc/systemd/system/glassfish.serviceAnd add the following
[Unit]
Description = GlassFish Server 6
After = syslog.target network.target

[Service]
User=glassfish
ExecStart=/opt/glassfish6/bin/asadmin start-domain
ExecReload=/opt/glassfish6/bin/asadmin restart-domain
ExecStop=/opt/glassfish6/bin/asadmin stop-domain
Type = forking

[Install]
WantedBy = multi-user.target
Save the changes and close the editor. Apply them with the following command.
sudo systemctl daemon-reloadNow you can start the service and check its status
sudo systemctl start glassfish
sudo systemctl status glassfish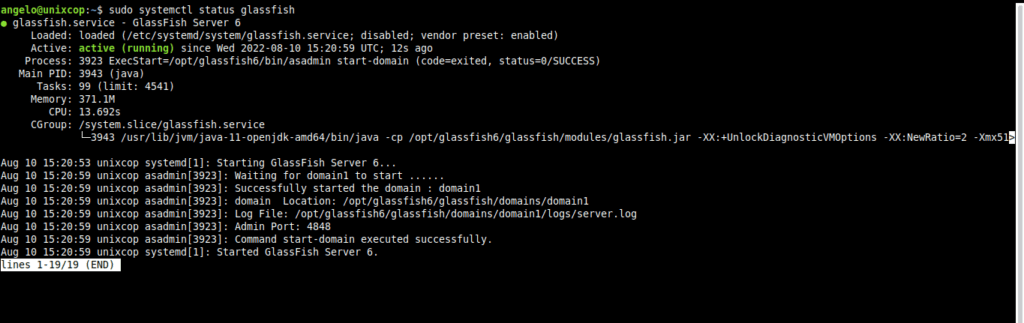
Configuring GlassFish before using it
Although we’re almost done, it’s a good idea to do some configuration first.
First, set a password for the administrator user. This allows you to administer the server.
Run this command
sudo /opt/glassfish6/bin/asadmin --port 4848 change-admin-passwordYou will be prompted to enter the admin user and password. At this point, there is no password set, so after entering the name, just press ENTER and then set the new password.
Enter the admin user name [default: admin]>
Enter the admin password>
Enter the new admin password>
Enter the new admin password again>>
Command change-admin-password executed successfully.
And then, enable secure access
sudo /opt/glassfish6/bin/asadmin --port 4848 enable-secure-adminThere you will have to enter the administrator user with the newly created password.
Enter admin user name> admin
Enter admin password for user "admin">
You must restart all running servers for the change in secure admin to take effect.
Command enable-secure-admin executed successfully.
To apply the changes, restart GlassFish
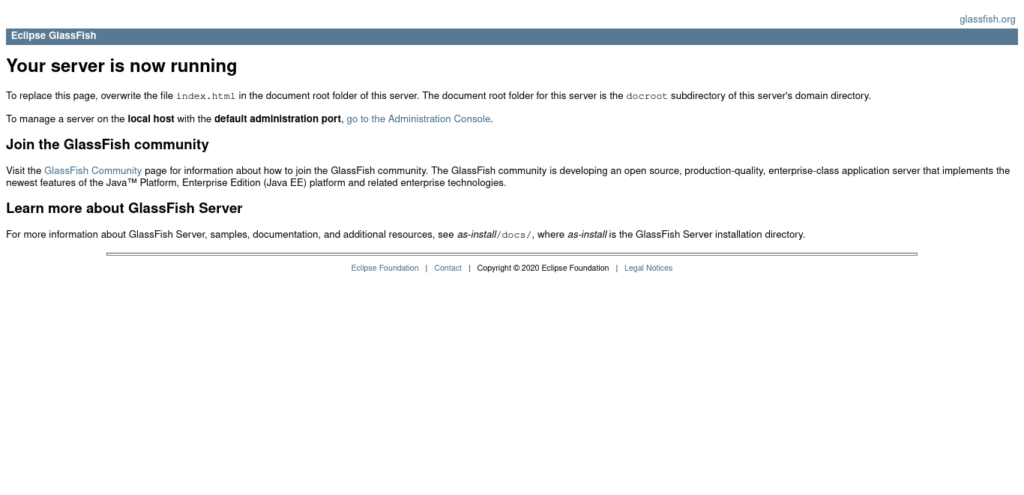
sudo systemctl restart glassfishNow you will be able to access the server through http://yourserver:8080.
And to the backend via http://your-server:4848
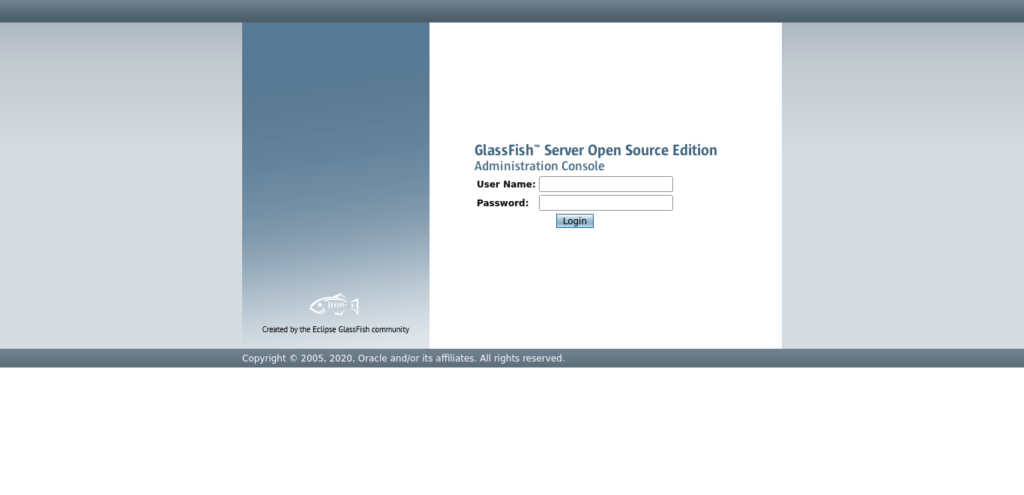
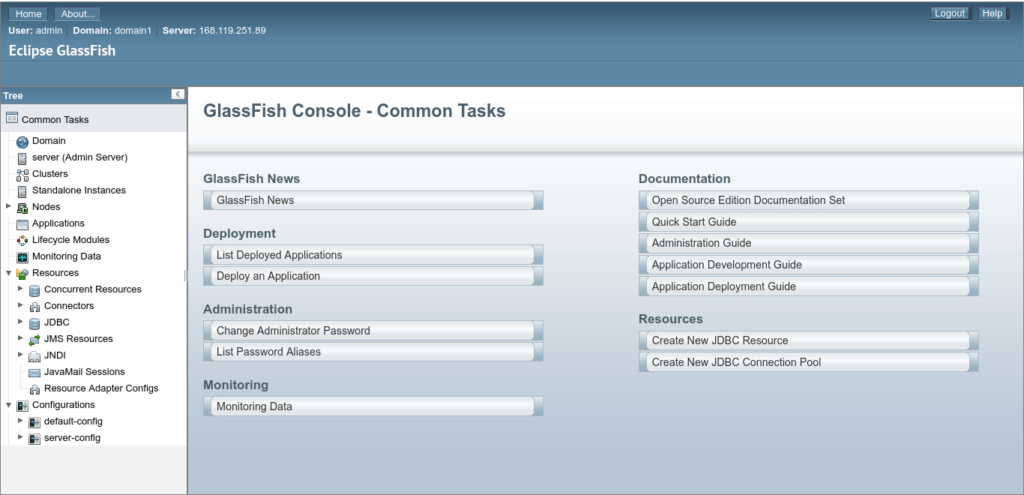
After logging in, you will see the control panel.
Conclusion
Thanks to this post, you learned how to install GlassFish on Ubuntu 22.04 without too much trouble.