
In this post, you will learn how to install Diffgram.
Complete training data platform for machine learning delivered as a single application.
Open Source Data Labeling, Workflow, Automation, Exploring, Streaming, and more!
Overview
Training data: Training Data is the art of supervising machines through data. The day-to-day work involves people transferring their knowledge to the computer – often through annotation, declaring a region of media, such as an image or audio file, to be valid or invalid. These annotations produce structured data – ready to be consumed by Data Science. This is required because raw media is considered unstructured – meaning not readable by data science.
Diffgram is a single application to annotate different kinds of data using this tool as follows:
Images: Annotation of image data in the following data formate.
Box, Polygons, Lines, KeyPoints, Classification Tags, Quadratic Curves, Cuboids, Segmentation
Video: Long, High Frame Rate, High-Resolution Videos.
3D Labeling Docs
Text: Named Entity Recognition, Part of Speech Tagging, Coreference Resolution, Dependency Parsing
Requirements:
- OS: Ubuntu20.04 (I am using ubuntu. you can use any Linux OS according to your choice)
- Docker Engine
- GCP, Azure, or AWS bucket storage (I will use GCP in this blog)
Steps to install Diffgram
Step 1:
Prepare GCP Storage
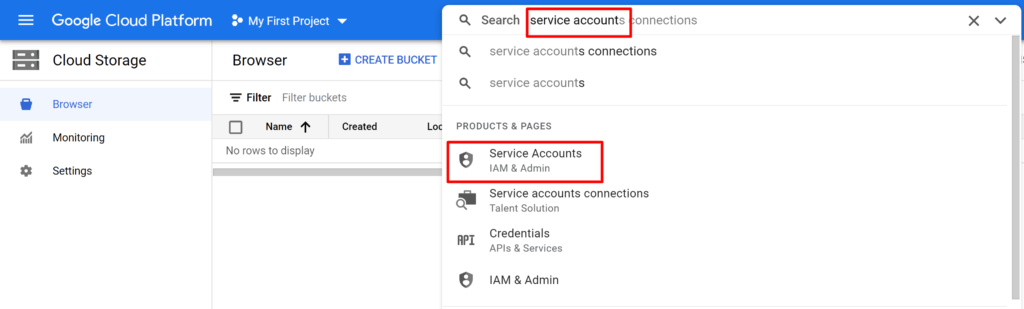
a. login to your GCP console, type Service Accounts in the search bar, and select “Service Account.”
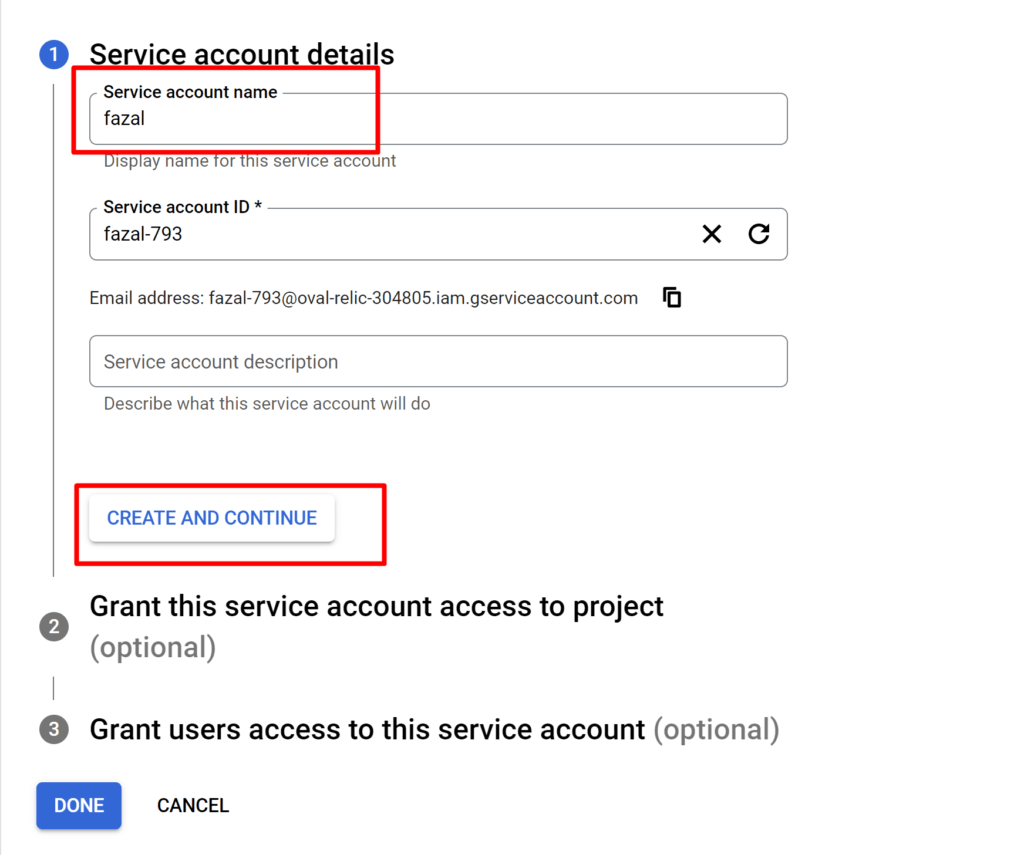
b. On the Service Accounts page, click on create account
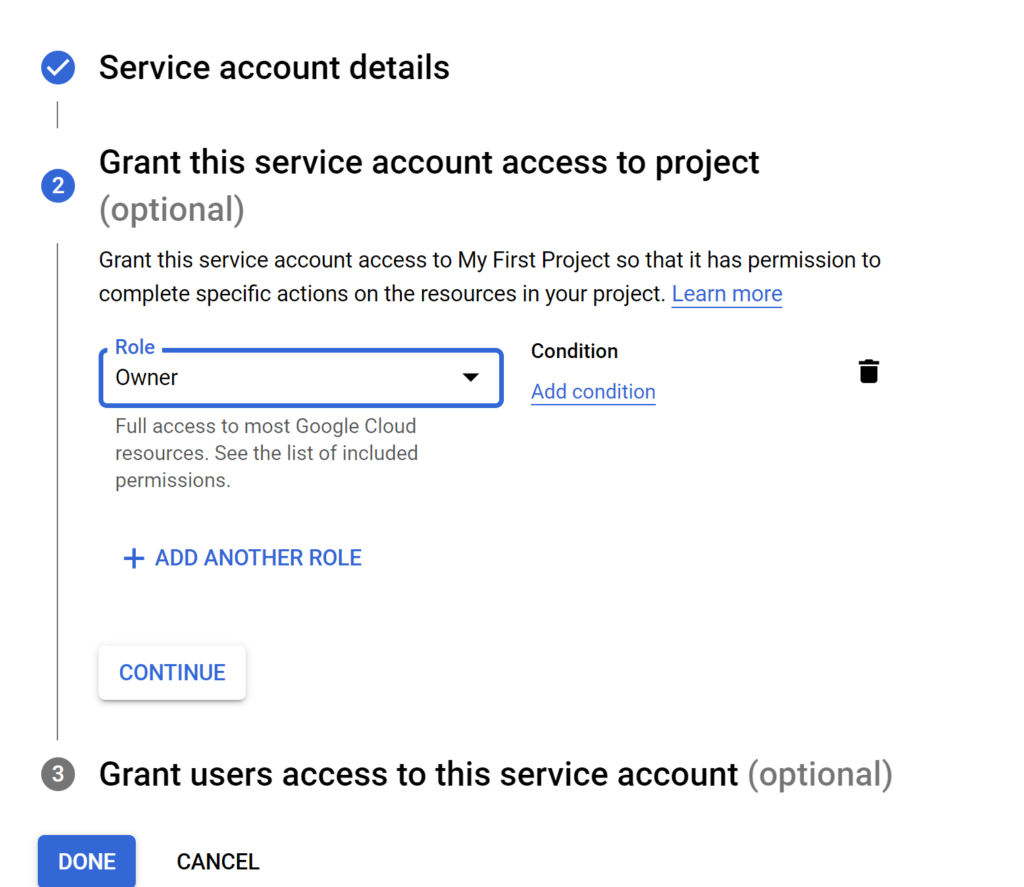
c. Define Account Role and grant access to project
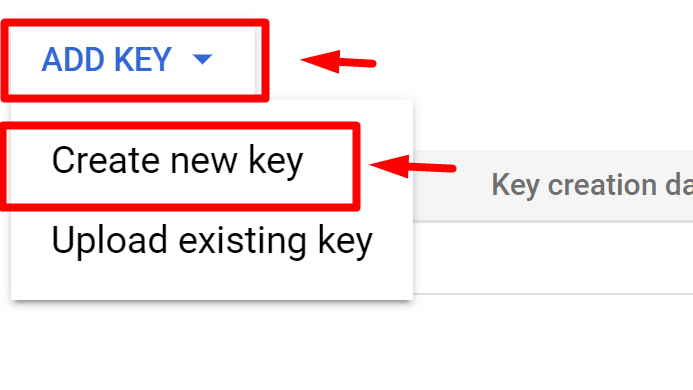
d. After creating the service account, click on the account action tab and select manage keys.
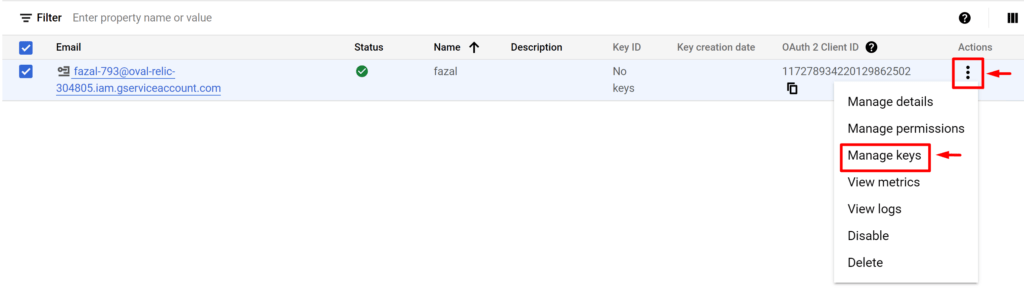
e. Add a new key and save the key in JSON format. We will use this key in our diffgram server to authenticate and authorize our local server to the GCP storage bucket.
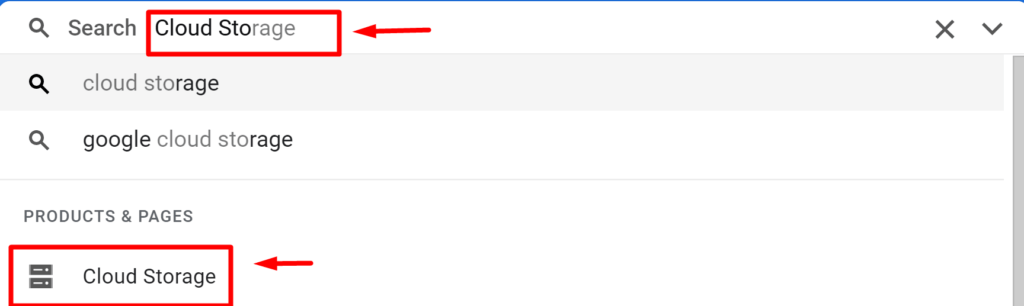
f. The Service Account is created. Now create a storage bucket. To create a storage bucket, type “Cloud Storage” in the top search bar and select “Cloud Storage.”
g. Create a bucket with the following details
name: diffgrambucket01 (this name will be used during installation)
Location type: region (you can use multi-region for HA and backup )
storage class: Standard
control access: uniform
protection tools: none (choose object versioning retention policy option according to your requirements)
Click on the create button to create the bucket.
Step 2 :
Prepare Diffgram machine. I am using VM. You can use either a bare-metal server or virtualized environment
a. Install Ubuntu20.04.
b. Install Docker engine on the ubuntu machine.
Commands:
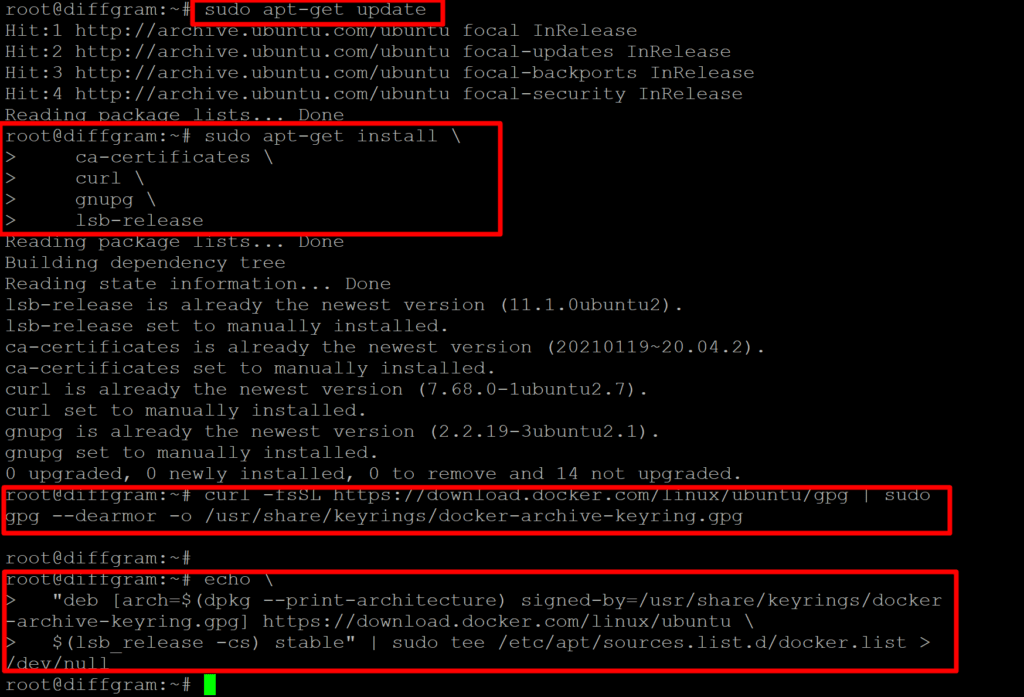
Update the apt package index and install packages to allow apt to use a repository over HTTPS:
$sudo apt-get update
$sudo apt-get install \
ca-certificates \
curl \
gnupg \
lsb-release
Add Docker’s official GPG key
$ curl -fsSL https://download.docker.com/linux/ubuntu/gpg | sudo gpg --dearmor -o /usr/share/keyrings/docker-archive-keyring.gpg
Use the following command to set up the stable repository. To add the nightly or test repository, add the word nightly or test (or both) after the word stable in the commands below:
$echo \
"deb [arch=$(dpkg --print-architecture) signed-by=/usr/share/keyrings/docker-archive-keyring.gpg] https://download.docker.com/linux/ubuntu \
$(lsb_release -cs) stable" | sudo tee /etc/apt/sources.list.d/docker.list > /dev/null
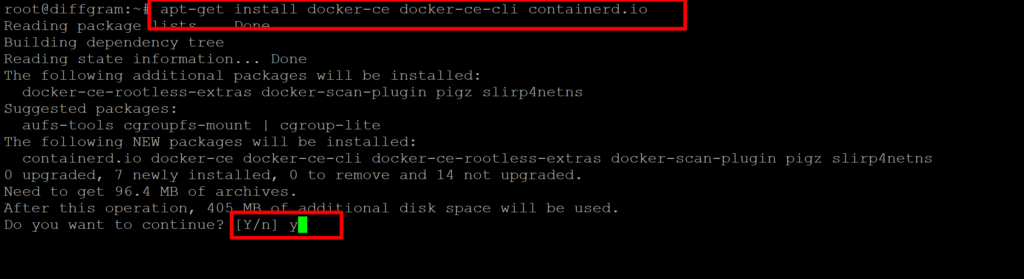
Install Docker Engine
$sudo apt-get update
$sudo apt-get install docker-ce docker-ce-cli containerd.io
$sudo apt install docker-compose
$sudo apt install python3-pip
Step 3 :
Install Diffgram with Docker and Docker Composer
Commands
git clone https://github.com/diffgram/diffgram.git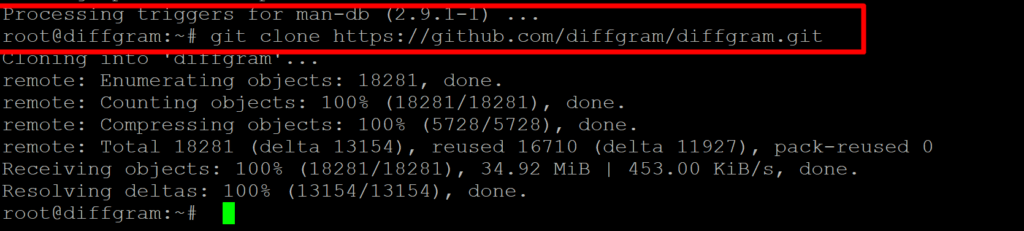
$cd diffgram
Before running the following command, make sure you are in the diffgram directory folder.
pip install -r requirements.txt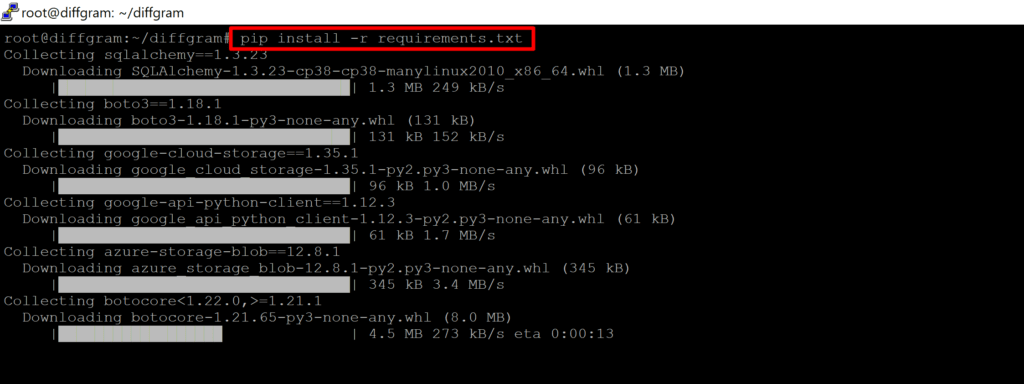
Transfer the key JSON file to the diffgram directory using the SFTP client. The key which is already created in STEP 1 section e.
python install.pySelect option 1 : GCP
type ./key3.json
Note: “./” is a must before key if the key is in the diffgram directory; otherwise, write the path where your key exists
your bucket name created on GCP Cloud
BD yes, if you have an external database, use the “n” option and connect with your external database
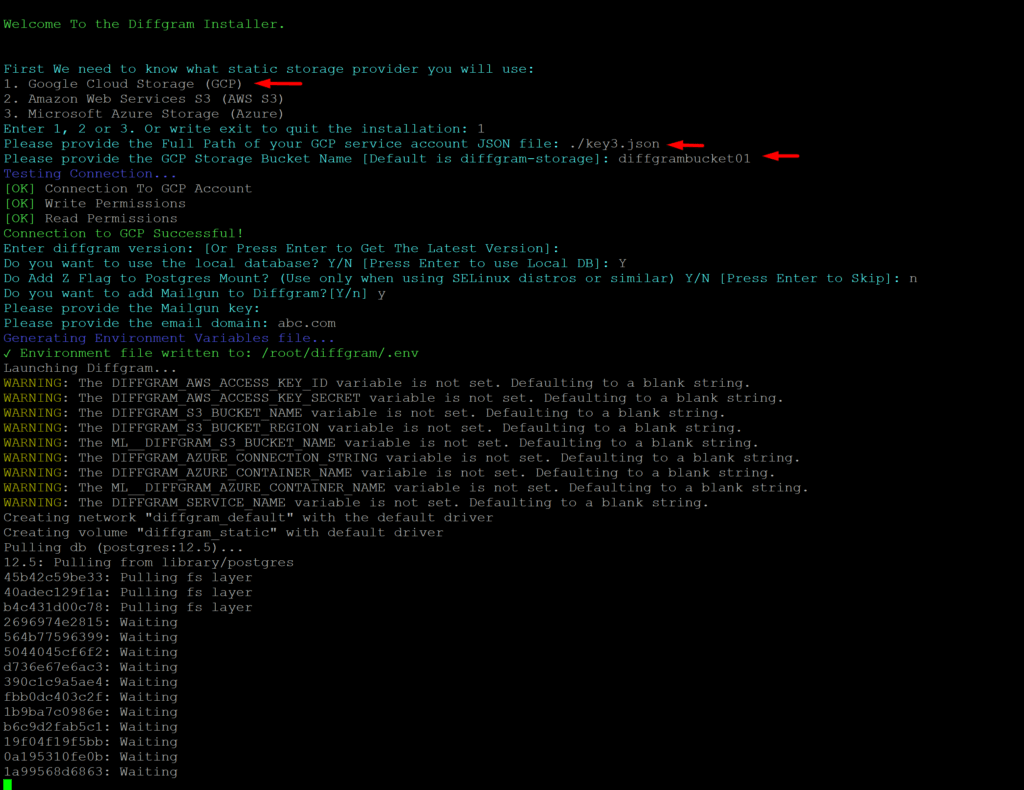
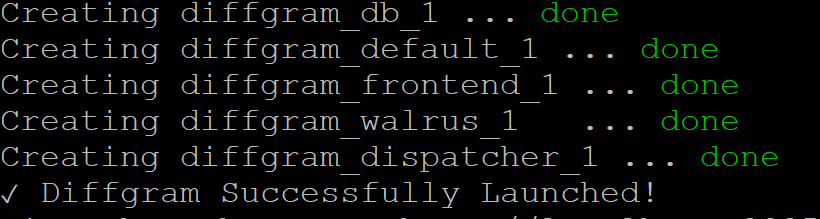
sit back and relax… the system is pulling images (PostgresDB, diffgram-open-core/default, diffgram-open-core/frontend, diffgram-open-core/walrus, diffgram-open-core/local_dispatcher )
Access the dashboard using the following ling
http://your server IP:8085
in my environment, my server IP is 192.168.137.92
http://192.168.137.94:8085
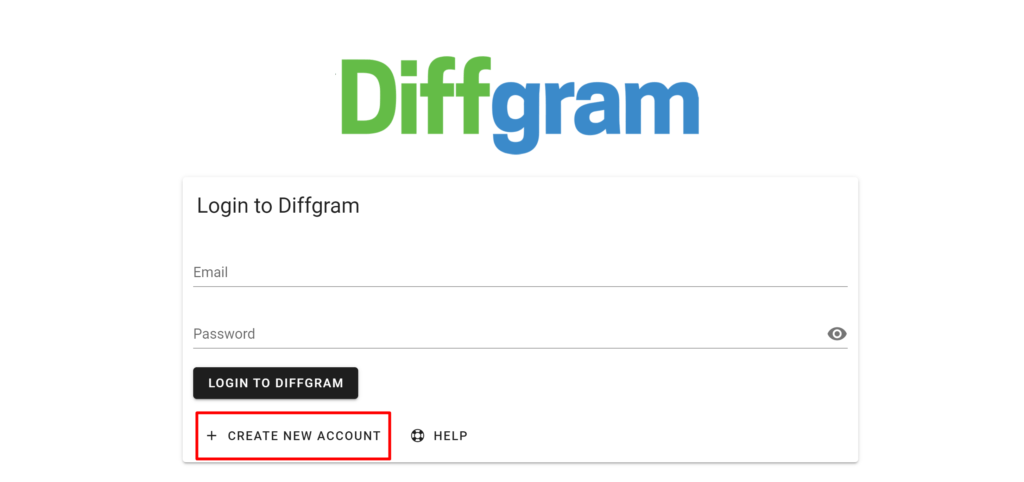
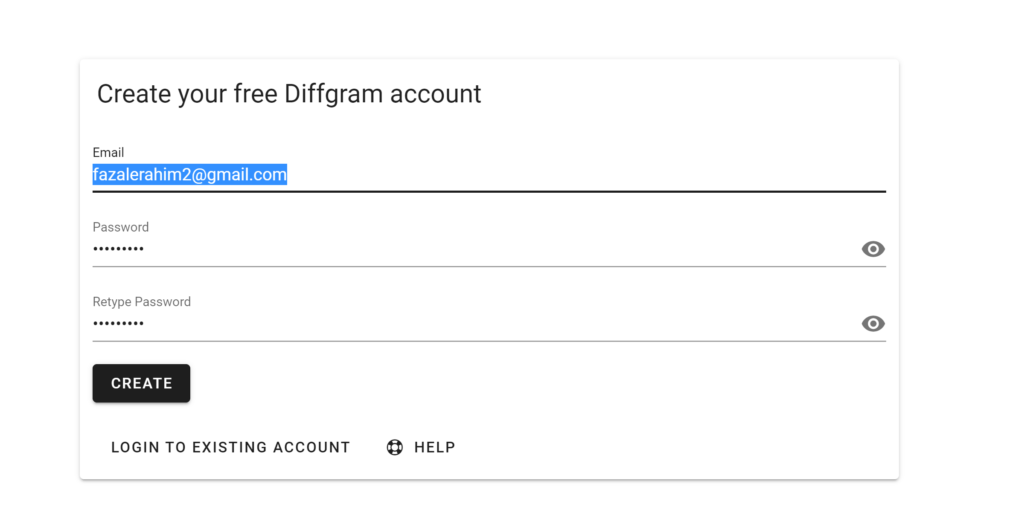
create account
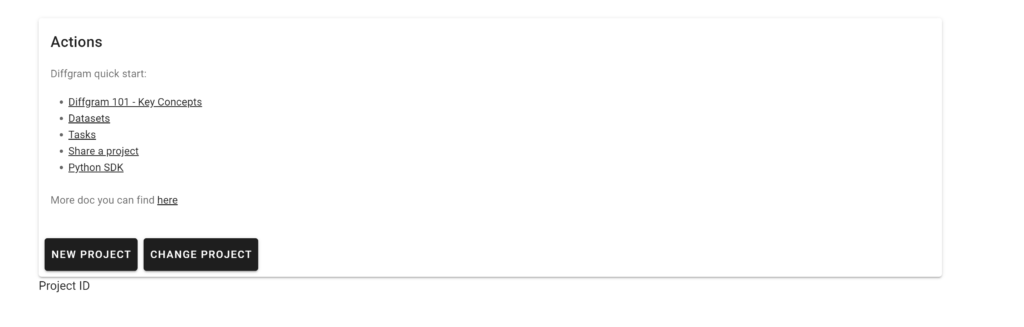
Create your Datasets, Tasks, and projects