Introduction
Apache Spark is an open-sourcedistributed computational framework that is_created to provide faster computational results.
It is an in-memory computational engine, meaning the data will be processed in memory.
Spark supports various APIs for streaming, graph processing, SQL, MLLib. It also supports Java, Python, Scala, and R as the preferred languages. Spark mostly installed in Hadoop clusters but you can also install and configure spark in standalone mode.
In this article, we will be seeing how to install Apache Spark in Debian and Ubuntu-based distributions.
Install Java in Ubuntu
To install Apache Spark in Ubuntu, you need to have Java installed on your machine. Most of the modern distributions come with Java installed by default and you can verify it using the following command.
$ java -version
If no output, you can install Java using our article on how to install Java on Ubuntu or simply run the following commands to install Java on Ubuntu and Debian-based distributions.
$ sudo apt update
$ sudo apt install default-jre
$ java -version
Install Scala in Ubuntu
Next, you can install Scala from the apt repository by running the following commands to search for scala and install it.
Search for the package
$ sudo apt search scalaInstall the package
$ sudo apt install scala -yTo verify the installation of Scala, run the following command.
$ scala -version 
Install Apache Spark in Ubuntu
Now go to the official Apache Spark download page and grab the latest version (i.e. 3.1.2) at the time of writing this article. Alternatively, you can use the wget command to download the file directly in the terminal.
$ wget https://apachemirror.wuchna.com/spark/spark-3.1.2/spark-3.1.2-bin-hadoop3.2.tgz
Now open your terminal and switch to where your downloaded file is placed and run the following command to extract the Apache Spark tar file.
$ tar -xvzf spark-3.1.2-bin-hadoop3.2.tgz 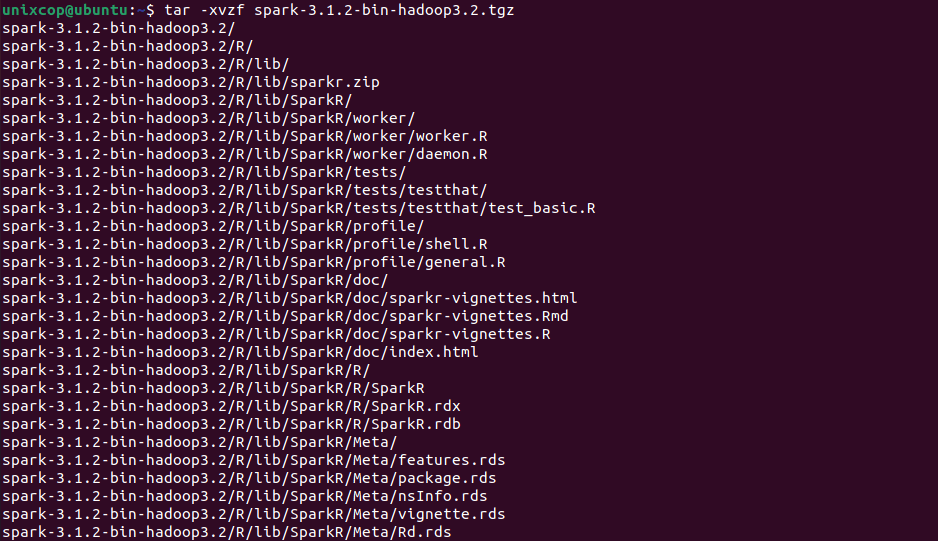
Finally, move the extracted Spark directory to /opt directory.
sudo mv spark-3.1.2-bin-hadoop3.2 /opt/sparkConfigure Variables for Spark
Now you have to set a few environmental variables in your .profile file before starting up the spark.
$ echo "export SPARK_HOME=/opt/spark" >> ~/.profile
$ echo "export PATH=$PATH:/opt/spark/bin:/opt/spark/sbin" >> ~/.profile
$ echo "export PYSPARK_PYTHON=/usr/bin/python3" >> ~/.profile
To make sure that these new environment variables are reachable within the shell and available to Apache Spark, it is also mandatory to run the following command to take recent changes into effect.
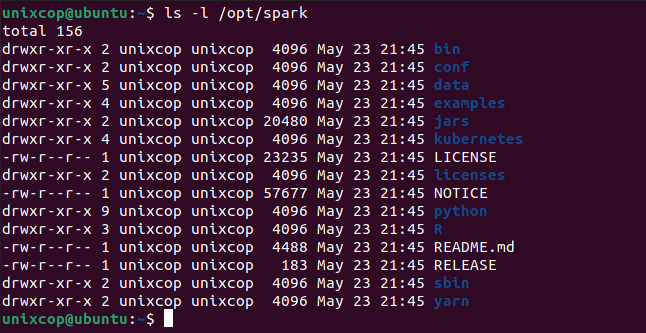
$ source ~/.profileAll the spark-related binaries to start and stop the services are under the sbin folder.
$ ls -l /opt/spark
Start Apache Spark in Ubuntu
Run the following command to start the Spark master service and slave service.
$ start-master.sh
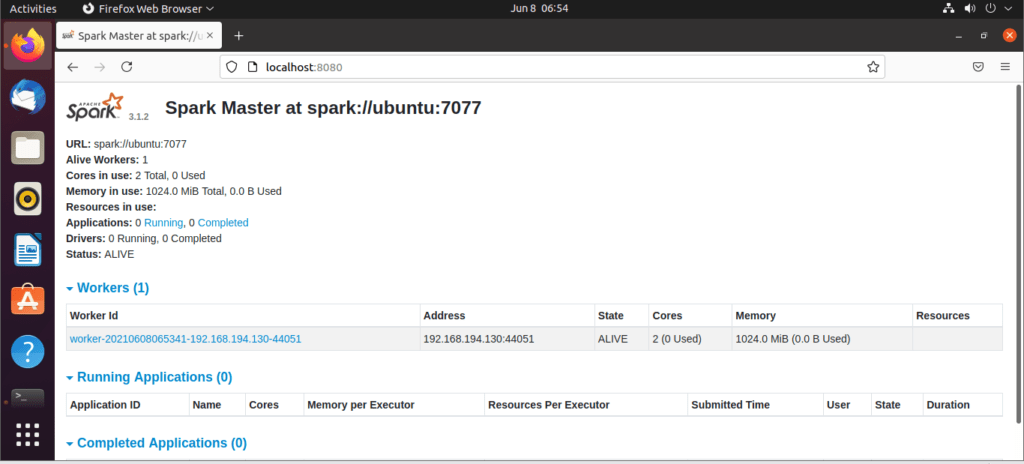
Once the service started go to the browser and type the following URL access spark page. From the page, you can see my master service is started.
http://localhost:8080/Then you can add a worker with this command :
$ start-workers.sh spark://localhost:7077
The worker will be added as shown:
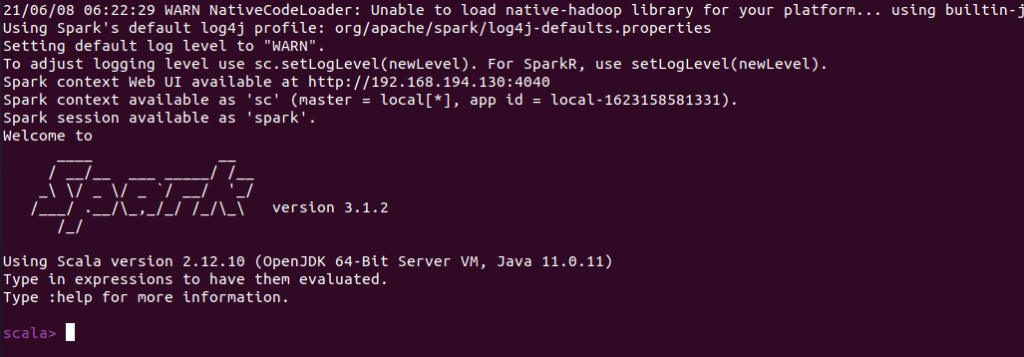
You can also check if spark-shell works fine by launching the spark-shell command.
$ spark-shell