Icinga 2 is a free and open source monitoring tool designed to be scalable and extensible. Icinga 2 checks the availability of your network resources, notifies users of outages, and generates performance data for reporting. We can monitor large and complex environments across multiple locations using Icinga2.
We can also setup Icinga2 with high availability clusters with a distributed setup for large / complex environments.
In this guide we will learn how to install and configure Icinga 2 and Icinga Web 2 on CentOS 8.
Installation of Icinga2:
First, Update and Upgrade your CentOS Linux.
yum -y update && yum -y upgradeSecondly, Install Icinga repository.
yum install -y https://packages.icinga.com/epel/icinga-rpm-release-8-latest.noarch.rpmEnable EPEL Repository and Get EPEL repository.
dnf -y install https://dl.fedoraproject.org/pub/epel/epel-release-latest-8.noarch.rpm
yum install -y epel-release
We will Get some tools that we will need later for installation and configuration of Icinga2 and Icinga Web 2.
yum install -y git curl make gcc wget nano vim net-tools tar unzip zip python-devel python-pip python-setuptoolsUse below command to install icinga2:
yum install -y icinga2
Start and Enable Icinga2 service.
systemctl enable icinga2
systemctl start icinga2
systemctl status icinga2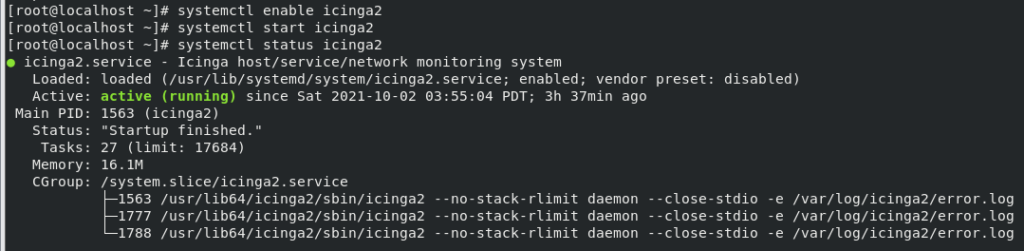
We will install the required plugins for Icinga2.
yum install -y nagios-plugins-allRun the following command to confirm the icinga files are correct before you want to change icinga files.
icinga2 daemon -C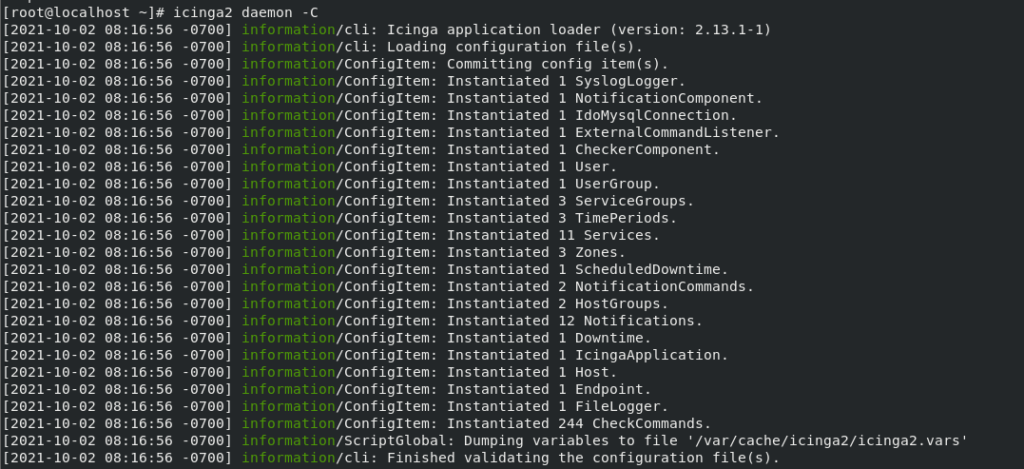
If you are want to use SELinux with Icinga2 then, you need to install the following packages and set firewall rules for port 80 and 443.
yum install -y icinga2-selinux
firewall-cmd --add-service=http && firewall-cmd --permanent --add-service=http
After completing above steps, We will now install and configure MYSQL as database for Icinga2.
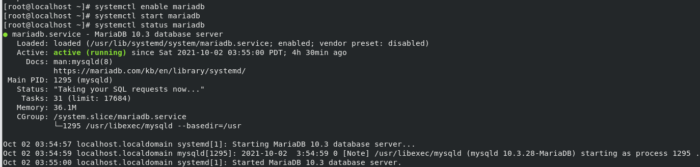
yum install -y mariadb-server mariadb
systemctl enable mariadb
systemctl start mariadb
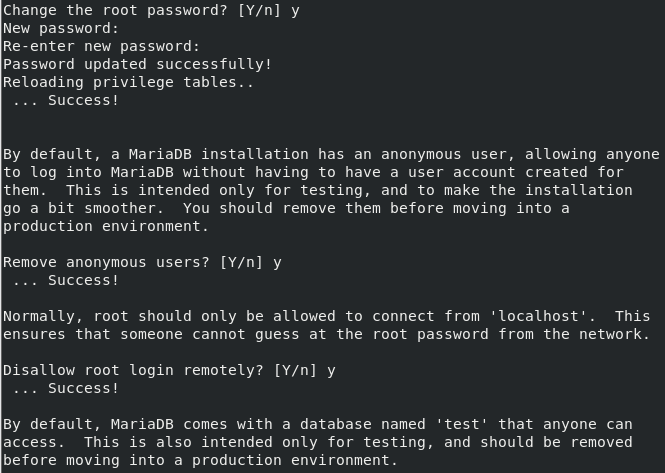
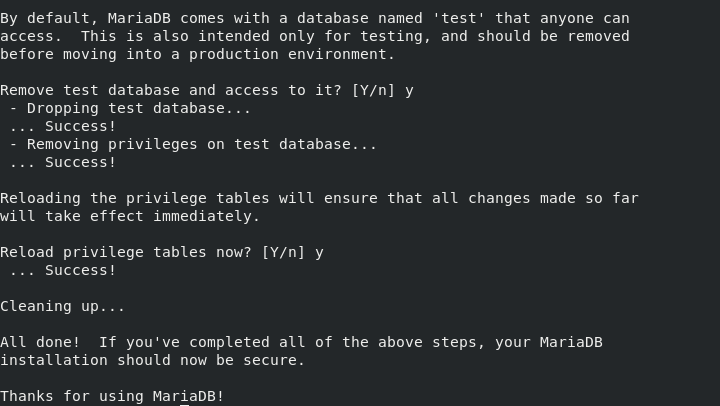
Secure the MYSQL Installation
mysql_secure_installationAfter Entering above command system will ask for root password. press Enter as you didn’t have any. After that system will ask you if you want to add root password press “y” and set root password. Please press “y” for every time system ask you about some configuration. See below pictures for reference:
Install the IDO Mysql using following command:
yum install icinga2-ido-mysqlLogin to mysql by entering following command:
mysql -u root -pCreate the following databases for Icinga2 and icinga web 2:
CREATE DATABASE icinga;
GRANT SELECT, INSERT, UPDATE, DELETE, DROP, CREATE VIEW, INDEX, EXECUTE ON icinga.* TO 'icinga'@'localhost' IDENTIFIED BY 'icinga';
CREATE DATABASE icingaweb;
GRANT ALL PRIVILEGES ON icingaweb.* TO 'icingaweb'@'localhost' IDENTIFIED BY 'icingaweb';
FLUSH PRIVILEGES;
QUIT;
Import Icinga 2 MYSQL Schema and also enable IDO MySQL for Icinga2.
mysql -u root -p icinga < /usr/share/icinga2-ido-mysql/schema/mysql.sql
icinga2 feature enable ido-mysql
Restart the Icinga service so that the above configuration may take effect.
systemctl restart icinga2.serviceInstallation of Icinga Web 2:
First, install web server.
yum install -y httpd
systemctl enable httpd
systemctl start httpd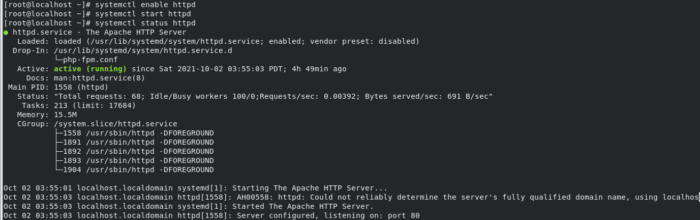
Configure Icinga 2 Rest API User:
icinga2 api setup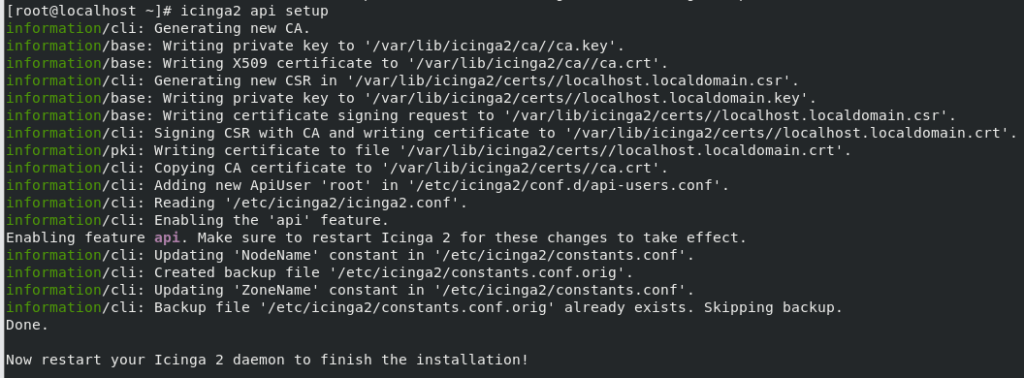
We will edit file “/etc/icinga2/conf.d/api-users.conf” with nano editor.
/etc/icinga2/conf.d/api-users.confAdd the following lines:
object ApiUser "icingaweb2" {
password = "Wijsn8Z9eRs5E25d"
permissions = [ "status/query", "actions/*", "objects/modify/*", "objects/query/*" ]
}
Edit the file “vim /etc/icinga2/features-enabled/ido-mysql.conf” using nano editor.
nano /etc/icinga2/features-enabled/ido-mysql.confAdd the following configuration:
/**
* The IdoMysqlConnection type implements MySQL support
* for DB IDO.
*/
object IdoMysqlConnection "ido-mysql" {
user = "icinga"
password = "icinga"
host = "localhost"
database = "icinga"
}
Now, Restart Icinga2 service to apply the above configuration.
systemctl restart icinga2We will install SCL repository, It is required for Icinga Web 2.
dnf -y group install "Development Tools"
dnf -y install gcc-c++ gcc make
dnf install mysql-devel.x86_64
Install Icinga Web 2 and Icinga CLI using the following command:
yum install -y icingaweb2 icingacliIf you need SELinux for Icinga Web 2 install it using the following command:
yum install -y icingaweb2-selinuxInstall PHP FPM and other PHP modules we might need for Icinga web 2.
rpm -Uvh https://dl.fedoraproject.org/pub/epel/epel-release-latest-8.noarch.rpm
dnf install -y https://rpms.remirepo.net/enterprise/remi-release-8.rpm
dnf module list php
dnf install php-json php-ldap
yum install -y php-mysqlnd php-fpm php-ldap php-pgsql php-xmlrpc php-intl php-gd php-pdo php-soap php-posix php-cli
Start and Enable the service.
systemctl start php-fpm.service
systemctl enable php-fpm.service
systemctl restart httpd
systemctl restart php-fpm.service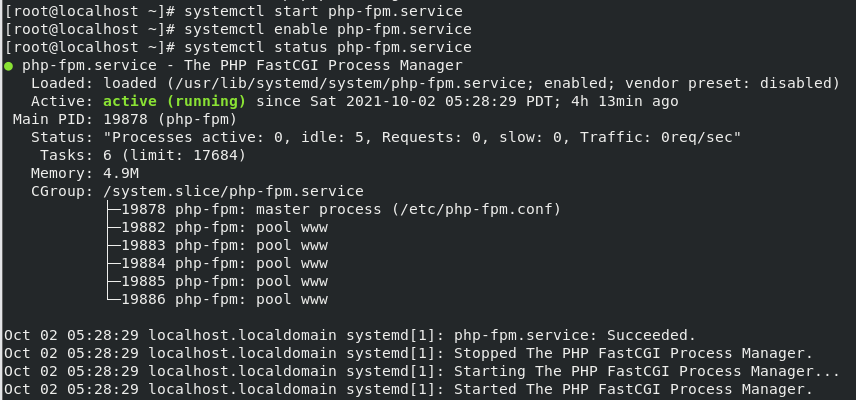
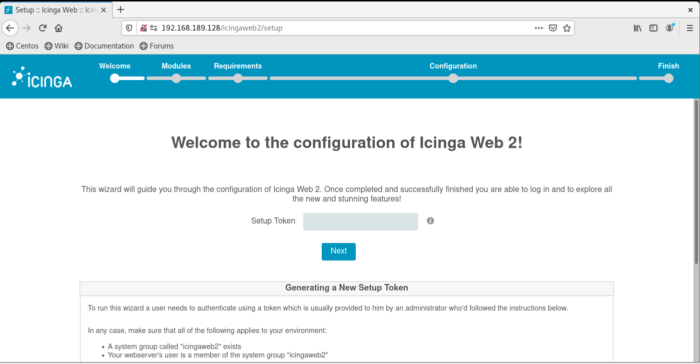
Now, let’s create the token for finishing Icinga Web 2 configuration through web interface:
icingacli setup token create
Open Icinga Web 2 Using following url into your web browser:
http://192.168.189.128/icingaweb2/setupReplace the IP in above url with your system IP.
Icinga Web 2 Configuration:
It will request the generated token, paste it and click on next
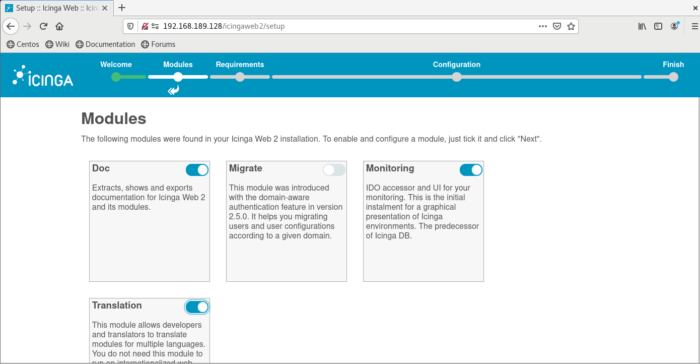
Monitoring modules is enable by default, you can enable Doc and Translation optionally and then click next
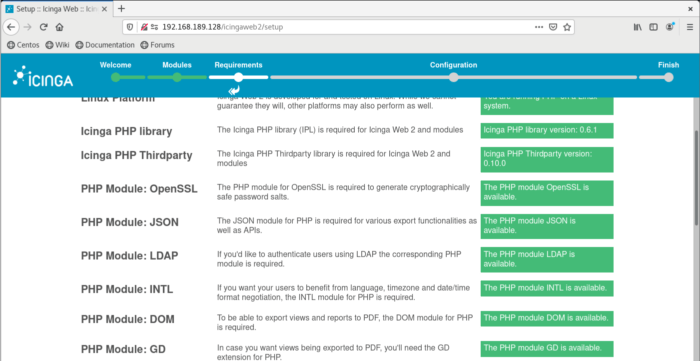
Now all PHP Modules should be green, in case you have some in yellow, it is recommended to fix it before moving forward, if all are green, just click next.
By default we are going to use database authentication.

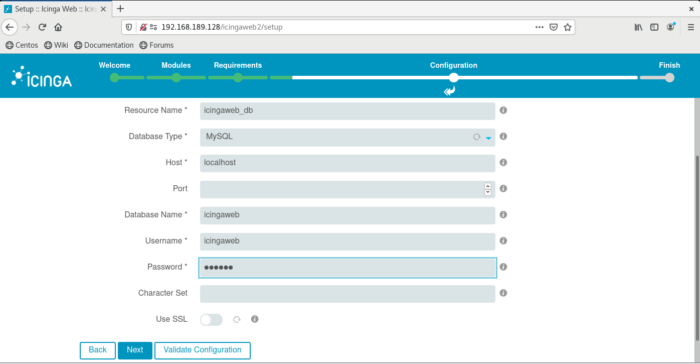
Configure the database resource, here we are going to use the credentials we created for icingaweb database. You need to set the parameters localhost, database name, username and password. Before clicking next, you can click on Validate Configuration in order to validate that the credentials are working correctly.
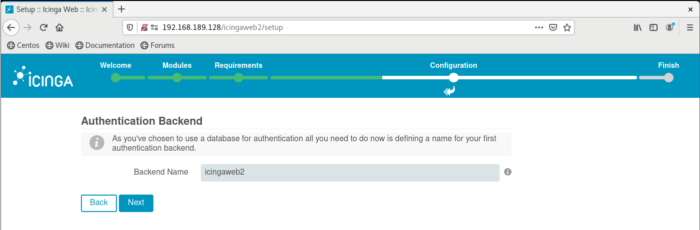
Let’s configure the Authentication Backend, this one was defined in the api-users.conf file, just click next.
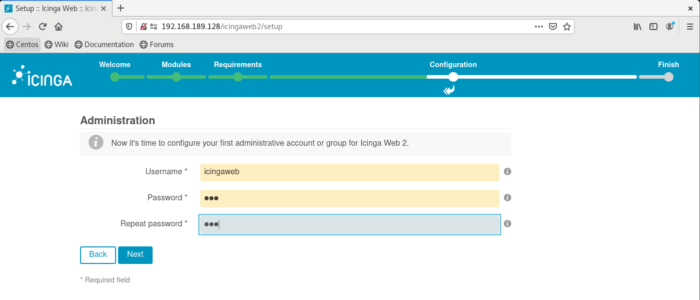
In the administration screen you define the username and password for login to the Icinga Web interface.
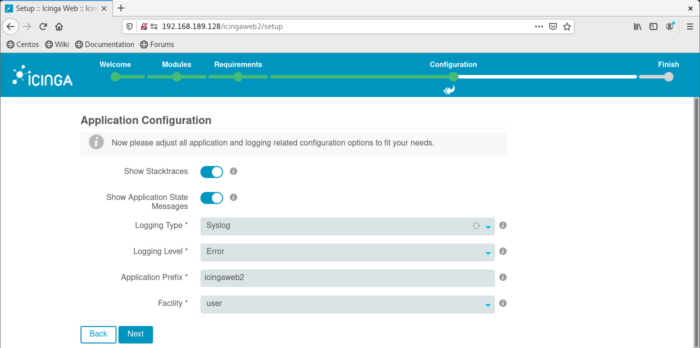
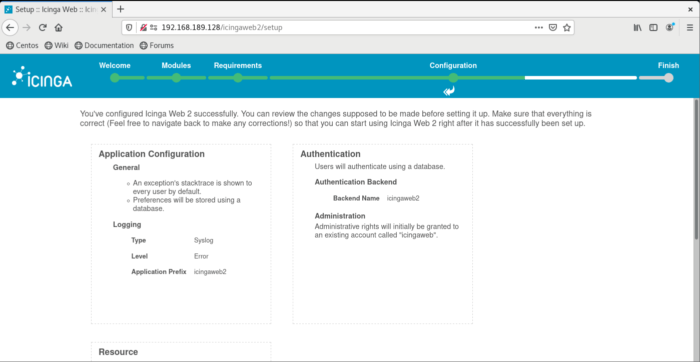
In the application configuration screen you just need to click next, you can change adjust it according your needs, but the defaults are fine for now.
you have a resume screen, here just need to click next.
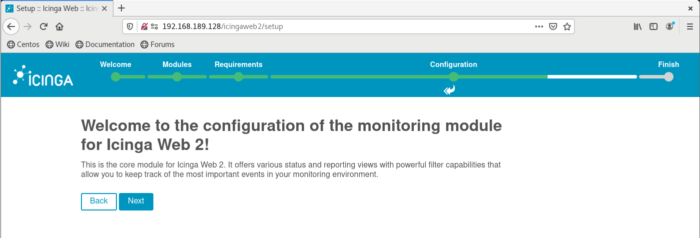
Now, you can configure monitoring module for Icinga Web 2, only click next.
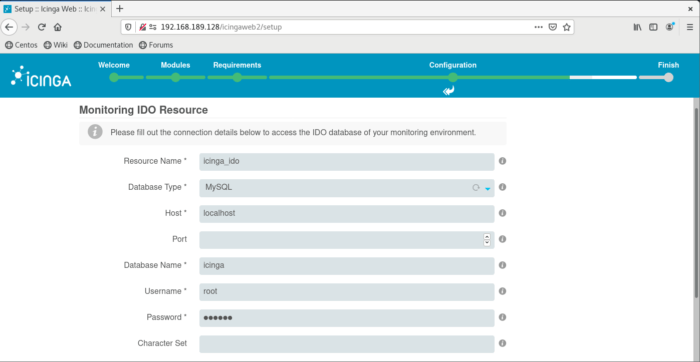
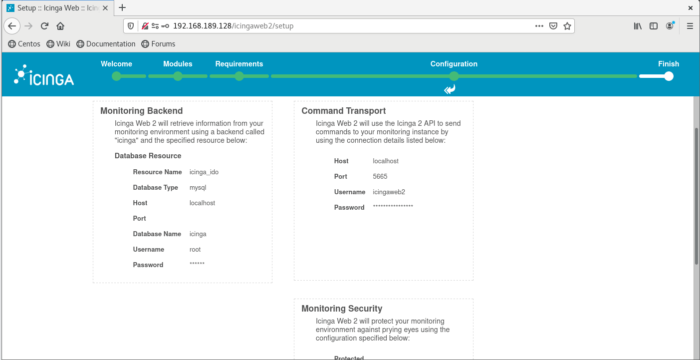
Now, let’s configure the monitoring IDO Resource, here we’ll use the credentials we created for the icinga database. Here you need to set the parameters localhost, database name, username and password. Before clicking next, you can click on Validate Configuration in order to validate that the credentials are working correctly.
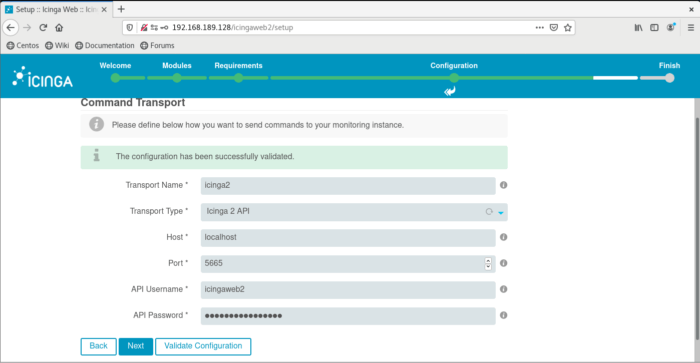
Selecting Command Transport:
Now select the command transport. Now, configure the monitoring IDO Resource, here we’ll use the credentials we created for the icinga database. Here you need to set the parameters localhost, database name, username and password. Before clicking next, you can click on Validate Configuration in order to validate that the credentials are working correctly.
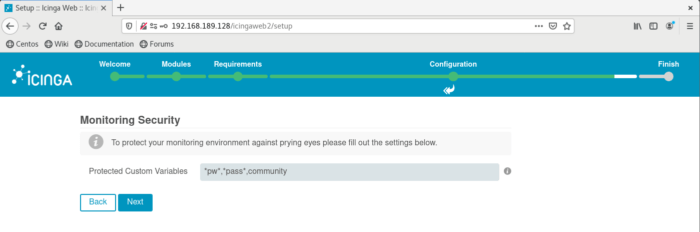
In the monitoring security screen you only need to click next.
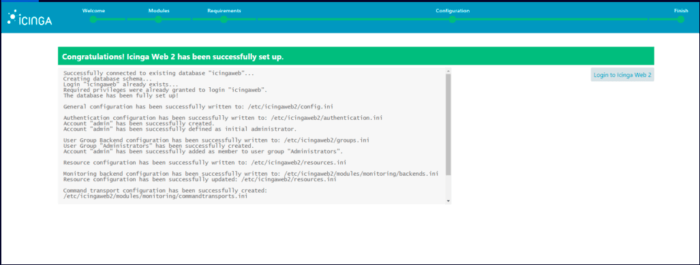
Now you have a success screen for Icinga Web 2, you only need to click Finish.
You should have now a congratulations screen with a Login to Icinga Web available, only click on that button for logging in into Icinga Web 2.