
Introduction
Greeting for the day! We are going to convert Ubuntu 20.04 in Zentyal today. The Server is a very popular OS among Linux admins across the planet. Though Zentyal community edition comes as dedicated os too, I was just testing what if we convert running Ubuntu Machine to the server? The verdict was clear that Servers get ready much quicker in comparison to installing dedicated OS instead. Thought to create a write-up for the same. We have categorized the article into three parts. First, a brief introduction of the server and its features. Second, how to convert Ubuntu into the Server. The third part will be having a conclusion and other views regarding the scenario.
A Brief Introduction
The Zentyal Firewall is based upon Ubuntu OS, so it will be easy to transform Ubuntu OS in the firewall. Have a look at the key features of the server.
- Act as file server- Samba is in intergrated part of Server, you can share resoruces across the network.
- Integration with MS AD Enviroment- Server can be integratred with Microsoft Active Directory Enviroment easily.
- Server can act a dedicated firewall- Very easy to mangeable firewall, where you can restrict file and resource access in a very precised manner, even deploy commnads directy from terminal as well.
- IT Infra Server- Zentyal can act and DNS, DHCP and print server as well, define multiple domains, manage multiple Internet connections or share printers. All can be done here.
- Email and chat server- A dedicated Email server where user level disc quota, permissions can be defiend. Zarafa comes as a default feature of Server.
- Easy to manage GUI- All service can be manged from a single dashdboard, all processes and logs are visible from dashbaord itself.
Convert Ubuntu 20.04 to Zentyal
For our example scenario, I will be using Ubuntu 20.04 (You can use any supported Debian-based OS version). Recommended to have 1 TB of storage at a minimum. RAM can be 8 GB along with any good processor. At leader two network cards are required to have.
Update server first
# apt update
Check what IP address we have got!
$ ip addr
1: lo: <LOOPBACK,UP,LOWER_UP> mtu 65536 qdisc noqueue state UNKNOWN group default qlen 1000
    link/loopback 00:00:00:00:00:00 brd 00:00:00:00:00:00
    inet 127.0.0.1/8 scope host lo
       valid_lft forever preferred_lft forever
    inet6 ::1/128 scope host
       valid_lft forever preferred_lft forever
2: enp0s3: <BROADCAST,MULTICAST,UP,LOWER_UP> mtu 1500 qdisc fq_codel state UP group default qlen 1000
    link/ether 08:00:27:fa:71:41 brd ff:ff:ff:ff:ff:ff
    inet 192.168.43.219/24 brd 192.168.43.255 scope global dynamic noprefixroute enp0s3
       valid_lft 3587sec preferred_lft 3587sec
    inet6 2401:4900:596b:2e6d:7ae6:301e:e5ef:4c5f/64 scope global temporary dynamic
       valid_lft 3593sec preferred_lft 3593sec
    inet6 2401:4900:596b:2e6d:1b8b:23a1:5578:dcb2/64 scope global dynamic mngtmpaddr noprefixroute
       valid_lft 3593sec preferred_lft 3593sec
    inet6 fe80::37b5:c0bc:85c0:856f/64 scope link noprefixroute
       valid_lft forever preferred_lft forever
- Add following line source list of Ubuntu.
# nano /etc/apt/source.list
All following lines to the list
deb http://packages.zentyal.org/zentyal 7.0 main extra
Add following repo
wget -q http://keys.zentyal.org/zentyal-7.0-packages-org.asc -O- | sudo apt-key add -
Update server
# apt update
Now finally convert a server into a firewall i.e. zentyal.
# apt-get install zentyal
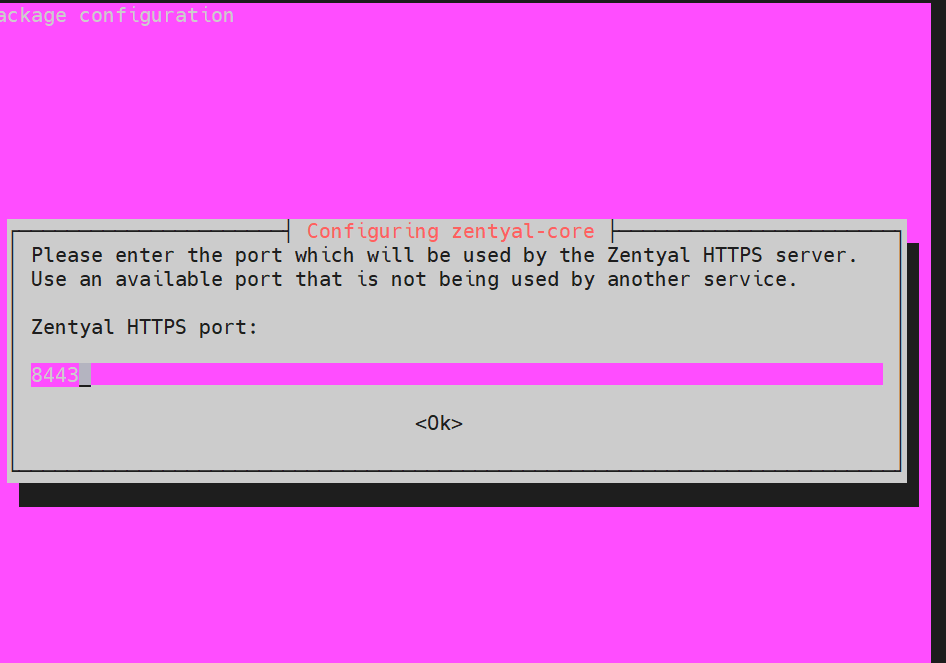
A screen something like below will appear. The default port of service will be 8443.
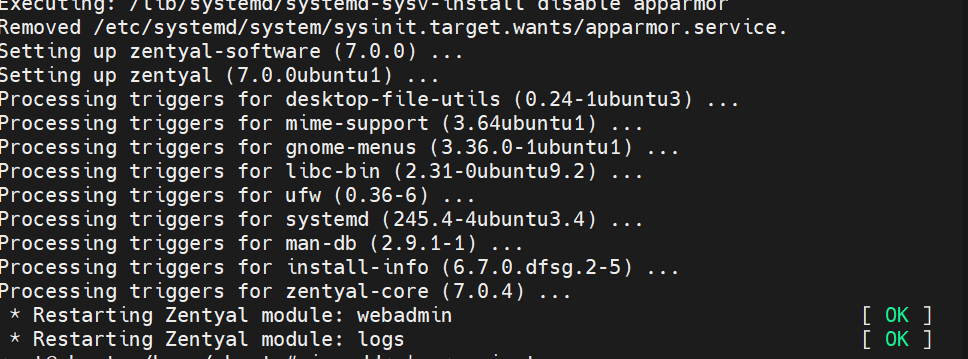
After installation is over, you can check if the zentyal service is running properly or not?
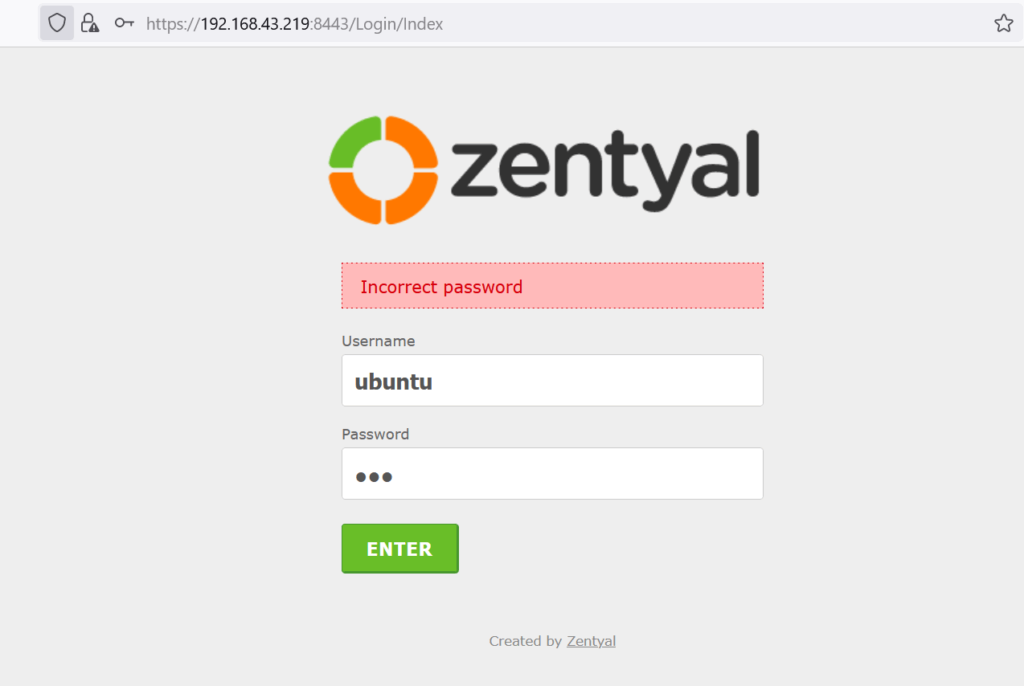
Finally, we have a running server, lets’s try to browse and see if things are up to the mark or not ?? Login with os username and password.
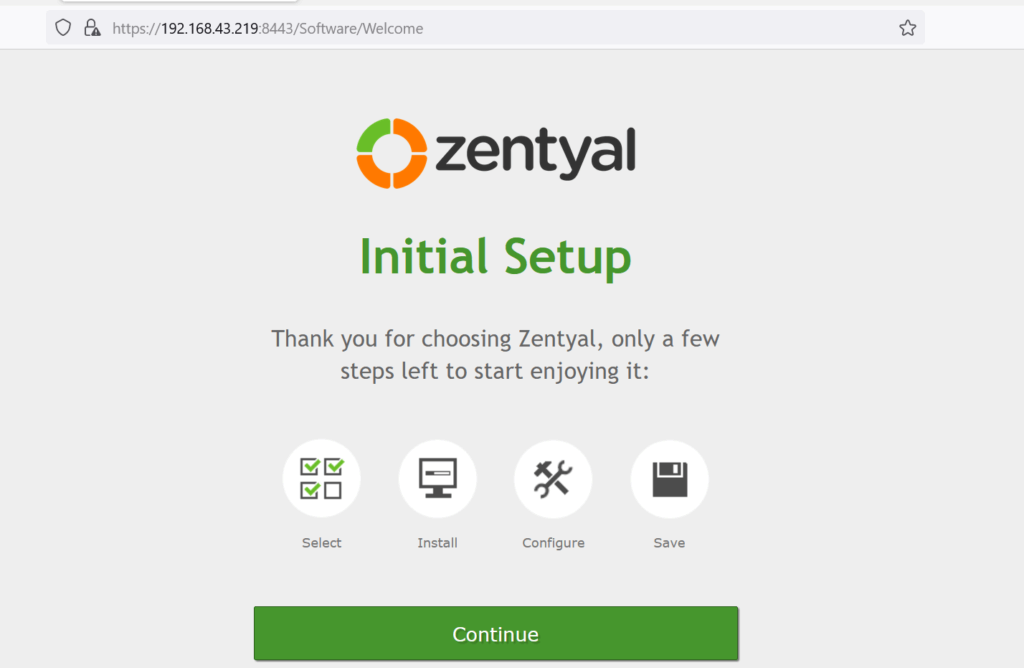
All seems good, the server will ask to get started.
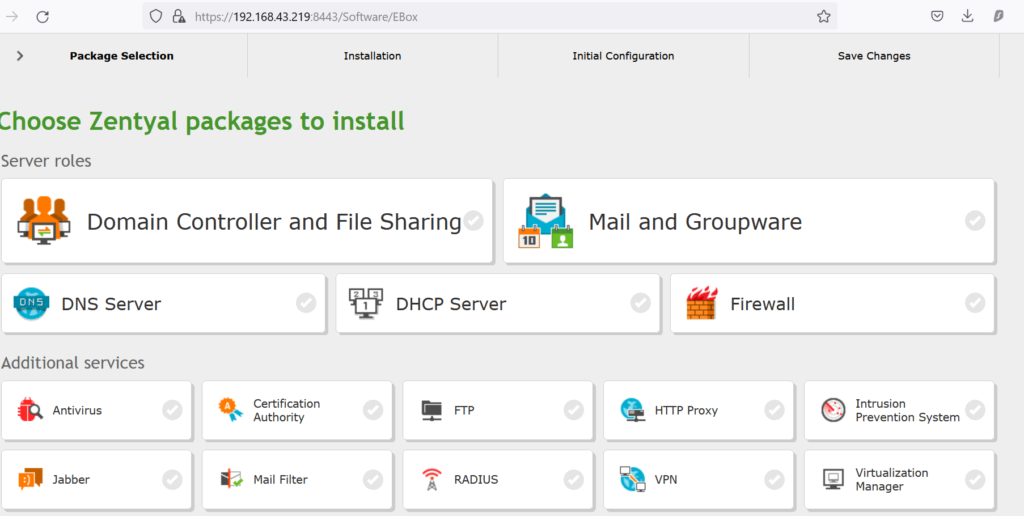
Check what packages you are willing to go with, opt and go accordingly.
Wola! you have a dedicated firewall and infra server now that too with a running Ubuntu OS.
Conclusion
Quicker setup of a firewall without putting much effort! Feel very lightweight, you have better control over resources and the Firewall can be used as a multipurpose resource.
