

We have 3 users, Jhon, Doe, Mike. Suppose you are at the IT department for a Software Company. You have to manage the identity of those 3 users. Easy right? You can easily manage their Identity Access. But how about 3 users become 300 or 3000? How can you manage them?
Well things get pretty hard I guess, How about if we can have a system that has a central identity info, maybe that would be easier to solve our stated problem.No worries, FreeIPA is here to help you by solving the problem.
In this article we will learn some very basics about FreeIPA & will go through some hands-on !
Let’s get started.
IPA Stands for Identity, Policy, and Audit. FreeIPA aims to provide those 3 in a centrally managed fashion. It is an integrated security information management solution combining Linux (Fedora), 389 Directory Server, MIT Kerberos, NTP, DNS, Dogtag (Certificate System). It consists of a web interface and command-line administration tools.
I guess I am done talking with the basic jargon, let’s get on work.
Requirements
I needed the following things to do the installation & configuration work:
- Fresh installed Cantos 8 Machine
- 4 GB of RAM.
- 4 Core CPU.
- 50 GB of free Space.
- 1 Static IP.
Before Getting Started
Machine Installation
I have installed a centos8 machine on the virtual box with the IP 192.168.0.101 & user IPA. We will do the rest of the work with the username IPA. User IPA has administrative access to the machine. It’s not recommended that we use root for the installation purposes.
Set the Hostname
We will set the hostname as ipamaster.unixcop.local. Obviously you can set of your own
hostnamectl set-hostname ipamaster.unixcop.localSELinux Permissive
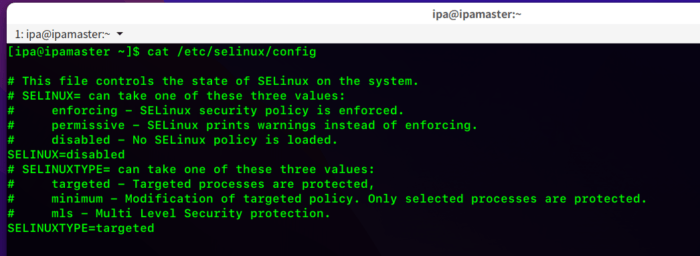
We need to set the SELinux is Permissive/Disabled mode
We can make it permanent or temporary by changing the configuration situated at the /etc/selinux Directory
I made the change permanent like below. You have to reboot the system after making those changes.
Entry to the hosts file
We have to add the IP & hostname to the /etc/hosts file. In my case, the IP is 192.168.0.101
The output of my hosts file is as follows

Make Sure those ports are not being used by anyone else !
- 80, 443, 8080: HTTP/HTTPS
- 389, 636: LDAP/LDAPS
- 88, 464: Kerberos
- 123: NTP
In Case you don’t know how to check the open/used port in the Linux system
Run this following command to show how to check the listening ports of your system
netstat -tulpnInstallation & Configuration
System Updation
First we need to update our system, just to make sure all the packages/softwares are updated.
Run the command sudo dnf update -y
Have patience please ! it might take a while (on fresh machine depending on your internet connection)
Install required packages
Almalinux/Centos 8 comes with the Modularity Repository feature that allows you to install additional versions of software on independent life cycles through the Application Stream also referred to as AppStream. This enables you to keep your operating system up-to-date while having the right version of an application that suits your use case.
FreeIPA Server and client packages are distributed through the AppStream repository in Alma Linux/Centos 8. Wanna try ? run the following command
sudo dnf module list idm

From the output, we are seeing that, we have DL1 and client modules
For more info about the DL1 module, run the following command
sudo dnf module info idm:DL1
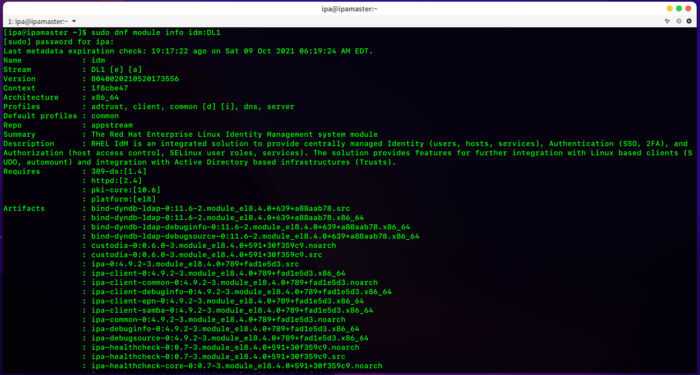
Here, you will get the detailed info about the module.
Since we are installing a server here, we have to install the DL1 module first. Also, DL1 contains an ipa-client because a master is a client of itself.
Run the following command to install the module
sudo dnf install @idm:DL1 -y
If you want to install freeIPA without DNS, run only the following
sudo dnf install freeipa-server --setup-dns
If you want to include DNS, run the following
sudo dnf install ipa-server-dns bind-dyndb-ldap
Wait till the package to download & install, It might take some time depending on your internet connection.
Add to the firewall
We need to add the following services to the firewall
http.https, dns, ntp, freeipa-ldap, freeipa-ldaps
Command:
sudo firewall-cmd --add-service={http,https,dns,ntp,freeipa-ldap,freeipa-ldaps} --permanent
Then, we have to reload the firewall to effect the changes.
sudo firewall-cmd --reload
Install the freeIPA Server
We will install the freeIPA server including the DNS
Go with the following command
sudo ipa-server-install --setup-dns
installation work will do the followings during the installation
* Configure a stand-alone CA (dogtag) for certificate management
Then Configure the NTP client (chronyd)
* Create and configure an instance of Directory Server
*Create and configure a Kerberos Key Distribution Center (KDC)
* Configure Apache (httpd)
* Configure DNS (bind) and Configure the KDC to enable PKINIT
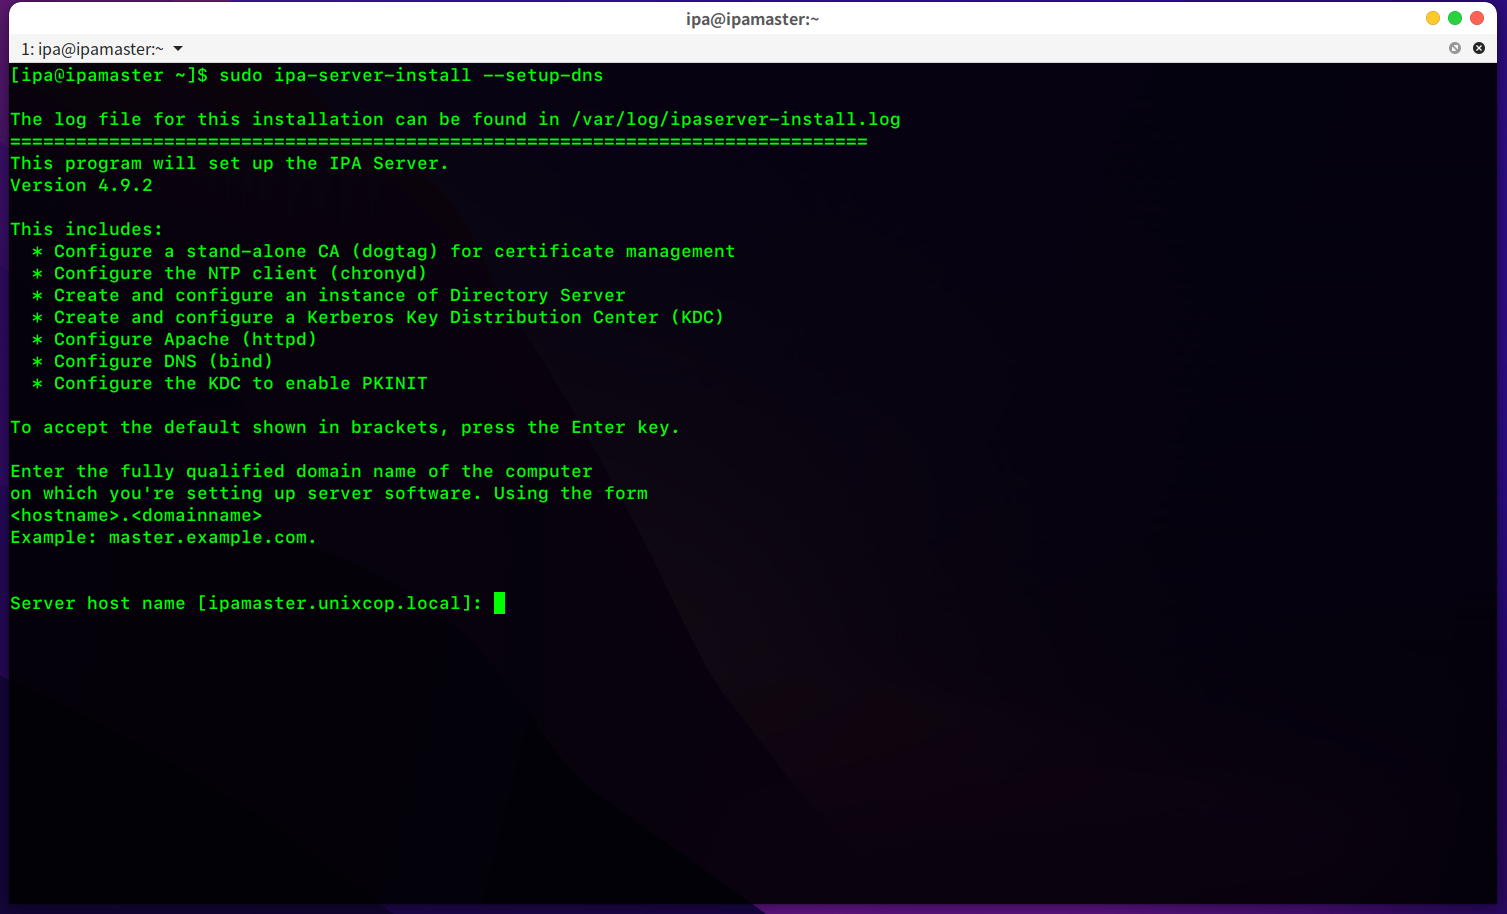
- It will ask for the hostname. We have already set the hostname earlier. Type it again or just press Enter, if you are lazy like me 😉
- Then it will ask for the confirmation of the domain name. In this case the name should be unixcop.local. Type of hit enter for the next step.
- Going ahead, you will find the following steps:
(I am sharing what I have done with the naming convention. Yours might be different)
REALM Name: UNIXCOP.LOCAL
- Directory Manager Password: (choose a password of 8 character)

- Confirm the Password
- IPA has an administrative user named “admin” We have to set the password for this user & confirm the password.
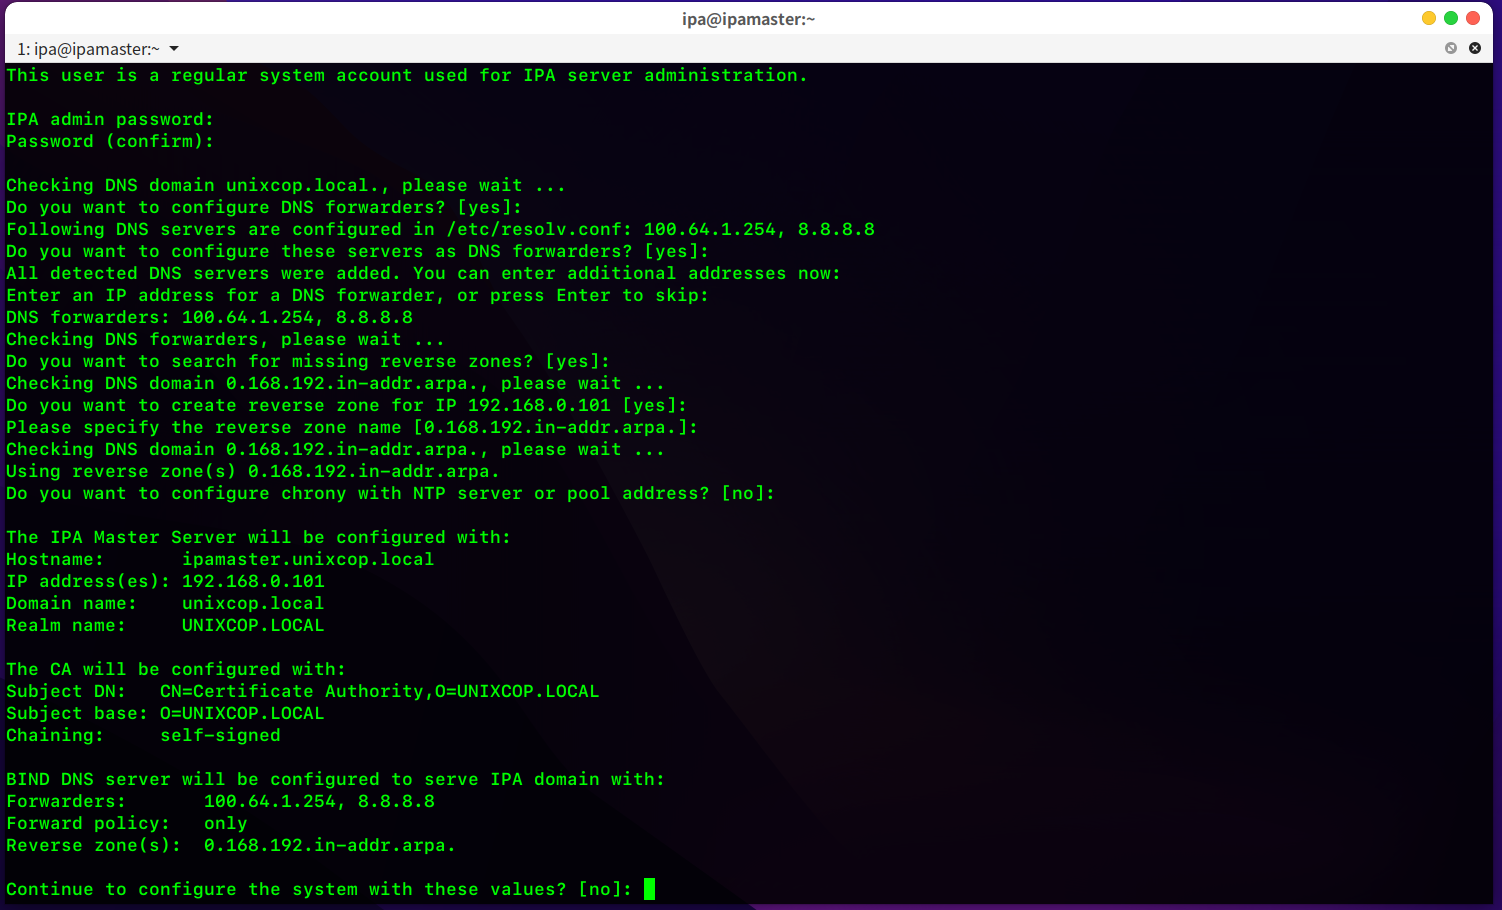
- We want to configure these servers as DNS Forwarders, press Enter for additional DNS Servers, add ip address, for now we don’t need that.
- Then it will add the DNS reverse zone & will configure the NTP. We have to type Yes whenever it wants to configure chrony with NTP servers.
- After finishing all of those, The prompt will show up with an installation summary.We have to type Yes on the prompt saying Continue to configure the system with those values.
- Then the IPA will start configuring the system & will get the following output.
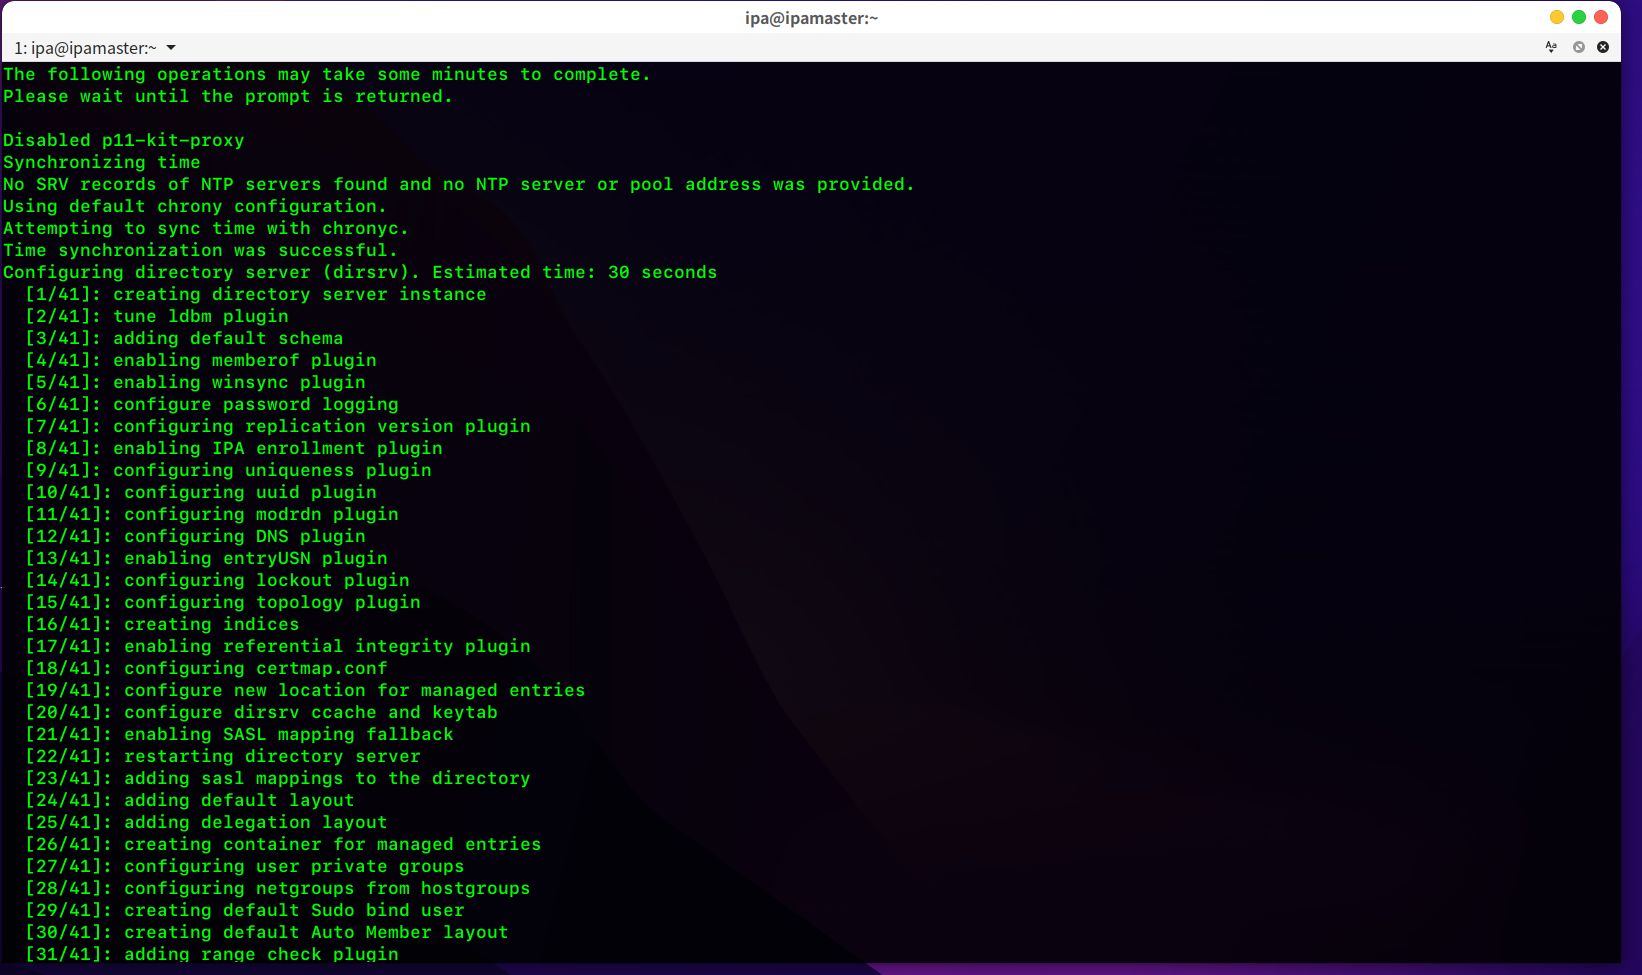
After a while, after all the installation process is done, we will get the output as follows

Verify Admin
To use ipa command, you need to first get a Kerberos ticket. It’s a certificate issued by an authentication server, encrypted using the server key.
Run the following command & you will get the output like this
kinit admin

We can check the detailed information using the klist command
klist

Also, user-find option of the IPA command can be used to verify the user
ipa user-find admin

Access The FreeIPA GUI
After all done, Now we are ready to access the GUI
Open your favourite browser & type the following
https://ipamaster.unixcop.local/
You will find the Landing page as follows

Login to the page using “admin” as username and the password that you have given at the installation stage.
Successful login will show up with this page.

Add some uses
We will add our first user John using the ipa user-add command
Full command will look like this. His username is user1
ipa user-add user1 --first=john --last=doe [email protected] --shell=/bin/sh --password
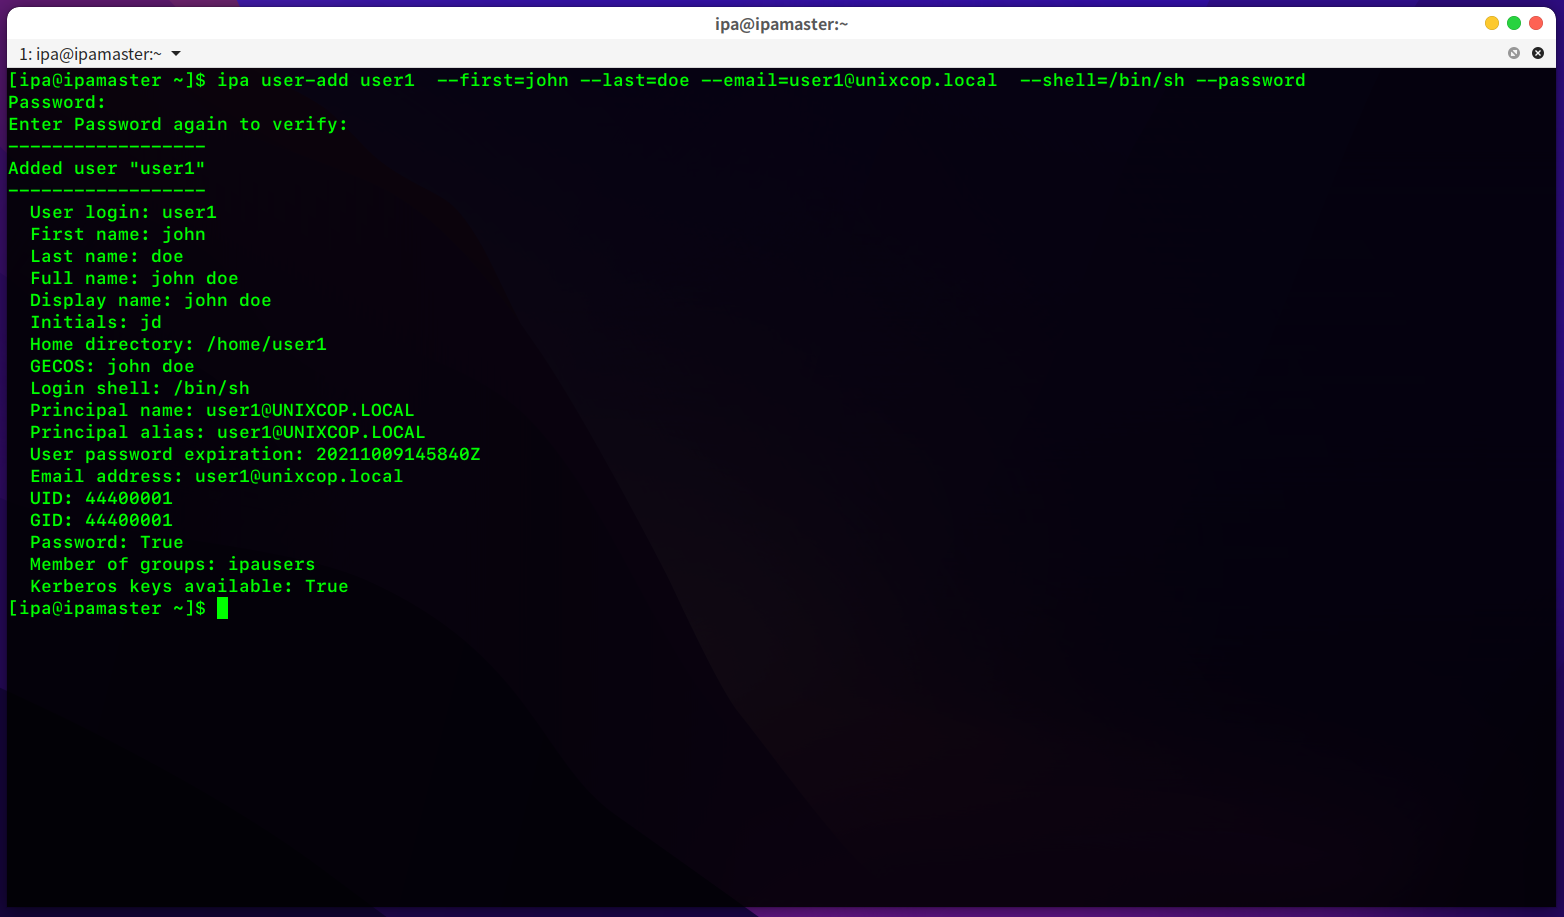
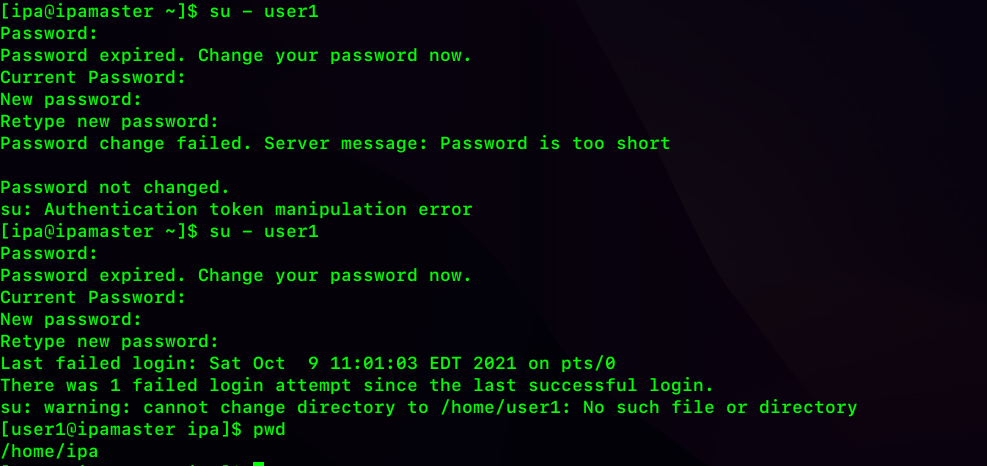
At first login, user1 will be forced to change the password
And another thing, it looks like it’s home directory has not been created. It’s using our master node user’s home directory.
We have to change this thing. We have to make sure that the user1 will land on it’s own home directory.
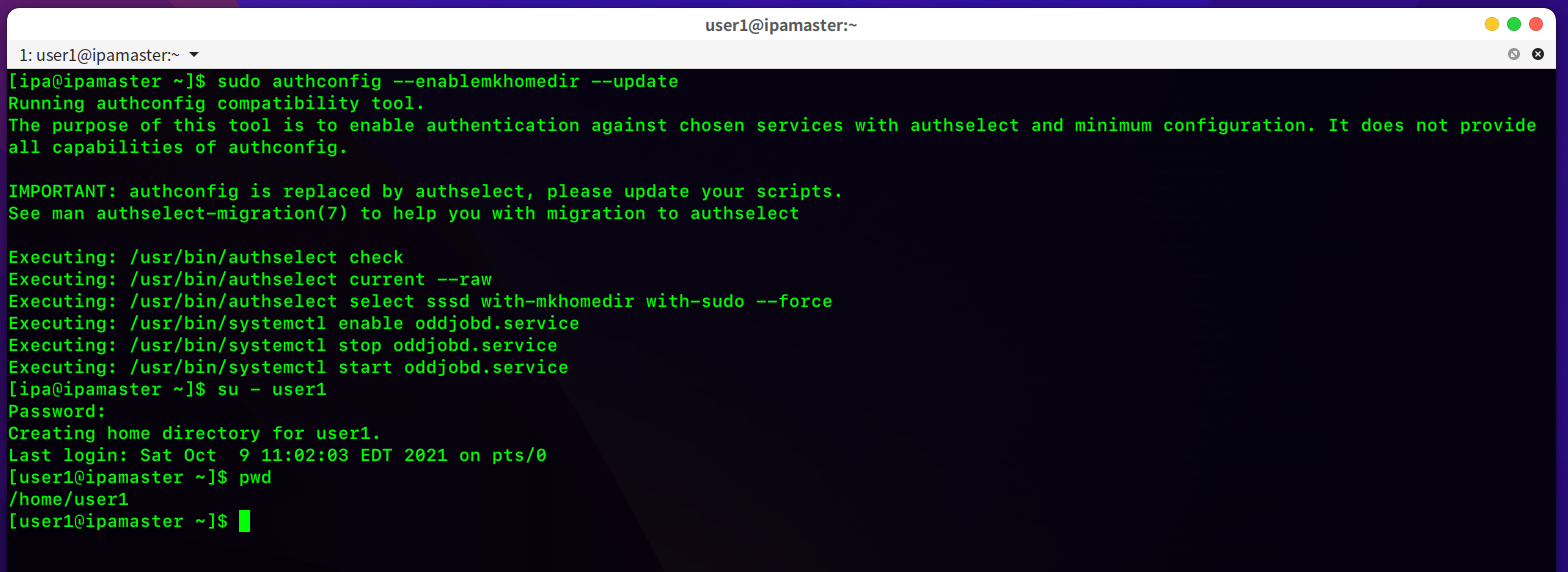
Using authconfig command, we will update the user1’s home directory
sudo authconfig --enablemkhomedir --update
Sure enough, this is creating the user1’s home directory.
Uninstall
If you want to uninstall the freeIPA hit the following command
sudo ipa-server-install --uninstall
Well, that’s it for now. If you have any questions/queries/concerns, please let me know in the comment section. If you find it’s useful, don’t forget to share with your friends !
Hello!
How are you?
I am installing the FreeIPA on KVM machine, the network is configured and works nice (bridge mode – same network 10.1.1.x), behind PFsense that can access by: https:PFsense_IP:8080 right?
On your tutorial you write that we need open port 8080.
So, if the services have the same ports (pfesense and freeipa – 8080) so I need to switch other of pfsense?
Because I did install freeipa many times. Check users, ipactl status, it gives me no errors, all are well. And I can not access the freeipa web. It is not work.
Does the Domain name need registred and answer in internet or locally?
I fell lost to solve the problem. Please, can you help me?
Thanks
Douglas