
Data Integration ensures that information is timely, accurate, and consistent across complex systems. Although it is still frequently referred as Extract-Transform-Load (ETL), data integration was initially considered as the architecture used for loading Enterprise Data Warehouse systems.
Data integration now includes data movement, data synchronization, data quality, data management, and data services.
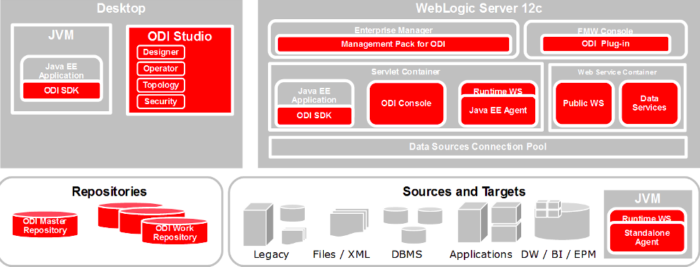
Oracle Data Integrator s built on several components all working together around a centralized metadata repository.
Also these components – graphical modules, runtime agents and web based interfaces – in conjunction with other advanced features make ODI a lightweight, state of the art data integration platform.
With its superior performance and flexible architecture, Oracle Data Integrator can_be used in various types of projects such as Data Warehousing, SOA, Business Intelligence or Application Integration.
Hello everyone ! So today we are learning about Oracle Data Integrator & will go through the installation process of it, sit back & relax, lot’s of boring & interesting staffs are coming !
Features of Oracle Data Integrator
- The integration with Oracle Business Intelligence Enterprise Edition provides business
users with report-to-source data lineage.
- The Load Balancing feature enables large volumes of data to be processed by automatically
balancing the workload between several Agents.
- Advanced Version Management provides an interface to manage, safeguard, and replicate
revisions of units of work, even in the largest development environments.
Architecture
I will try to describe an overview of this architecture components
The main components are as follows:
Repositories
So, This is the central repository with a client server fashion. It stores configuration information about the IT infrastructure, metadata of all applications, projects, scenarios, and the execution logs.
Users
Administrators, Developers and Operators use the Oracle Data Integrator Studio to access the repositories. This Fusion Client Platform (FCP) based UI is used for administering the infrastructure (security and topology), reverse-engineering the metadata, developing projects, scheduling, operating and monitoring executions.
Run-Time Agent
During the design phase, developers generate scenarios from the business rules that they have designed. The code of these scenarios is then retrieved from the repository by the Run-Time Agent.
Also This agent then connects to the data servers and orchestrates the code execution on these servers. It retrieves the return codes and messages for the execution, as well as additional logging information – such as the number of processed records, execution time etc in the Repository.
Oracle Data Integrator Console
Also Business & all other users can have read access to the repository, perform topology configuration and production operations through a web based UI called Oracle Data Integrator Console. This web application can be deployed in a Java EE application server such as Oracle WebLogic.
ODI Domains
An ODI domain contains the Oracle Data Integrator components that can be managed using Oracle Enterprise Manager Cloud Control.
Well, I guess i have made a complex yet easy to understand description. I will not go with the deep drive. Next go to the straight forward installation & configuration.
Requirements
I needed the following things to do the installation & configuration work:
- Fresh installed Cantos 8 Machine
- 4 GB of RAM.
- 4 Core CPU.
- 50 GB of free Space.
- 1 Static IP.
- Graphical Access on the server (if you work with ssh XAuthority like me)
Before Getting Started
Machine Installation
So, I have installed a centos8 machine on the virtual box with the IP 192.168.0.200 & user odi. We will do the rest of the work with the username odi & oracle (User oracle will_be added later on the installation interest).
User odi has administrative access to the machine. Not recommended that we use root for the installation purposes.
Set the Hostname
We will set the hostname as ipamaster.unixcop.local. Obviously you can set of your own
hostnamectl set-hostname odi.unixcop.local

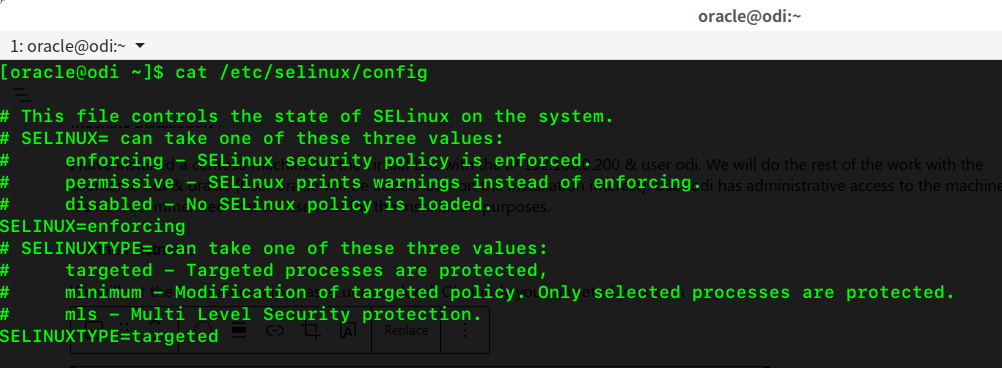
SELinux Permissive
Also We need to set the SELinux is Permissive/Disabled mode
So We can make it permanent or temporary by changing the configuration situated at the /etc/selinux Directory
Entry to the hosts file
Also We have to add the IP & hostname to the /etc/hosts file. In my case, the IP is 192.168.0.200
Installation & Configuration
System Updation
First we need to update our system, just to make sure all the packages/softwares updated.
Run the command
sudo dnf update -y
Have patience please ! it might take a while (on fresh machine depending on your internet connection)
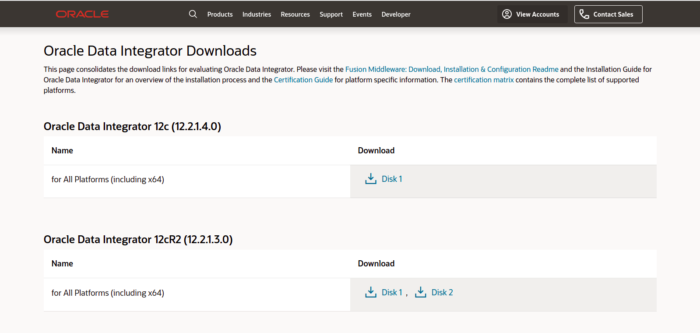
Download & Install Oracle Data Integrator
We need to download the ODI from official oracle source.
Go to this page https://www.oracle.com/middleware/technologies/data-integrator-downloads.html
Download for All Platforms (including x64)
After completing the download, let’s go the installation process. First we need to unzip the downloaded software with the unzip command.
unzip fmw_12.2.1.4.0_odi_Disk1_1of1.zip

When it done, we will go to the install step.
Run the following command
java -jar fmw_12.2.1.4.0_odi.jar
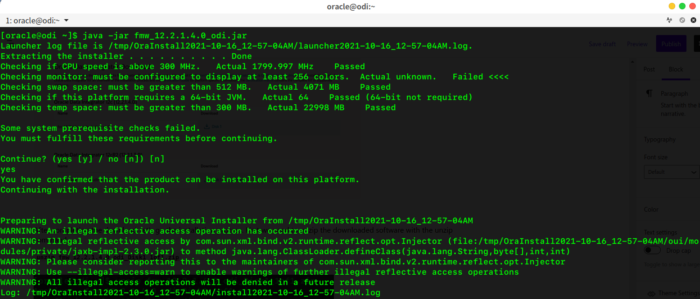
You may get this type of output on your terminal. Here you are seeing that I am getting some failed error, because I have sshed with the XAuthority, the required color not matched. If you do this on your server, you won’t get this error.
Continue? type ‘y’ or ‘yes’, you will get a GUI like the following
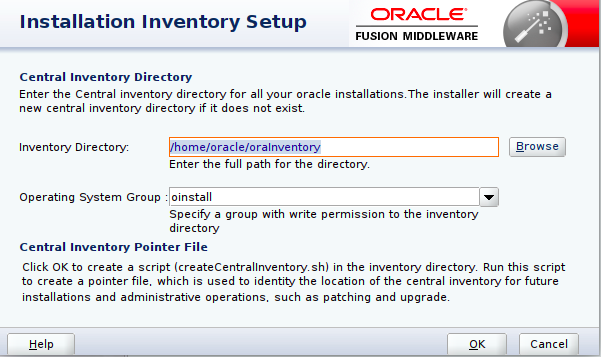
You will_be asked to set the inventory directory, I will go with the default, you can always change the directory for your own, then click OK
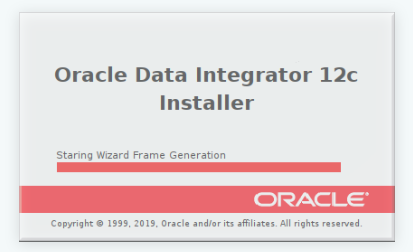
Wait till the installer loaded
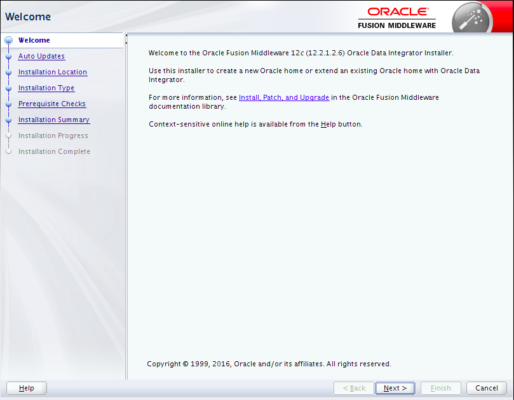
You will get the welcome page, review everything & press Next.
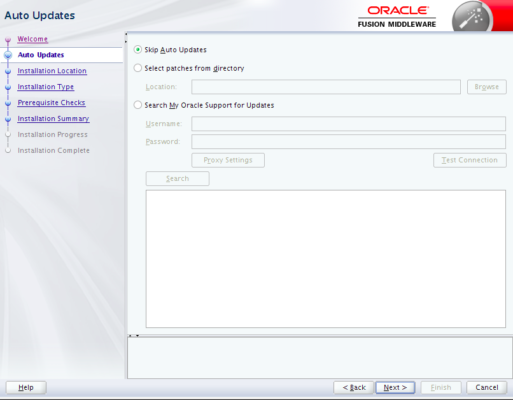
Select the Skip Auto Updated option & hit Next
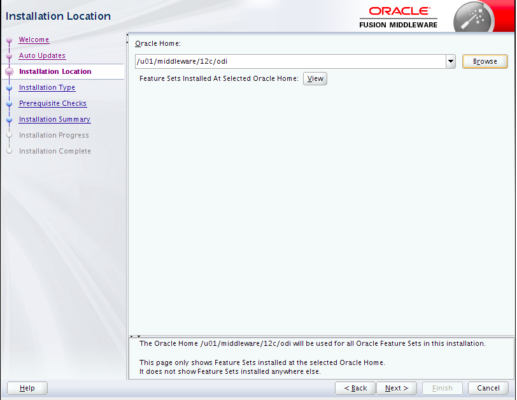
Select the Oracle Home as we have made initially. You can have your own (if any) & hit Next.
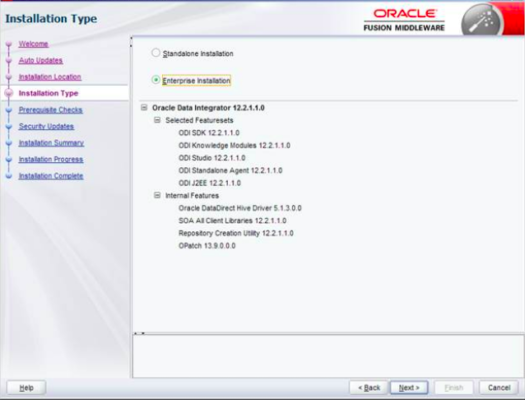
Select the Installation Type “Enterprise Installation” & Hit Next
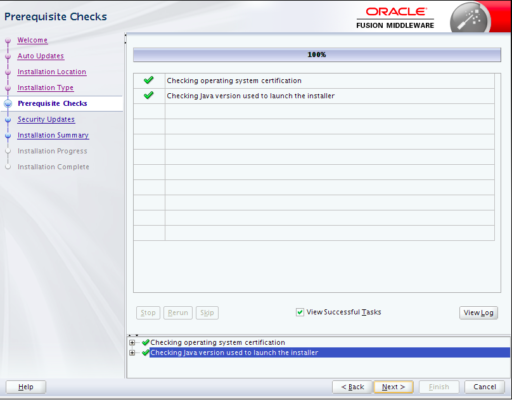
Next it will check the OS prerequisites to go ahead, once checking done, hit Next
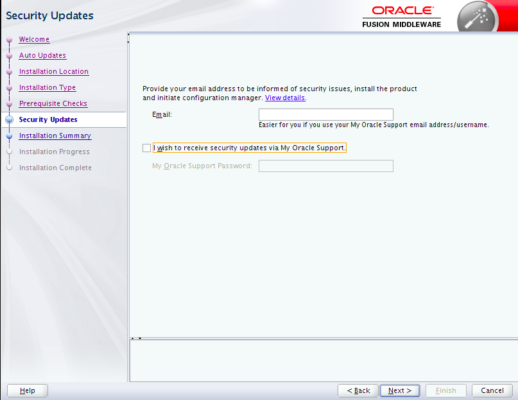
You can add your own mail or if you have oracle support mail, you can receive updates from here as well. Hit Next to proceed.
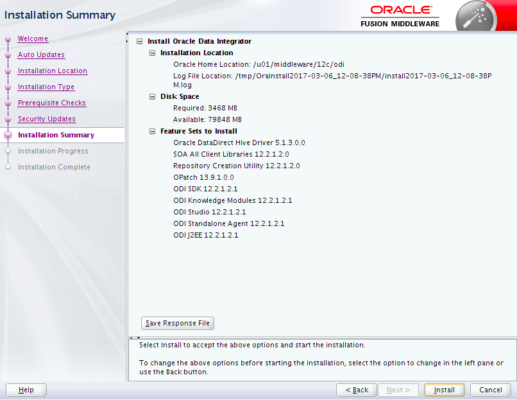
You will see the installation summary of your installation, click install to begin install.
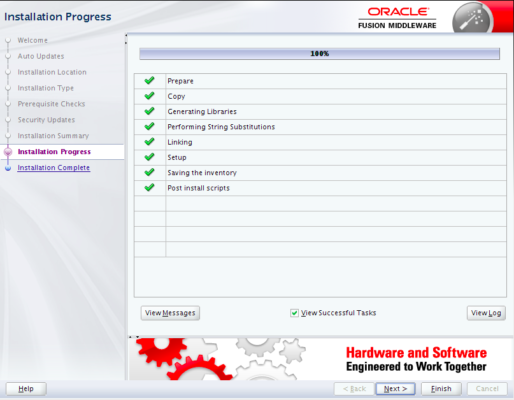
After a while, your installation process is done, if no other exceptions occur, Hit next once done.
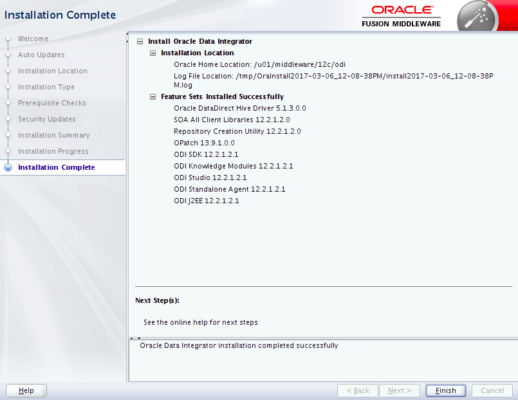
Finally, if everything goes well, you will see the installation summary, Hit Finish.
Congratulations ! you have successfully installed the ODI on CentOS 8.
That’s all for today guys, hope you will find this useful. Share with your friends & if you have any queries let me know in the comment section. Have a nice day !