
In this article, we will be learning how to create a load balancer in the Google Cloud Platform (GCP).
What is Load Balancing?
Load Balancing is a method or technique to efficiently distribute the incoming request from multiple clients to the different back-end servers running in your cluster.
What is Load Balancer?
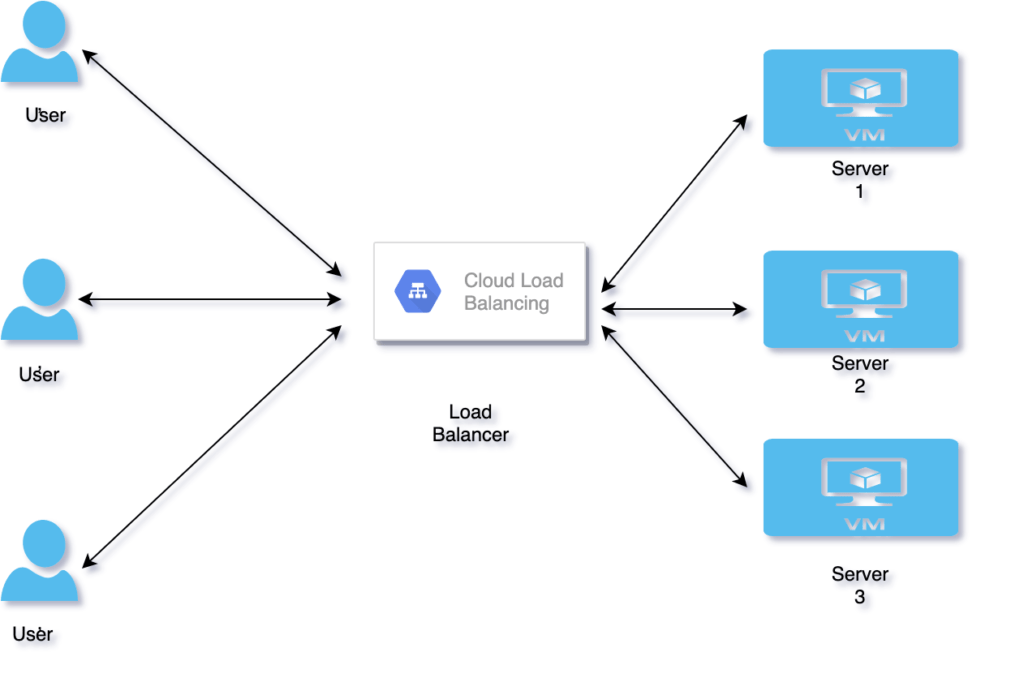
Load Balancers are physical hardware machines that efficiently distribute the incoming traffic from the clients across multiple back-end servers. Clients will always connect to a single IP or URL and the load balancer will connect to the servers behind the scene and decide which of the server is best suitable to process the client’s request.
Load balancers also detect the health of back-end machines so that it always sends the traffic only to those servers which are available to serve the request.
This is how the architecture of typical Load Balancer is:
Benefits of Load Balancing?
Few popular benefits of load balancing are:
- Increased performance.
- Fault tolerance.
- Increased scalability.
- Redundancy.
- Enhanced security.
Steps to create Load Balancer:
Prerequisites:
To create GCP LB we need to have at least 2 VMs where the traffic will be routed from the Load Balancer.
Step 1: Login to GCP
Login to your GCP account and click on Compute Engine and then select Instance Groups.
Step 2: Create an instance group.
In this step, we need to create an instance group where the requests will get redirected. Select the “Create an instance group” option.
Select “New Unmanaged Instance Group” and enter the details like instance group name, Region, Zone, VPC, subnet and instances which will be part of this instance group.
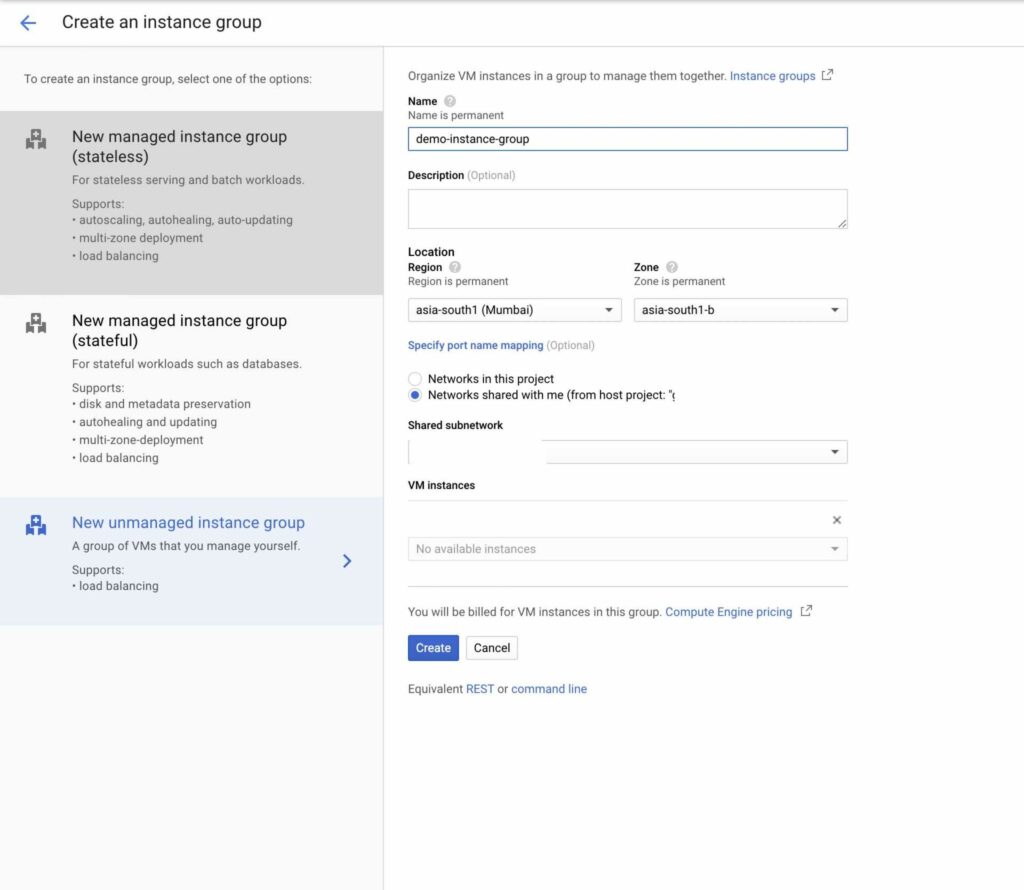
Click on “Create” button to create instance group.
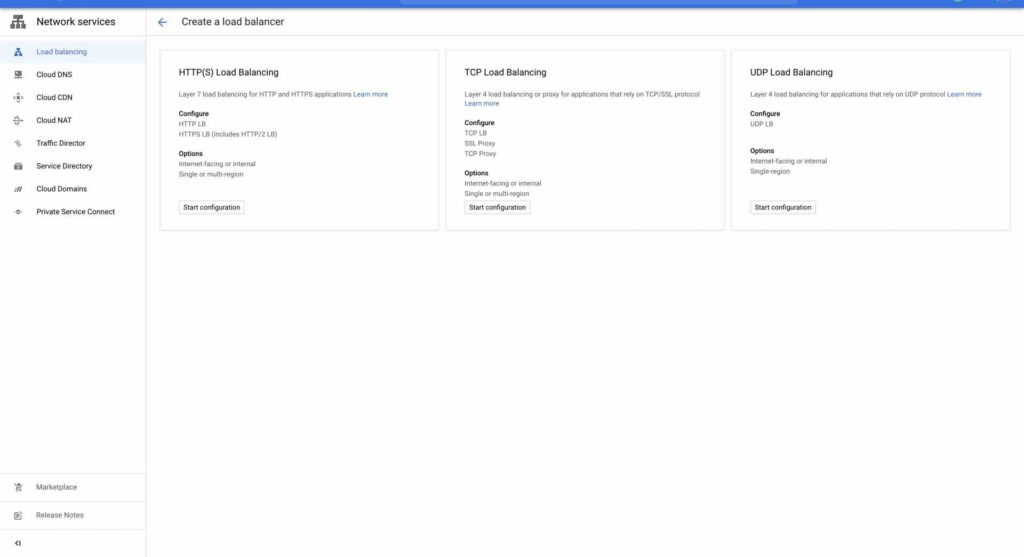
Step 3: Go to Load balancing
Click on Networking Services from left side of the menu and select Load Balancing
Once the page loads, click on “Create Load Balancer”

Step 4: HTTP(s) Load Balancing
There are various types of Load balancers available. As part of this article, we will create HTTP(s) Load Balancer.
Select HTTP(S) Load Balancing and click on “Start Configuration” Button.
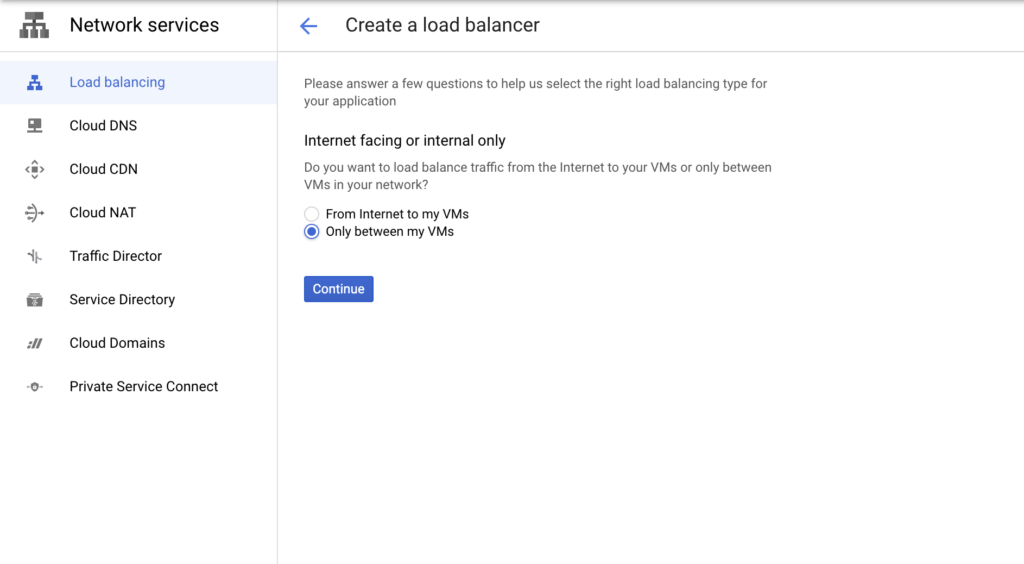
Select “Only between my VMs” and click on continue.
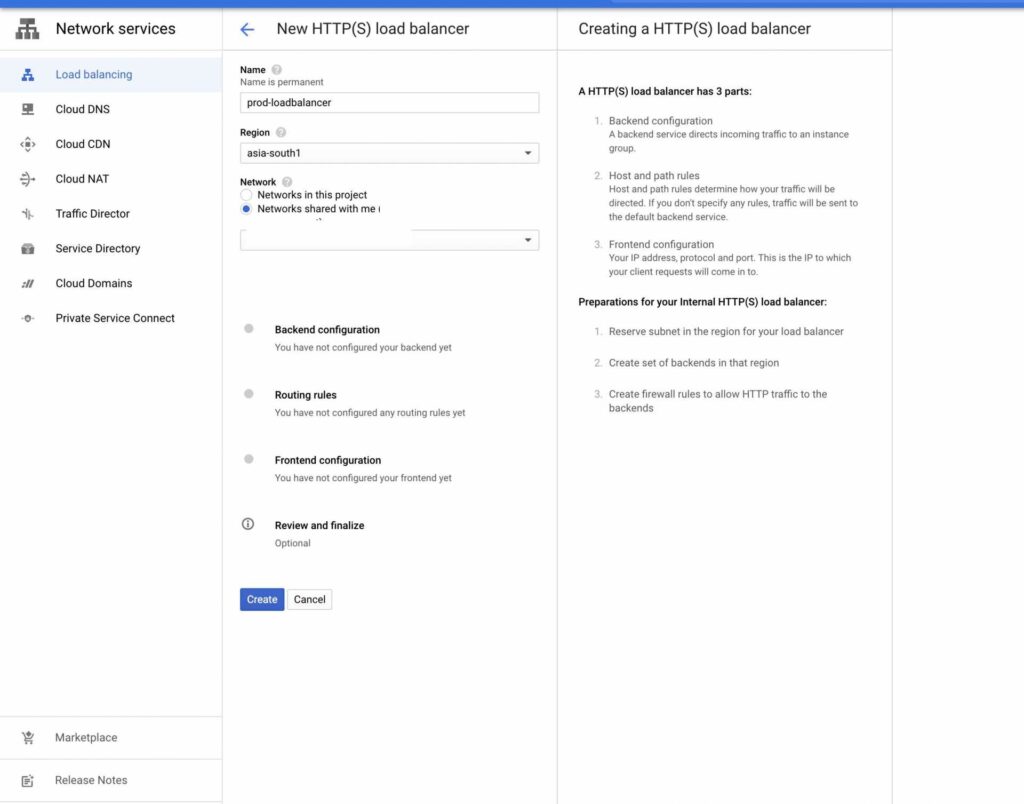
Step 5: Basic Details about Load Balancer
Here, we need to enter basic details about our load balancer like Name, Region, Network. Fill those and then click on “Backend Configurations”.
Step 6: Create Backend Configuration:
Before creating a back-end configuration we need to create back-end services where the requests will get redirected. Select the “Create a back-end service” option.
Enter the name of your back-end service
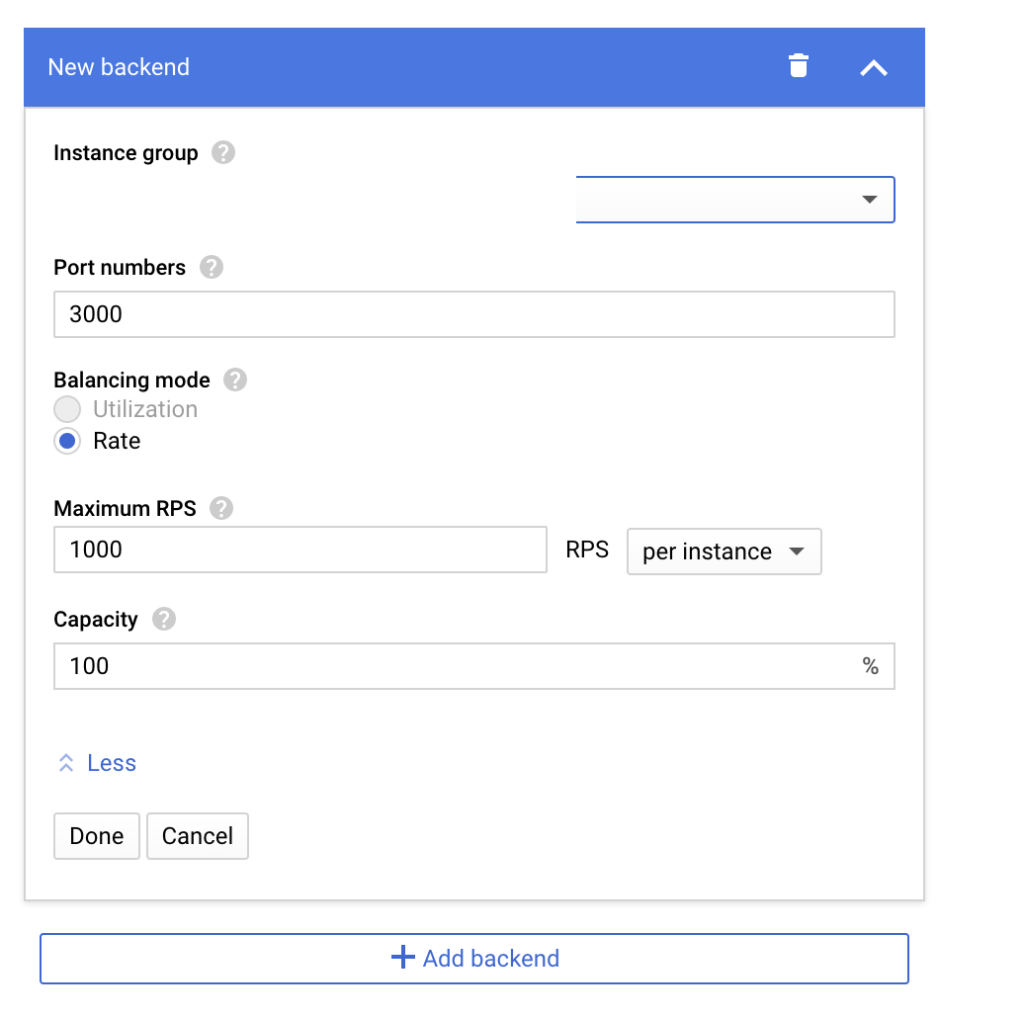
Step 6a: Select an instance group.
Select the instance group created in Step 2. Enter the port number of the service and then click on “Done”
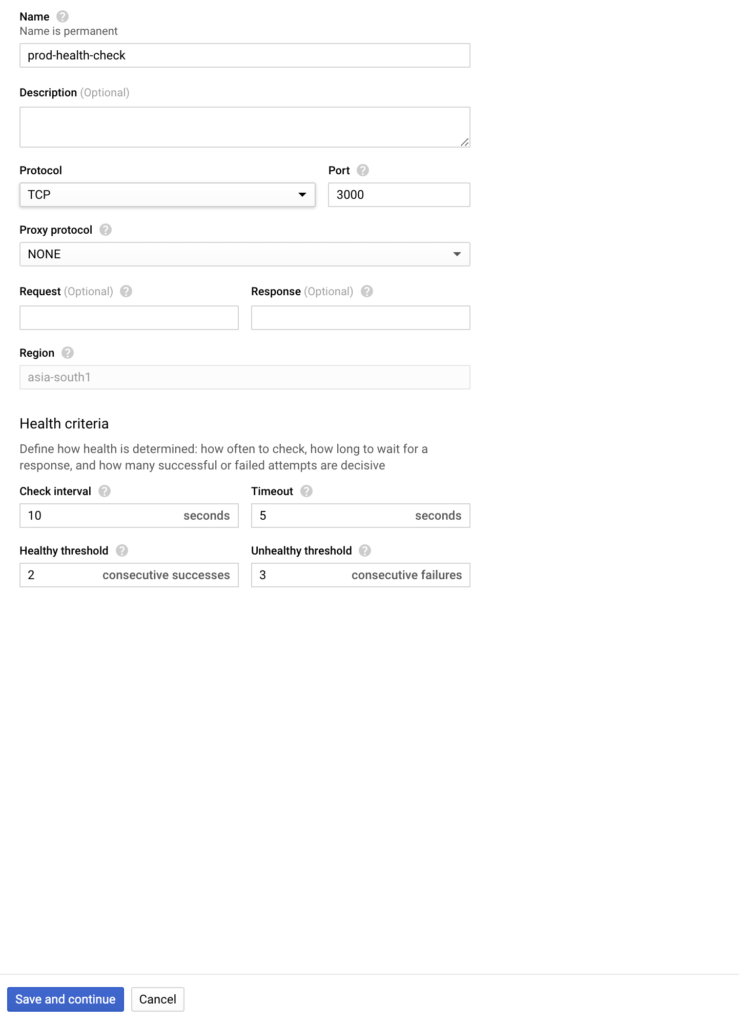
Step 6b: Create a health check:
Enter the name of your health check. Select protocol as TCP and give the service port as Port and then click on Save and Continue.
Click “Create” button to create a back-end service.
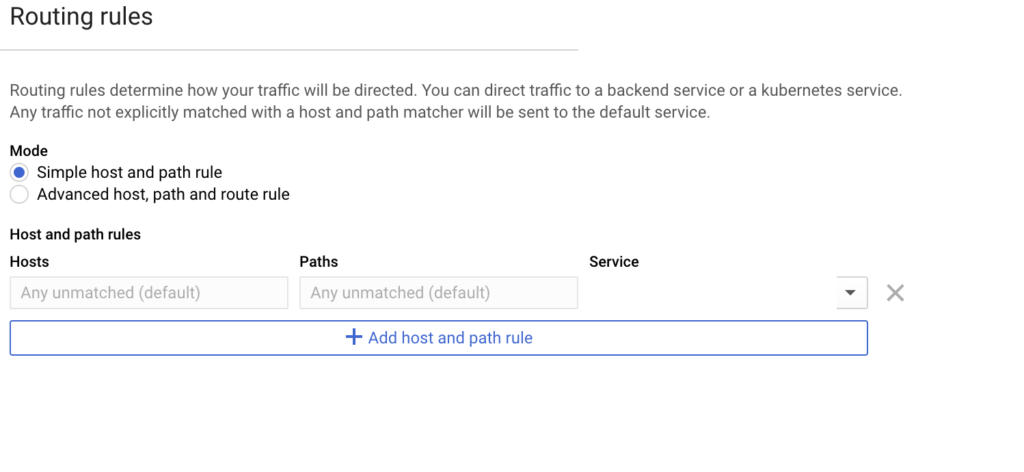
Step 7: Create routing rules:
Click on routing rules and select the back-end service created in step 6 from the drop-down option.
Step 8: Front end configuration
No Changes are required in this section. Leave the default options as it is.
Step 9: Review and create.
Click on Review and finalize to make sure all the configurations are correct. Click on Create button to start Load balancer creation.
Step 10: Verify
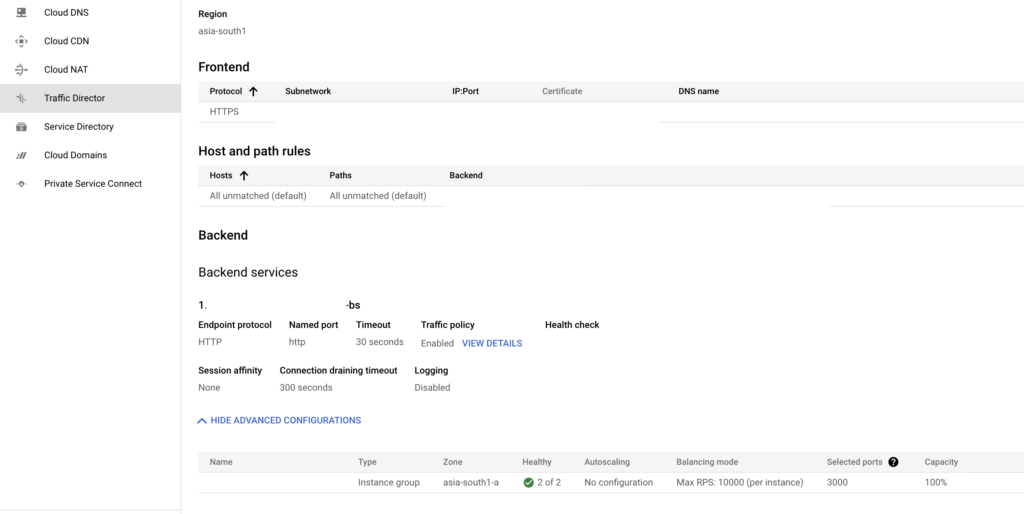
It will take few minutes for the LB creation. Once it is fully up and ready to serve the requests you will be able to see Green check in the Healthy column.
With this, your Internal HTTP(s) Load balancer is up and running.
Cheers !!!