
Hello, friends. In this post, we will talk about how to install Chamilo LMS on Ubuntu 20.04. Let’s go for it.
Introducing to Chamilo LMS
Chamilo is an LMS tool that allows us to set up a virtual campus for E-Learning. It is released under GPL so it is possible to install, modify and create complementary elements that allow to adapt this platform to specific needs of e-learning projects.
As is to be expected in this type of application, you can create users, courses, material, and evaluations so that nothing is missing for learning. And thanks to the available plugins, you can integrate it with Zoom or Google Meets.
The application is made with PHP and as database manager uses MariaDB / MySQL, so it is compatible with Linux, Windows and any system compatible with these tools. Let’s go for it.
Install Chamilo LMS on Ubuntu 20.04
Install Apache and PHP on Ubuntu
Before we start, we have to install and configure a few things.
So, the first thing to do is to install Apache and PHP for this in an SSH session by running
sudo apt update
sudo apt upgrade
And now install Apache
sudo apt install apache2
Then, install PHP, its modules as well as the unzip package.
sudo apt install php7.4 libapache2-mod-php7.4 php7.4-json php7.4-curl php7.4-mysql php7.4-xml php7.4-xmlrpc php7.4-common php77. 4-sqlite3 php7.4-curl php7.4-intl php7.4-mbstring php7.4-gd php7.4-zip php7.4-imap php7.4-ldap php7.4-apcu php7.4-cli php7.4-zip unzip php7.4-zip unzip
Thereafter, you should make some changes in the PHP configuration. To complete this, edit the configuration file.
sudo nano /etc/php/7.4/apache2/php.ini
And modify the following values
max_execution_time = 360
memory_limit = 512M
upload_max_filesize = 100M
date.timezone = America/Chicago
Replace America/Chicago with your timezone. Save your changes and close the text editor.
Apply the changes by restarting Apache
sudo systemctl restart apache2
Remember that you have to open ports 80 and 443 in the firewall for Apache to work.
Install MariaDB and prepare it for Chamilo
The next step is to install MariaDB. sudo apt install mariadb-server Now create a new key for the root user by executing the root script.
sudo mysql_secure_installation
After you have set the new password and answered Y to all the questions, you will have to create the database for Chamilo as well as the MariaDB user.
So, access the MariaDB shell
sudo mysql -u root -p
And now start creating the database.
CREATE DATABASE chamilo;
The user and his password.
Replace chauser and password by the values you want.
CREATE USER 'chauser'@'localhost' IDENTIFIED BY 'password';
After this, assign the correct permissions.
GRANT ALL ON chamilo.* TO 'chauser'@'localhost' WITH GRANT OPTION;
Refresh permissions
FLUSH PRIVILEGES;
And exit the shell exit;
Download Chamilo on Ubuntu 20.04
Now we can download Chamilo using the wget command. At the time of writing this post, the latest stable version is 1.11.16.
So, run
wget https://github.com/chamilo/chamilo-lms/releases/download/v1.11.16/chamilo-1.11.16.zip
Then unzip it
sudo unzip chamilo-1.11.16.zip
Create a folder inside the /var/www/html/ folder where the Chamilo content will go.
sudo mkdir /var/www/html/chamilo
And move everything unzipped to this folder.
sudo mv chamilo-1.11.16/* /var/www/html/chamilo
Make Apache the owner of the folder.
sudo chown -R www-data:www-data /var/www/html/chamilo/
Then, set the correct permissions.
sudo chmod -R 755 /var/www/html/chamilo/
After this, create a new Virtual host for Chamilo.
sudo nano /etc/apache2/sites-available/chamilo.conf
and add the following
<VirtualHost *:80>
    ServerAdmin [email protected]
    DocumentRoot /var/www/html/chamilo
    ServerName your-domain

    <Directory /var/www/html/chamilo/>
        Options FollowSymlinks
        AllowOverride All
        Require all granted
    </Directory>

    ErrorLog ${APACHE_LOG_DIR}/error.log
    CustomLog ${APACHE_LOG_DIR}/access.log combined
</VirtualHost>
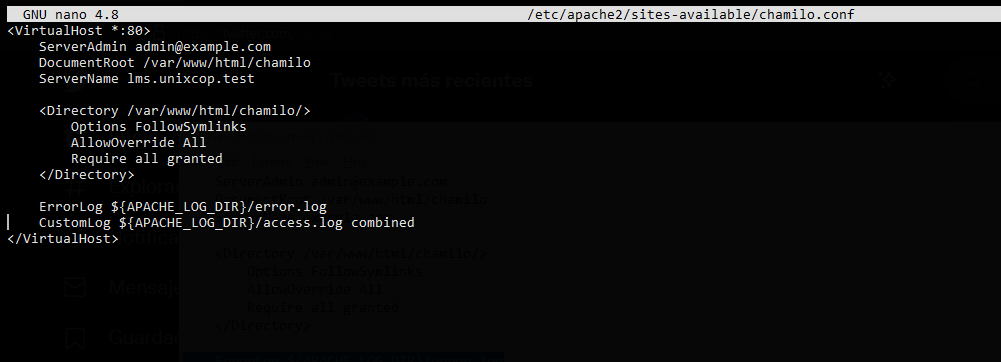
Replace the ServerName value with your domain.
Save the changes and close the editor.
Enable the new configuration
sudo a2ensite chamilo.conf
And the Apache rewrite module
sudo a2enmod rewrite
Finally, restart Apache to apply all changes.
sudo systemctl restart apache2
Install Chamilo on Ubuntu 20.04
When you access your server you will be able to choose the language, and then you will see the following welcome screen
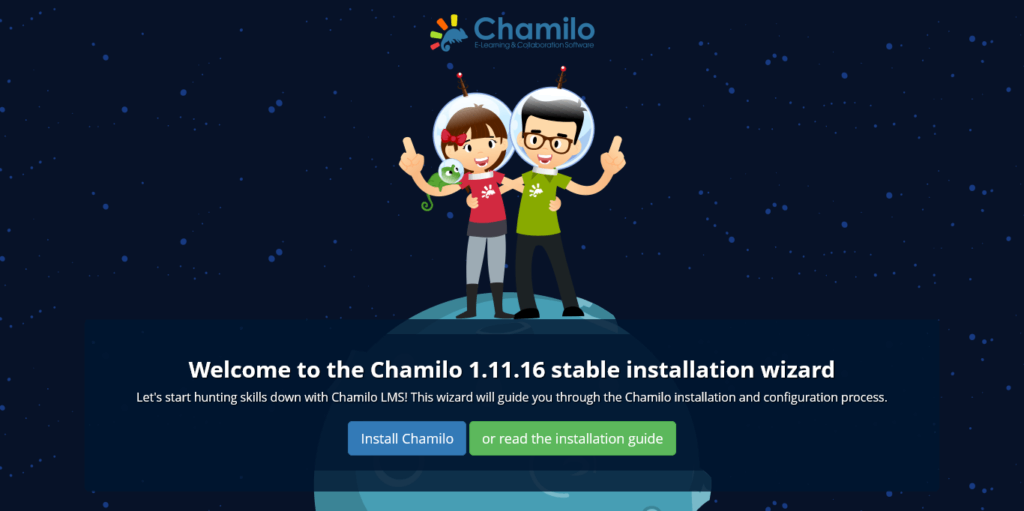
Start the installation by clicking on Install Chamilo.
Then, you will see the system requirements screen.
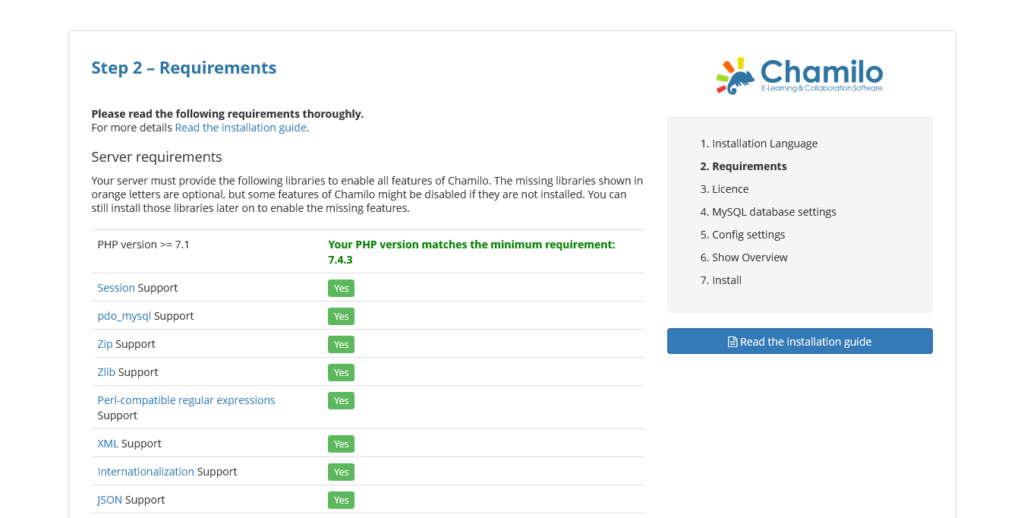
At the bottom, you will see the New Installation button that you have to click.

Then, you will be shown the application license.
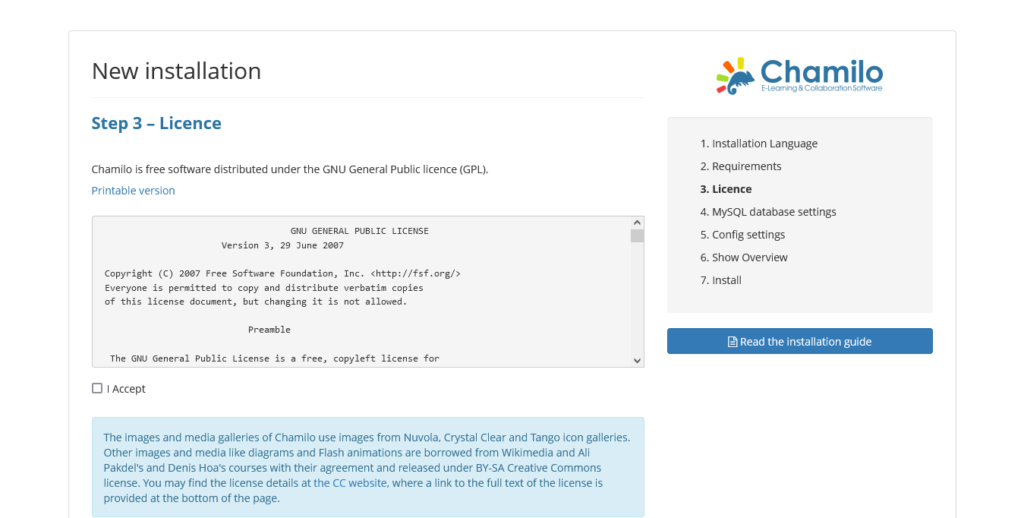
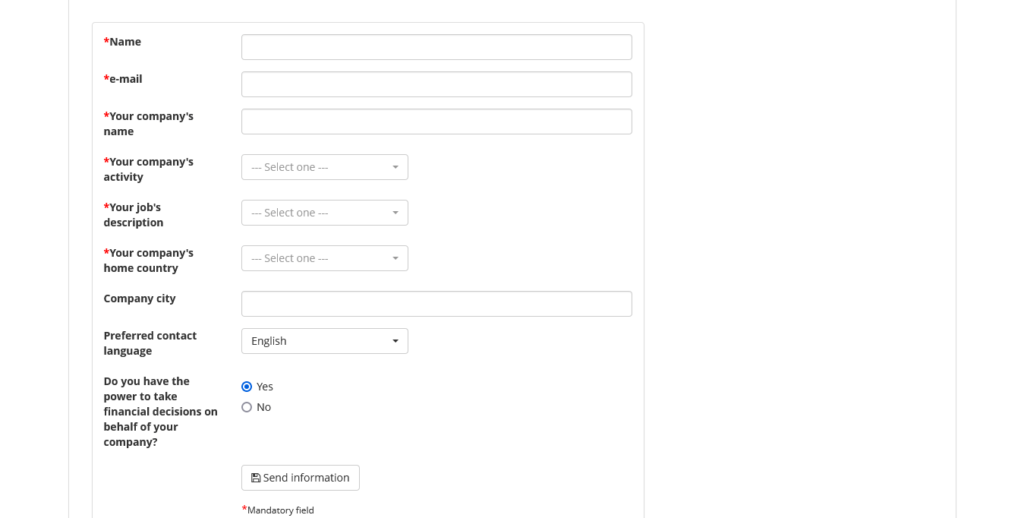
Accept it and below you will be able to configure the basic Chamilo data. Set your company name, your name, and email, as well as the language to use. This data will help the program to evolve.
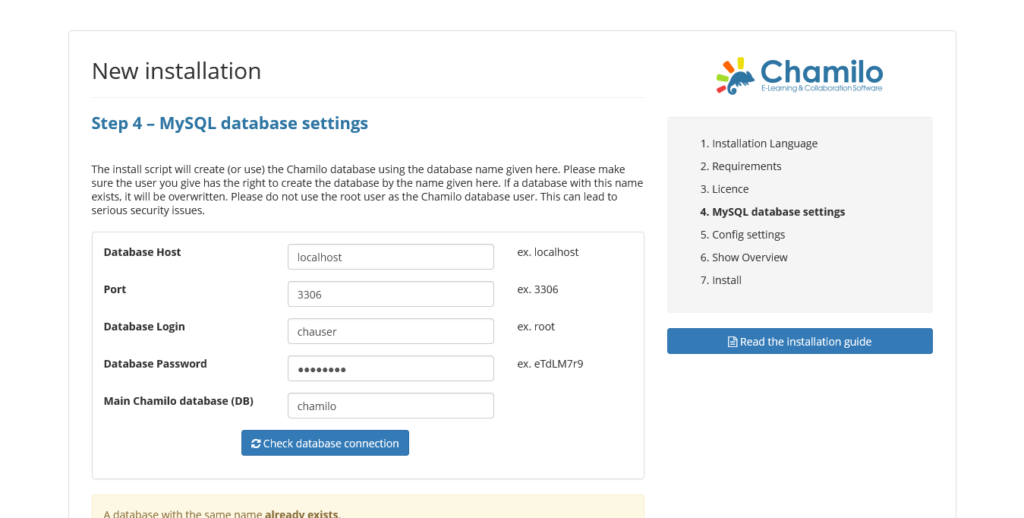
Thereafter, set the database parameters.
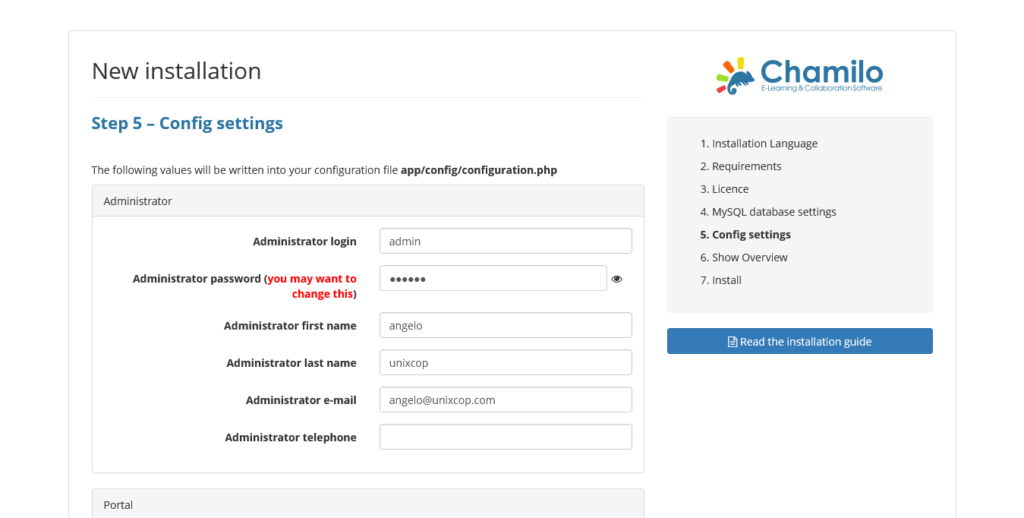
Now you have to configure the Chamilo instance. Set the password of the admin user as well as his data.
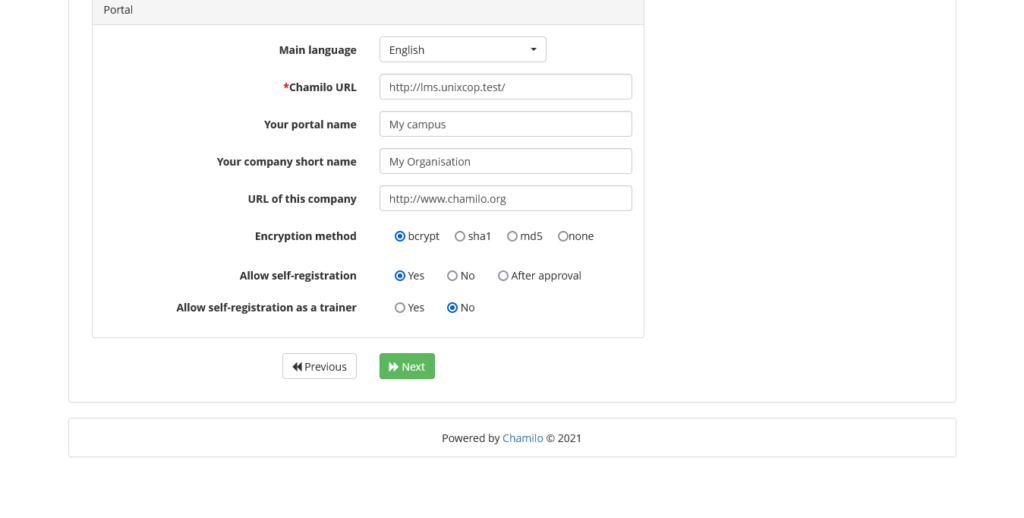
On the same page, you have to configure the portal. Here you define the language, the URL, the portal name and other options.
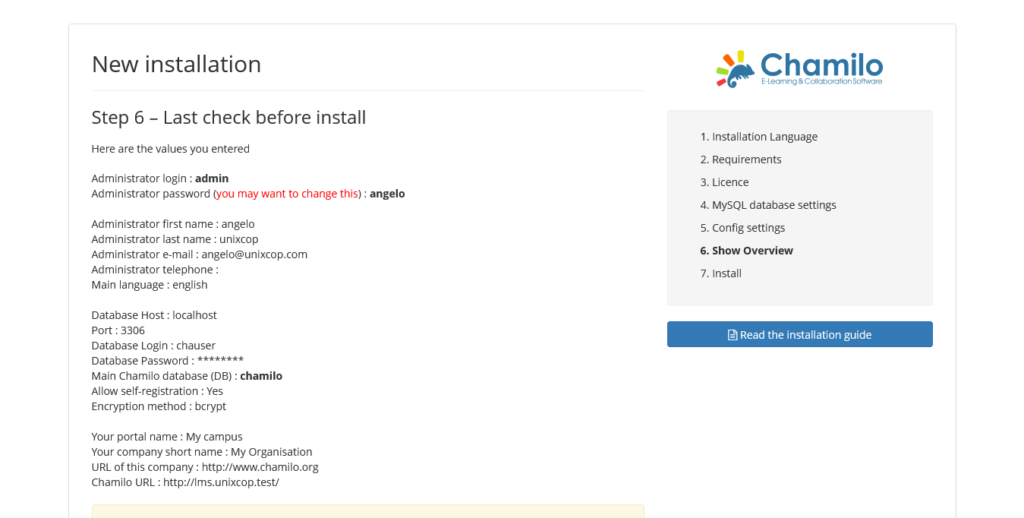
Finally, you will see a summary of the installation,
Then, the installation will start and if everything went well, you will see the following screen
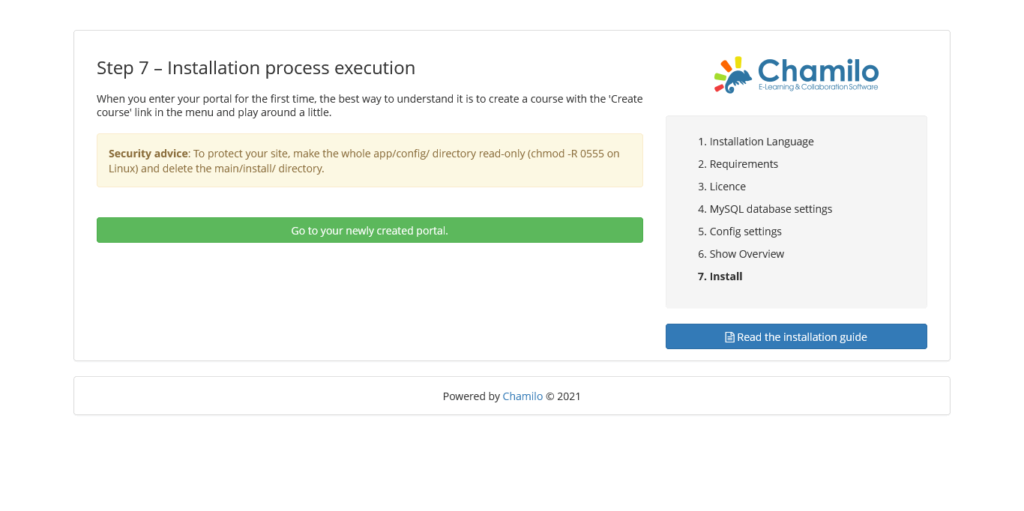
If you click on the green button, you can go to your portal.
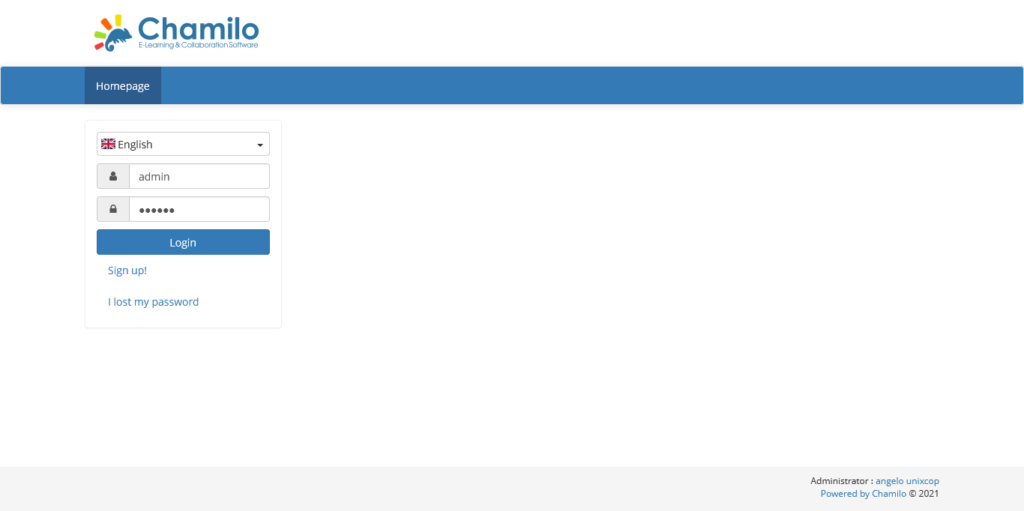
First the login screen
And then the admin panel
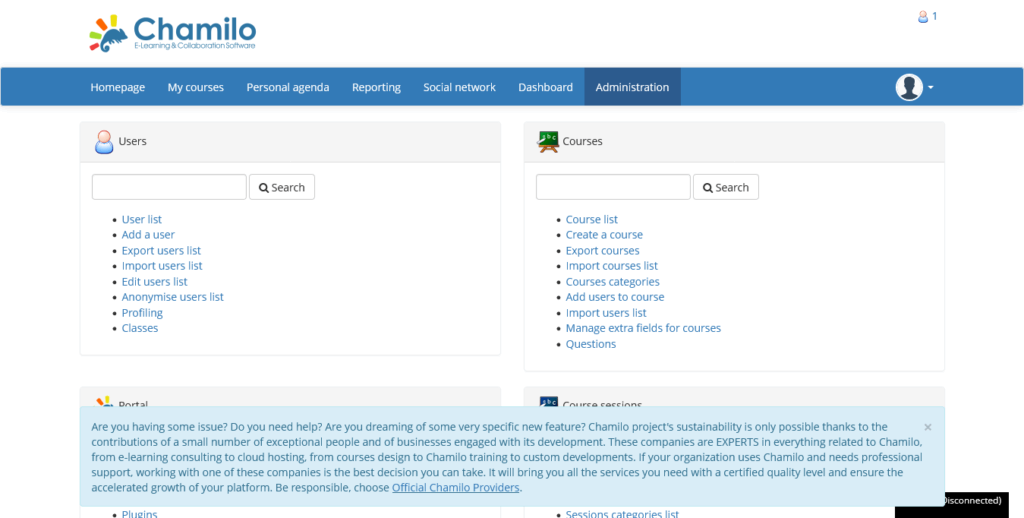
So, enjoy it
Conclusion
In this post, we have shown you how to install Chamilo LMS on Ubuntu 20.04 step by step now we have to use it to deploy our knowledge.