Introduction
Visual Studio Code or VS Code is a lightweight but powerful source code editor which runs on your desktop and is available for Windows, macOS, and Linux. It comes with built-in support for JavaScript, TypeScript, and Node.js and has a rich ecosystem of extensions for other languages (such as C++, C#, Java, Python, PHP, Go) and runtimes (such as .NET and Unity). Begin your journey with VS Code with these introductory videos.
Setting up Visual Studio Code(Standard Setup)
Getting up and running with Visual Studio Code is quick and easy. It is a small download so you can install it in a matter of minutes and give VS Code a try. Also, try the Ruby programming tutorial.
Cross platform VS Code
VS Code is a free code editor, which runs on the macOS, Linux, and Windows operating systems.
Follow the platform-specific guides below:
VS Code is lightweight and should run on most available hardware and platform versions. You can review the System Requirements to check if your computer configuration is supported.
How do we make this?
We can use a container to create a remote VS Code.
Advantages
- Code on your Chromebook, tablet, and laptop with a consistent dev environment.
- If you have a Windows or Mac workstation, more easily develop for Linux.
- Take advantage of large cloud servers to speed up tests, compilations, downloads, and more.
- Preserve battery life when you’re on the go.
- All intensive computation runs on your server.
- You’re no longer running excess instances of Chrome.
Create pod
# podman pod create --name vscodeapp -p 8443:8443 --network bridgeApplication Setup
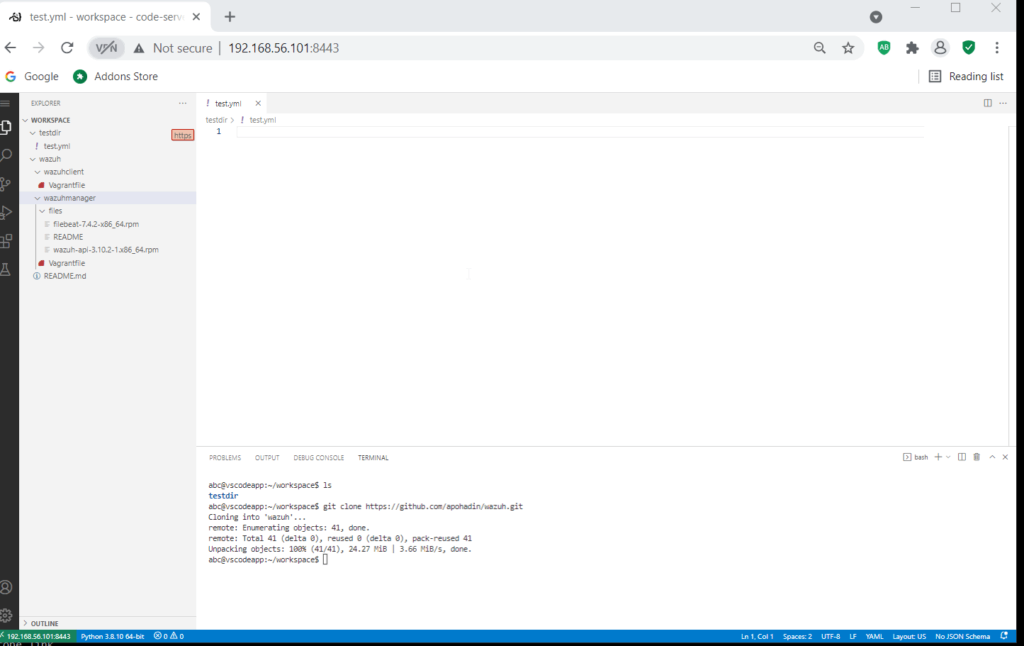
Access the WebUI at http://<your-ip>:8443. For GitHub integration, drop your ssh key into /config/.ssh. Then open a terminal from the top menu and set your GitHub username and email via the following commands.
git config --global user.name "username"
git config --global user.email "email address"
Extensions
VS Code extensions let third parties add support for additional:
- Languages – C++, C#, Go, Java, Python
- Tools – ESLint, JSHint , PowerShell
- Debuggers – PHP XDebug.
- Keymaps – Vim, Sublime Text, IntelliJ, Emacs, Atom, Brackets, Visual Studio, Eclipse
Extensions integrate into VS Code’s UI, commands, and task running systems so you’ll find it easy to work with different technologies through VS Code’s shared interface. Check out the VS Code extension Marketplace to see what’s available.
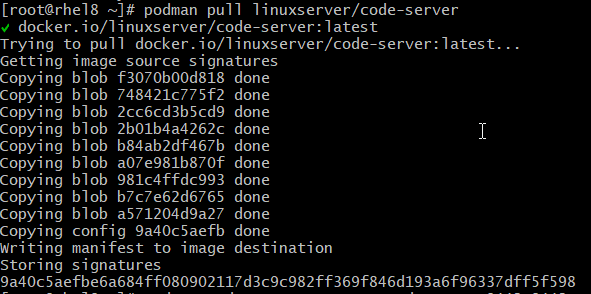
Get the image for VSCode
# podman pull linuxserver/code-server
Create the container
# podman run --pod vscodeapp --name vscode-server -d linuxserver/code-server:latestOpen from your Browser

Additional components and tools
VS Code is a small download by design and only includes the minimum number of components shared across most development workflows. Basic functionality like the editor, file management, window management, and preference settings are included. A JavaScript/TypeScript language service and Node.js debugger are also part of the base install.
If you are used to working with larger, monolithic development tools (IDEs), you may be surprised that your scenarios aren’t completely supported out of the box. For example, there isn’t a File > New Project dialog with pre-installed project templates. Most VS Code users will need to install additional components depending on their specific needs.
Commonly used components
Here are a few commonly installed components:
- Git – VS Code has built-in support for source code control using Git but requires Git to be installed separately.
- Node.js (includes npm) – A cross platform runtime for building and running JavaScript applications.
- TypeScript – The TypeScript compiler,
tsc, for transpiling TypeScript to JavaScript.
You’ll find the components above mentioned often in our documentation and walkthroughs.
Creating User and Workspace Settings
To open your user and workspace settings, use the following VS Code menu command:
- On Windows/Linux – File > Preferences > Settings
- On macOS – Code > Preferences > Settings
You can also open the Settings editor from the Command Palette (Ctrl+Shift+P) with Preferences: Open Settings or use the keyboard shortcut (Ctrl+,).


