Hello, friends. In this tutorial, I will help you to install Firefox Sync Server on Debian 11. Thanks to this, you will be able to have a private repository where you can synchronize your Firefox. This makes it ideal for companies and educational institutions that want to have full control of their data.
What is Firefox Sync?
Firefox Sync is a feature included by default in Firefox that allows us to synchronize our preferences, add-ons, history and other settings in a new installation of Firefox via an account. That is, we can use Firefox, customize it and so on, when we log in on another computer, it will start to synchronize everything leaving our Firefox as it was when we used it.
One of the advantages of this model is that we will be able to use Firefox on several devices and have the same settings on each of them. This is great.
By default, Firefox uses its server for sync, but we can deploy our own to give us more control of the data and options.
Thanks to Docker, the process is simple.
**Note: Before you start, you need to have a valid domain to complete this post.
Installing Docker on Debian 11
We are going to use Docker to install Firefox Sync. So, our first step will be to install Docker on Debian 11. For this, we recommend you to read.
How to install Docker on Debian 11?
Thereafter, we can continue.
Installing a Firefox Sync Server on Debian 11
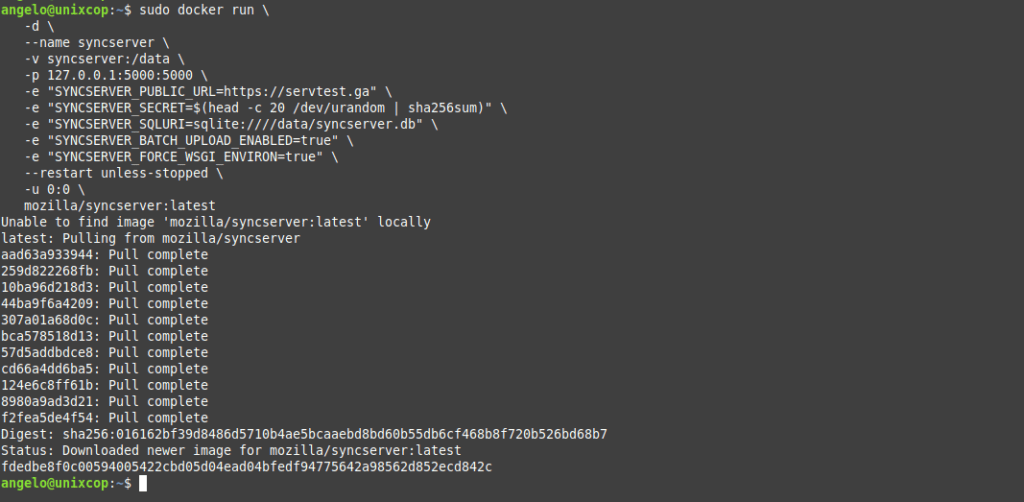
The best way to do this is via Docker. Since we already have it installed, all we have to do is run the Docker image of Firefox Sync.
sudo docker run \
   -d \
   --name syncserver
   -v syncserver:/data \
   -p 127.0.0.1:5000:5000 \
   -e "SYNCSERVER_PUBLIC_URL=https://servtest.ga" \
   -e "SYNCSERVER_SECRET=$$(head -c 20 /dev/urandom | sha256sum)" \
   -e "SYNCSERVER_SQLURI=sqlite:////data/syncserver.db" \
   -e "SYNCSERVER_BATCH_UPLOAD_ENABLED=true" \" "SYNCSERVER_BATCH_UPLOAD_ENABLED=true" \" \
   -e "SYNCSERVER_FORCE_WSGI_ENVIRON=true" \e "SYNCSERVER_FORCE_WSGI_ENVIRON=true \
   --restart unless-stopped \
   -u 0:0 \
   mozilla/syncserver:latest
Before you run it, check the options. First, you have to have a valid domain name. In this case, I used servtest.ga but it can be another one. Moreover, you can change the volume folder to your own and expose a different port.
When you run it, it will start downloading and deploying the image.
Install Nginx on Debian 11 as reverse proxy
Now you need to install Nginx to make it work as a reverse proxy. To do this run.
sudo apt install nginxThen, create a new Server Block in Nginx for Firefox Server Sync.
sudo vi /etc/nginx/sites-enabled/syncserver.confAnd now add the following content
server {
  listen 80;
  listen [::]:80;
  server_name servtest.ga;

  location / {
    proxy_pass http://127.0.0.1:5000;
    proxy_http_version 1.1;
    proxy_set_header Connection $http_connection;
    proxy_set_header Upgrade $http_upgrade;
  }
}
Replace servtest.ga with your domain name. Save the changes and close the editor.
Restart nginx to complete the process.
sudo systemctl restart nginx.Installing Let’s Encrypt certificates using Certbot
It is convenient to install Let’s Encrypt certificates to enable access using HTTPS.
To achieve this, install Certbot and the Nginx plugin.
sudo apt install certbot python3-certbot-nginxThereafter, you can install the certificate for your domain as follows
sudo certbot --nginx --agree-tos --no-eff-email -d servtest.ga -m [email protected]
Replace servtest.ga with your domain and enter your correct email address.
Accessing the new Firefox Sync server
To access the new server, you need to open a new browser tab and in the address bar type about:config and then search for the following key
identity.sync.tokenserver.uriAnd set the following value
https://servtest.ga/token/1.0/sync/1.5
Save the changes and your browser is now configured.
Conclusion
In this post, you learned how to deploy a Firefox Sync server on Debian 11 using Docker technology. The process is simple, and we only need a domain and a usable server.


