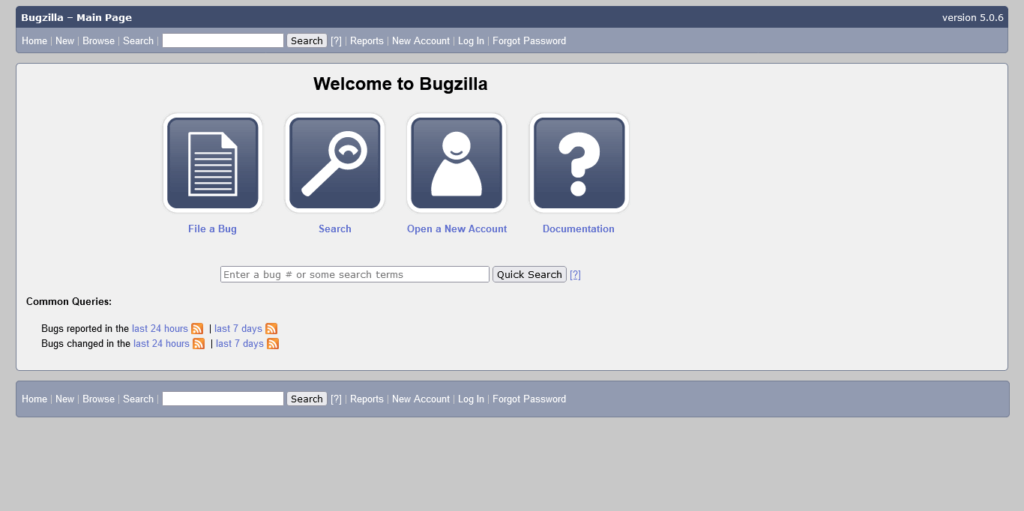
Hello, friends. In this post, we continue with the bug tracking that is so important in many work teams. So today we will show you how to install Bugzilla on Debian 11.
Bugzilla is a bug tracking system used by many work teams to manage and fix bugs. It is written in Perl language and uses a MySQL / MariaDB database to manage the daots.
Some of Bugzilla’s features include
- Optimized database structure for increased performance and scalability
- Excellent security to protect confidentiality
- Advanced query tool that can remember your searches
- Integrated email capabilities
In addition to this we can install it on our favorite Linux distribution without many problems. So let’s go for it.
Installing packages needed for Bugzilla
In this tutorial I will run the commands as root user. The first thing we have to do is to completely update the system.
apt update
apt upgrade
Thereafter, we have to install many packages including the compiler tools, Perl, and many of its modules. To install them all in one command, run.
apt install build-essential libdatetime-timezone-perl libappconfig-perl libdate-calc-perl libtemplate-perl libmime-tools-perl libdatetime-perl libdatetime-perl libemail-sender-perl libemail-mime-perl libemail-mime-perl libemail-mime-perl libdbi- perl libdbd-mysql-perl libcgi-pm-perl libmath-random-isaac-perl libmath-random-isaac-xs-perl libapache2-mod-perl2 libapache2-mod-perl2-dev libchart-perl libxml-perl libxml-twig-perl libxml-twig-perl perlmagick libgd-graph-perl libtemplate- plugin-gd-perl libsoap-lite-perl libhtml-scrubber-perl libjson-rpc-perl libdaemon-generic-perl libtheschwartz-perl libtest-taint-perl libauthen-radius-perl libhtml-formattext-withlinks-perl libgd-dev graphviz sphinx- common rst2pdf libemail-address-perl libemail-reply-perl libfile-slurp-perl libencode-detect-perl libmodule-build-perl libnet-ldap-perl libfile-which-perl libauthen-sasl-perl libfile-mimeinfo-perl libssl-dev libssl1. 1With this the server will have the Perl modules for Bugzilla installation.
Installing Apache and MariaDB on Debian 11
Now we have to install Apache and also a database manager like MariaDB. To achieve this, just run this command.
apt install apache2 mariadb-server mariadb-clientThen, you will have to define a new password for MariaDB. You can do this by running.
mysql_secure_installationYou will have to log in with an empty password that you can then change to a more secure one. In addition to this, you can answer And to each of the configuration questions that the script has.
Now it is convenient to create a new database and a new user to manage it.
So, open the MariaDB console
mysql -u root -pCreate a new database
CREATE DATABASE bugzilla;Then create a new user along with its password. You can change the values to any other values you want.
CREATE USER 'buguser'@'localhost' IDENTIFIED BY 'password';Grant permissions on the created database to this new user.
GRANT ALL PRIVILEGES ON bugzilla.* TO 'buguser'@'localhost';Apply the changes and exit the console.
FLUSH PRIVILEGES;
exit;
Now it is necessary to make some configurations on the MariaDB server. Edit the configuration file of this.
nano /etc/mysql/mariadb.conf.d/50-server.cnfAnd under the [mysqld] section add the following:
max_allowed_packet=16M
ft_min_word_len=2
Save the changes and to apply them restart the MariaDB server.
systemctl restart mariadbDownload and install Bugzilla on Debian 11
With the help of the wget command you can download Bugzilla as follows
wget https://ftp.mozilla.org/pub/mozilla.org/webtools/bugzilla-5.0.6.tar.gz
Then create a new folder for the Bugzilla files.
mkdir /var/www/html/bugzillaUnzip the archive inside the folder.
tar xf bugzilla-5.0.6.tar.gz -C /var/www/html/bugzilla --strip-components=1Access it
cd /var/www/html/bugzillaAnd in a file called localconfig you need to add the database information we have created.
nano localconfigAdd the following:
$create_htaccess = 1;
$webservergroup = 'www-data';
$use_suexec = 1;
$db_driver = 'mysql';
$db_host = 'localhost';
$db_name = 'bugzilla';
$db_user = 'buguser';
$db_pass = 'password';
remember that you have to modify the values by the ones you have added in the previous step.
Save the changes and close the editor.
Check that the Perl modules are complete
sed -i 's/^.*$var =~ tr/#&/' /var/www/html/bugzilla/Bugzilla/Util.pm
./checksetup.pl
Usually, there will be several missing and to install them you just need to run
/usr/bin/perl install-module.pl --all
Then make the Bugzilla folder Apache so that the web interface loads well.
chown -R www-data:www-data /var/www/html/bugzilla/And now create a new virtual host for Bugzilla
nano /etc/apache2/sites-available/bugzilla.confAdd the following
<VirtualHost *:80>
ServerName bugzilla.unixcop.test
DocumentRoot /var/www/html/bugzilla/

<Directory /var/www/html/bugzilla/>
AddHandler cgi-script .cgi
Options +Indexes +ExecCGI
DirectoryIndex index.cgi
AllowOverride Limit FileInfo Indexes Options AuthConfig
</Directory>

ErrorLog /var/log/apache2/bugzilla.error_log
CustomLog /var/log/apache2/bugzilla.access_log common
</VirtualHost>
Replace ServerName with your domain.
Enable the new site and the necessary modules.
a2ensite bugzilla.conf
a2enmod headers env rewrite expires cgi
To apply all the configuration restart Apache.
systemclt restart apache2Now just open your browser, go to your domain, log in to see the dashboard.

Enjoy it.
Conclusion
In this post you have learned how to install Bugzilla on Debian 11 following a step by step guide.


