Overview
This tutorial would let you learn the use of DHCP in practice as real world setup on production systems.
What is DHCP
DHCP, the Dynamic Host Configuration Protocol, describes the means by which a system can connect to a network and obtain the necessary information for communication upon that network. All information here regarding dhclient is for use with either of the ISC or OpenBSD DHCP clients. The DHCP server is the one included in the ISC distribution.
DHCP functioned as Automatic Network Configuration written by Greg Sutter.
When the DHCP client is executed on client machine, it begins broadcasting requests from configuration information via UDP port 68 as default.
Preparation
This setup would be based on FreeBSD 12.2 which should be working for other version with minimal adjustment.
Know the host name and ethernet interface:
Hostname: serve1.unixcop.com
Interface: em0
Host IP address: 192.168.0.11/24
IP address range: 192.168.0.100 – 192.168.0.199
Internet gateway: 192.168.0.1
DNS server/s: 192.168.0.1, 192.168.0.2, 192.168.0.3
Required package and options/dependencies:
sic-dhcp44-server
gmak, gettext-runtime, perl5
It would be necessarily to update all the ports by portsnap
root@serve1:~ # portsnap fetch
root@serve1:~ # portsnap extract
DHCP Server Installation
root@serve1:~ # cd /usr/ports/net/isc-dhcp44-server
root@serve1:~ # make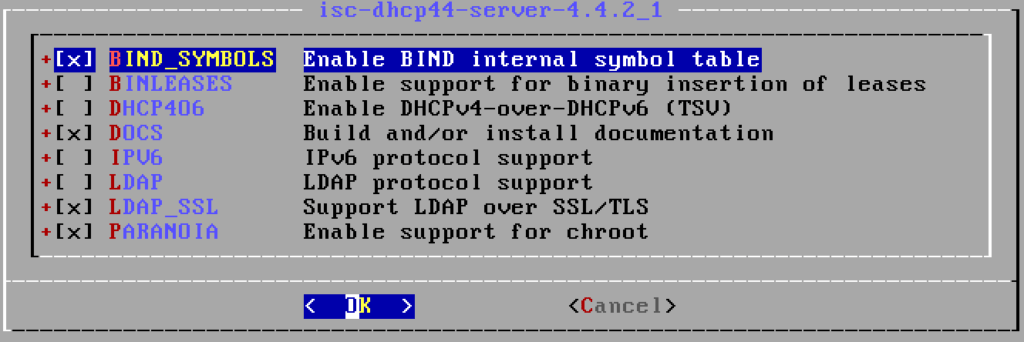
Deselect: IPV6
Hit OK after adjusted


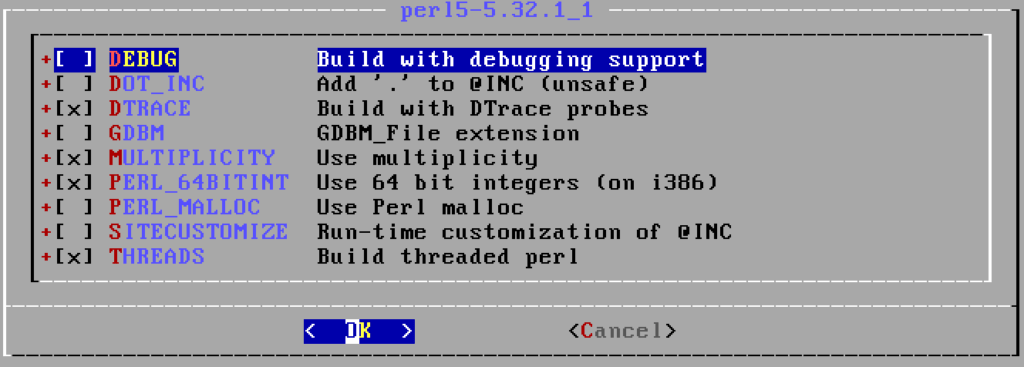
root@serve1:~ # make installConfiguration files and directory
This setup would required to modify some of the files as detailed below.
/etc/rc.conf
/usr/local/etc/dhcpd.conf
System configuration
root@serve1:~ # vi /etc/rc.conf
hostname="serve1.unixcop.com"
ifconfig_em0="inet 192.168.0.11 net mask 255.255.255.0"
defaultrouter="192.168.0.1"
sshd_enable=YES
sendmail_enable=NONE
clear_tmp_enable=YES
syslogd_flags="-ss"
dumpdev=NO
To save and quit vi editing interface: hit ESC button on the keyboard following by :wq
Configuring the DHCP Server
Check default configuration after installed DHCP server
root@serve1:~ # cat /usr/local/etc/dhcpd.conf

# dhcpd.conf
#
# Sample configuration file for ISC dhcpd
#

option domain-name "example.org";
option domain-name-servers ns1.example.org, ns2.example.org;

default-lease-time 600;
max-lease-time 7200;

#ddns-update-style none;

#authoritative;

log-facility local7;

subnet 10.152.187.0 netmask 255.255.255.0 {
}

subnet 10.254.239.0 netmask 255.255.255.224 {
  range 10.254.239.10 10.254.239.20;
  option routers rtr-239-0-1.example.org, rtr-239-0-2.example.org;
}

...

subnet 10.254.239.32 netmask 255.255.255.224 {
  range dynamic-bootp 10.254.239.40 10.254.239.60;
  option broadcast-address 10.254.239.31;
  option routers rtr-239-32-1.example.org;
}

subnet 10.5.5.0 netmask 255.255.255.224 {
  range 10.5.5.26 10.5.5.30;
  option domain-name-servers ns1.internal.example.org;
  option domain-name "internal.example.org";
  option routers 10.5.5.1;
  option broadcast-address 10.5.5.31;
  default-lease-time 600;
  max-lease-time 7200;
}

...
host passacaglia {
  hardware ethernet 0:0:c0:5d:bd:95;
  filename "vmunix.passacaglia";
  server-name "toccata.example.com";
}

...
host fantasia {
  hardware ethernet 08:00:07:26:c0:a5;
  fixed-address fantasia.example.com;
}

...

class "foo" {
  match if substring (option vendor-class-identifier, 0, 4) = "SUNW";
}

shared-network 224-29 {
  subnet 10.17.224.0 netmask 255.255.255.0 {
    option routers rtr-224.example.org;
  }
  subnet 10.0.29.0 netmask 255.255.255.0 {
    option routers rtr-29.example.org;
  }
  pool {
    allow members of "foo";
    range 10.17.224.10 10.17.224.250;
  }
  pool {
    deny members of "foo";
    range 10.0.29.10 10.0.29.230;
  }
}
Create DHCP scoop
root@serve1:~ # vi /usr/local/etc/dhcpd.confModify domain-name and domain-name-server at the top of the file.
...
option domain-name "unixcop.com";
option domain-name-servers 192.168.0.1, 192.168.0.2, 192.168.0.3;

default-lease-time 3600;
max-lease-time 86400;
ddns-update-style none;
...
Add the DHCP scoop for the decided networks at the bottom of the file.
subnet 192.168.0.0 netmask 255.255.255.0 {
  range 192.168.0.100 192.168.0.199;
  option routers 192.168.0.1;
}
To save and quit vi editing interface: hit ESC button on the keyboard following by :wq
To enable DHCP Server to start with system
root@serve1:~ # vi /etc/rc.conf
hostname=serve1
ifconfig_em0="inet 192.168.0.11/24 up"
...
dhcpd_enable="YES"
dhcpd_ifaces="em0"
To save and quit vi editing interface: hit ESC button on the keyboard following by :wq
To start the DHCP Server without restarting the system
root@serve1:~ # /usr/local/etc/rc.d/isc-dhcpd.sh startSetup verification
At the server console check if the DHCP Service is running and released IP addresses.
root@serve1:~ # /usr/local/etc/rc.d/isc-dhcpd.sh status
root@serve1:~ # cat /var/db/dhcpd/dhcpd.lease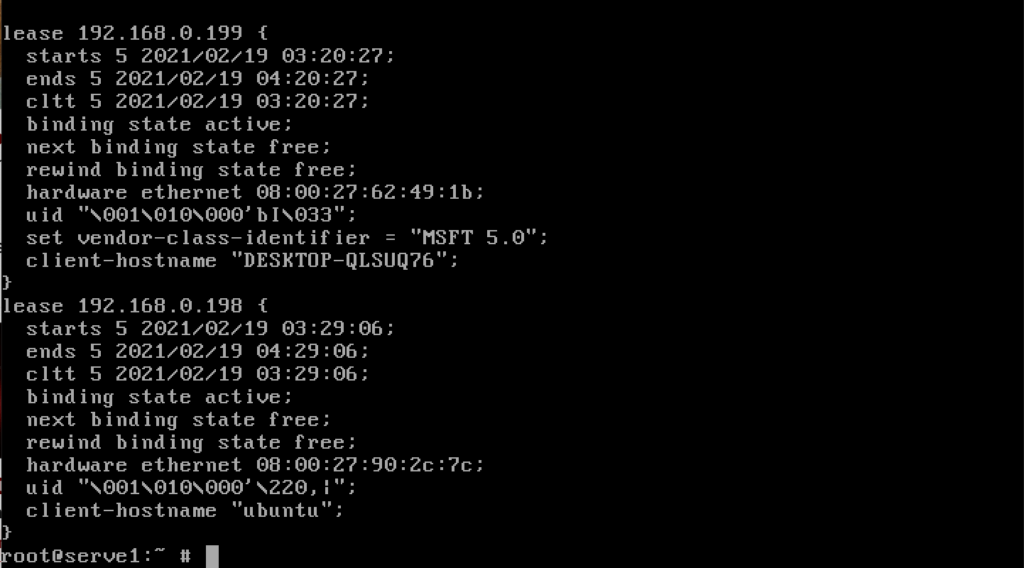
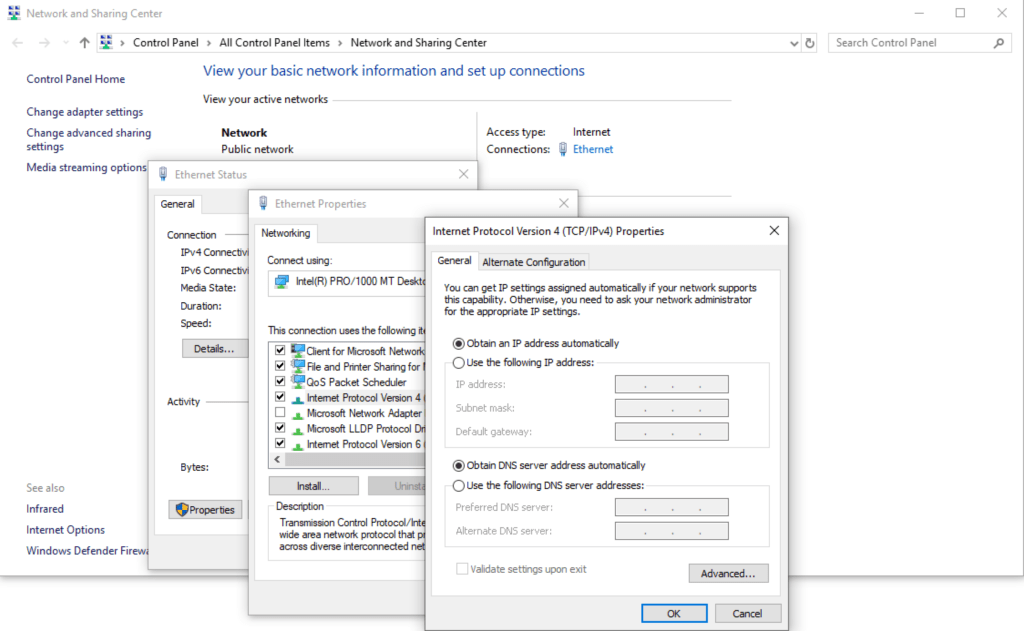
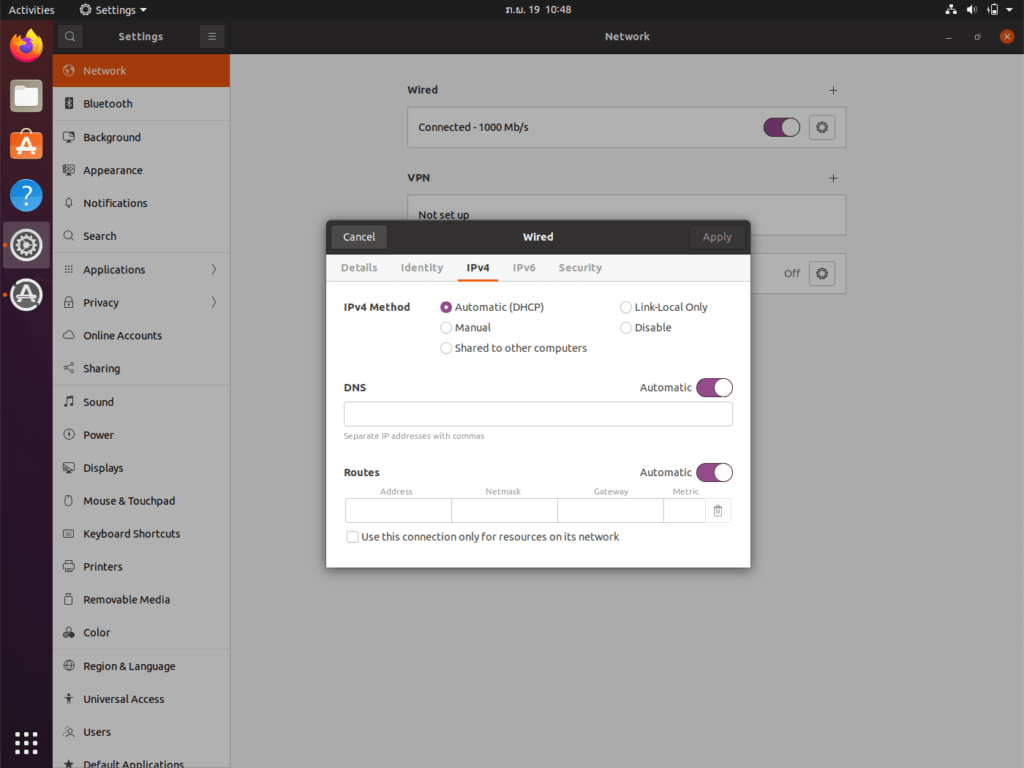
At the client side, it would required to setup as DHCP Client as may refer to the screenshot below for the computer with Microsoft Windows 10 and Ubuntu Linux.


Conclusion
This was minimal setup as per required to start and run the DHCP Server without DNS Authority update nor dynamic update to the DNS records.
Please enjoy and do not hesitate to give any feedback.


