Hello, friends. In this post, you will learn how to change the hostname in Debian 11. It is a short tutorial, but focused to newbies and even to those users who want to play with the shell.
As you can imagine, the hostname is the name that a computer has to identify itself within a network. This name can be freely chosen and serves as a reference to the computer.
This name should not be confused with the IP address that identifies the computer at the network level, but the hostname does it at the system level.
One of the most basic tasks that we can do with our system is to change the hostname. Especially in home or business networks. It is easy.
Change the hostname on Debian 11
There are several methods to change the hostname. It is easy, but it is good to keep in mind that it can get you out of trouble.
Using the hostnamectl command
The hostnamectl command is a tool that allows you to display information about the system. This information also includes the current hostname of the computer.
To achieve this, you can open a terminal and run
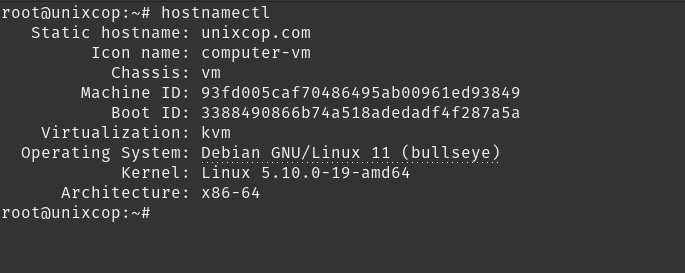
hostnamectlYou will see a screen output like the following:
   Static hostname: unixcop
         Icon name: computer-vm
           Chassis: vm
        Machine ID: 93fd005caf70486495ab00961ed93849
           Boot ID: 3388490866b74a518adedadf4f287a5a
    Virtualization: kvm
  Operating System: Debian GNU/Linux 11 (bullseye)
            Kernel: Linux 5.10.0-19-amd64
      Architecture: x86-64
From this output, we care about the value of hostname.
Static hostname: unixcopTo change it, just run
sudo hostnamectl set-hostname [your-hostname]For example,
sudo hostnamectl set-hostname unixcop.comOptionally, you can set a pretty hostname using --pretty.
sudo hostnamectl set-hostname "unixcop main server" --prettyYou may also want to edit the /etc/hosts file to reference the hostname
sudo vim /etc/hostsAnd edit the line that refers to 127.0.0.1.
127.0.0.1 localhost
127.0.0.1 unixcop.com
Save the changes and close the editor.
Finally, verify the changes by running hostnamectl again.

As you can see, it is simple to do.
Conclusion
Changing the hostname is simple and can save you some headaches. Furthermore, by doing it through the terminal, you can include it in configuration scripts.


