In this post, you will learn how to build a Continuous Delivery using Jenkins
What is CI/CD?
CI stands for Continuous Integration and CD stands for Continuous Delivery/Deployment.
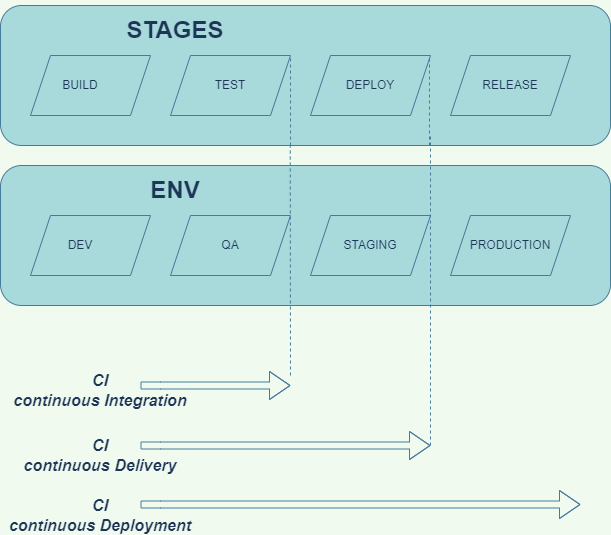
Starting with a real-world scenario of a project used in an organization which starts with a dev process. Any project, application, development, or software project starts with a dev process.The process of CI/CD requires to undergo 4 stages/env which are as follows:-
⦁ Dev
⦁ QA
⦁ Staging
⦁ Production
What is CI(Continuous Integration)
CI process takes place mostly in the dev phase. This process allows the team members to integrate their code or their work in a shared repository. This process is best achieved while using source code management tools like git, Bitbucket, or Gitlab. Every check-in is followed as well as validated by an automated build and unit tests. In order to make sure that everything is working smooth and flawlessly, automated integration tests can be conducted. This is a repetitive process that takes place daily or can be done as per the need or the requirement of the project.
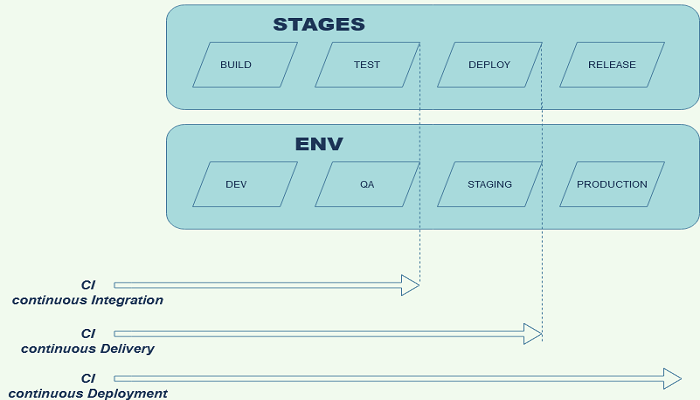
CI process expands from the DEV phase to some part of the testing or QA phase because most of the tests are unit tests which are automated at the dev end. Integration tests from the test environment can also be added to check if the code deployed/integrated is working fine. This is how CI works.all fine without any errors so this is the process of CI.
What is CD(Continuous Delivery)
CD or in other words known as Continuous Delivery, is a process which ensures that the code or build is all set for deployment.Continuous delivery expands from dev until the staging environment. This is done after the completion of CI process. If deployment on a production-like environment is done, it can be a QA or a Staging environment.
The staging environment is a production-like environment. It is sometimes also called a pre-prod environment or pre-production environment. The ultimate goal of continuous delivery process is to make sure that the build is always in a deployable state or a deployment-ready state. The goal of Continuous delivery is to create an environment or keep the environment similar to the copy of our production so that before deploying anything on the production, manual checking of the same can be done on the pre-prod or the staging environment. Also, staging environment can be used to test anything before deploying it to actual production environment.
What is CD(Continuous Deployment)
Continuous Deployment is only done after CI or Continuous Delivery. This process facilitates production deployment. This is an automatic deployment to production and every change or release that passes through all the stages/automated tests is then directly deployed to the production environment. This can be manually as well.
There are plugins available which can actually give you a graphical representation of the Continuous deployment process. But first lets create another project in Jenkins, so that we can see best how this works.
Here I’m creating the projects as per the Environment;
In this example, we are keeping it simple and just using these projects to execute a test program for print the environment name.
How to Build a Continuous Delivery/Deployment Pipeline Using Jenkins.
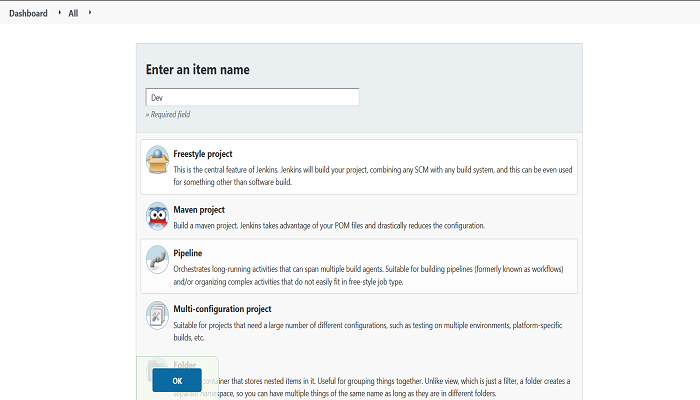
Step 1 : Go to the Jenkins dashboard and click on New Item. Choose a ‘Freestyle project’ and enter the project name as Dev. Click on the Ok button to create the project. Now you will see the Dev project or Dev jenkins job dashboard, click on configure. Now, go to build section, click on add build step and select Execute Shell from the dropdown.
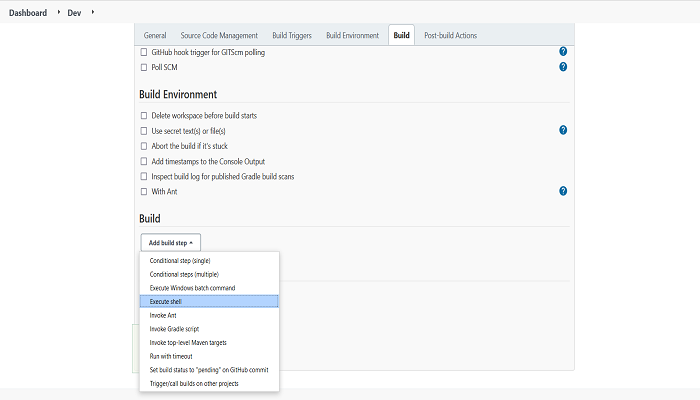
This will open an execute shell box where commands for the build can be written, and here, I am just printing the text with the echo command. (You can run any other command as per your environment or need), then click on Apply and Save.
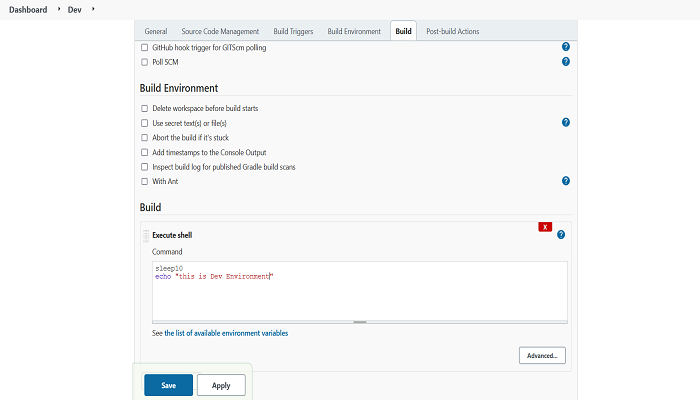
Similarly create projects for QA, Staging And Production ENV in the name of Dev, QA and prod.
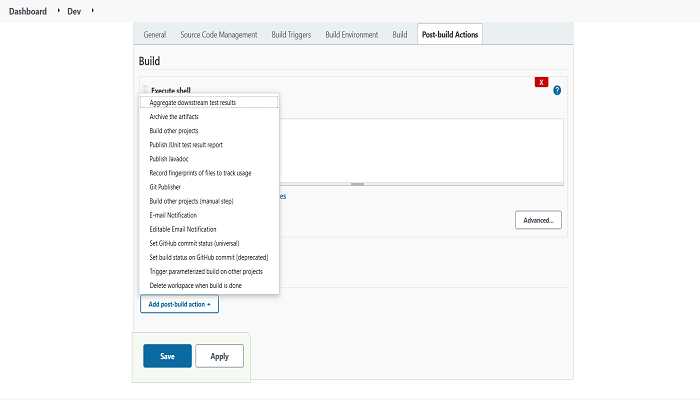
Step 2 : Open the Dev Jenkin job dashboard. Click on Post-build Actions on the top menu and then click on Add Post-build action. Now, Build other projects, where you can add the name of QA Project(It means this Jenkin job will automatically run after Dev Jenkin job runs successfully), then click on Apply and Save.
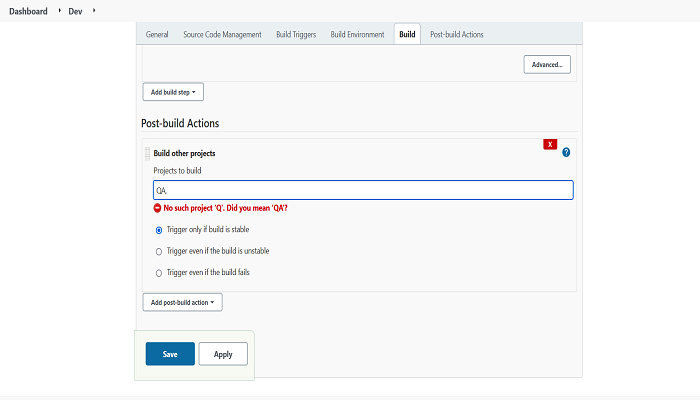
Similarly, do for QA and Staging Projects. In QA Project you have to enter the staging project name in Build other projects section.
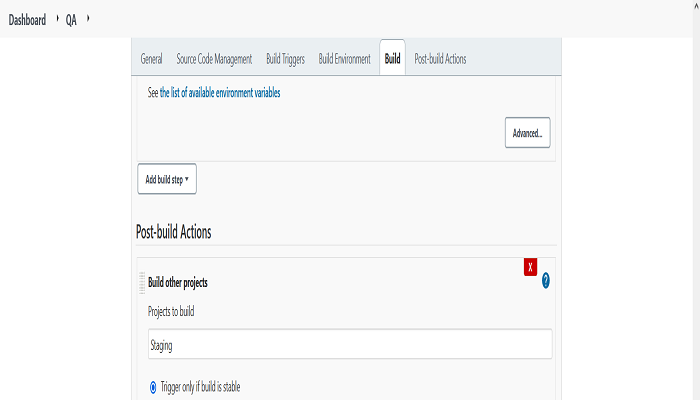
When you name for Staging Project, Make sure select Build other projects(manual step) from Add Post-build action.
NOTE : Build other projects(manual step) means Prod Project will not run automatically after the successful completion of Staging Project. This is same as Continuous Delivery.
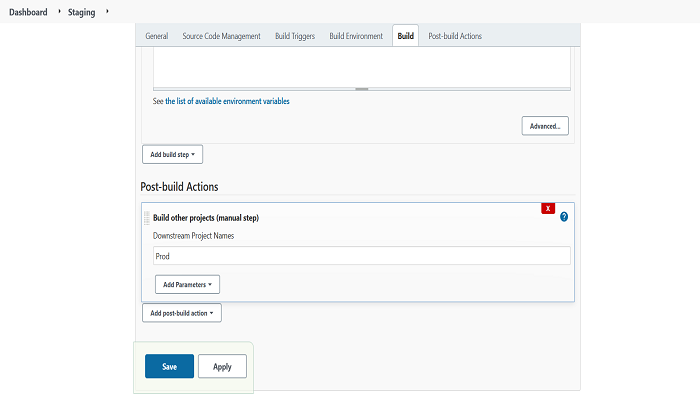
Step 3 : Now install the Build Pipeline plugin for “Build the Pipeline” for which you can refer my article for installing the Plugin and more detail about Build Pipeline.
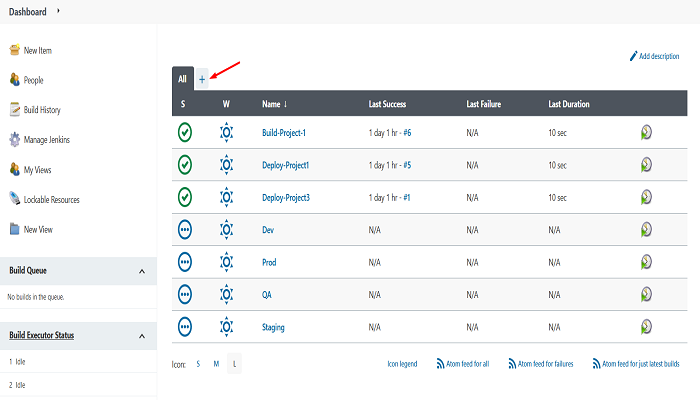
Step 4 : Add new Project as a Build Pipeline view.
For this click on the + icon as shown in the picture. Now, enter the view name and select the view as Build pipeline view then click Ok.
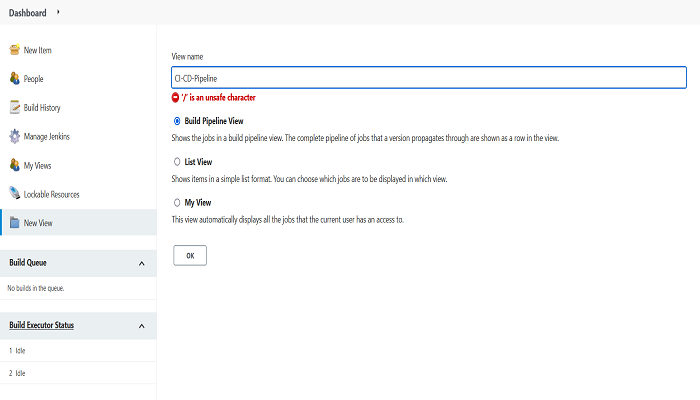
You will be directed to the configuration page of the Build pipeline project, where you can change the Upstream/downstream config with the name of your first Jenkins job. Proceed by clicking OK.
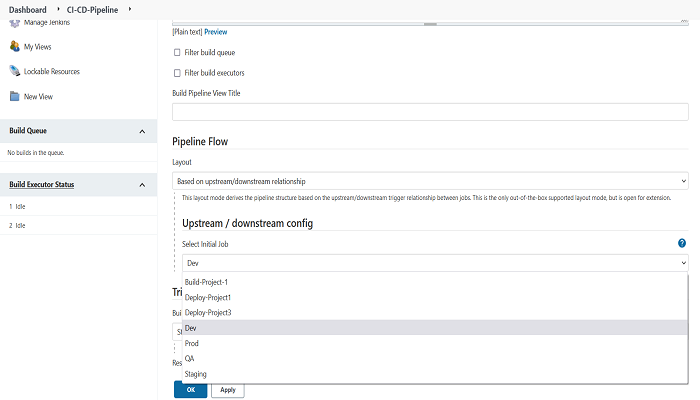
Once you click ok, you will get the Build pipeline page with options. When you click on Run, Pipeline will start running the Projects.
As you can see in the screenshot below, Dev Project is Running.

In the next screenshot, you can see the QA Project is Running after successful completion of Dev project.

Here, it shows Staging Project is Running after QA project is run.

But here, it can be seen that prod project is not running and this is only because the Build other Projects is a Manual step in the post-build project which means we have to run this Job ourselves.

You can see the small Icon which is for manual trigger of the Project. Once you will click here, it will start running.


Finally, All the projects are run successfully.

NOTE : If you want to run the Prod Project automatically, you can select Build other Projects instead of Build Other Project (Manual step) during staging Project.


